≡ Menu
Vegan Bloomin' Onion Bread

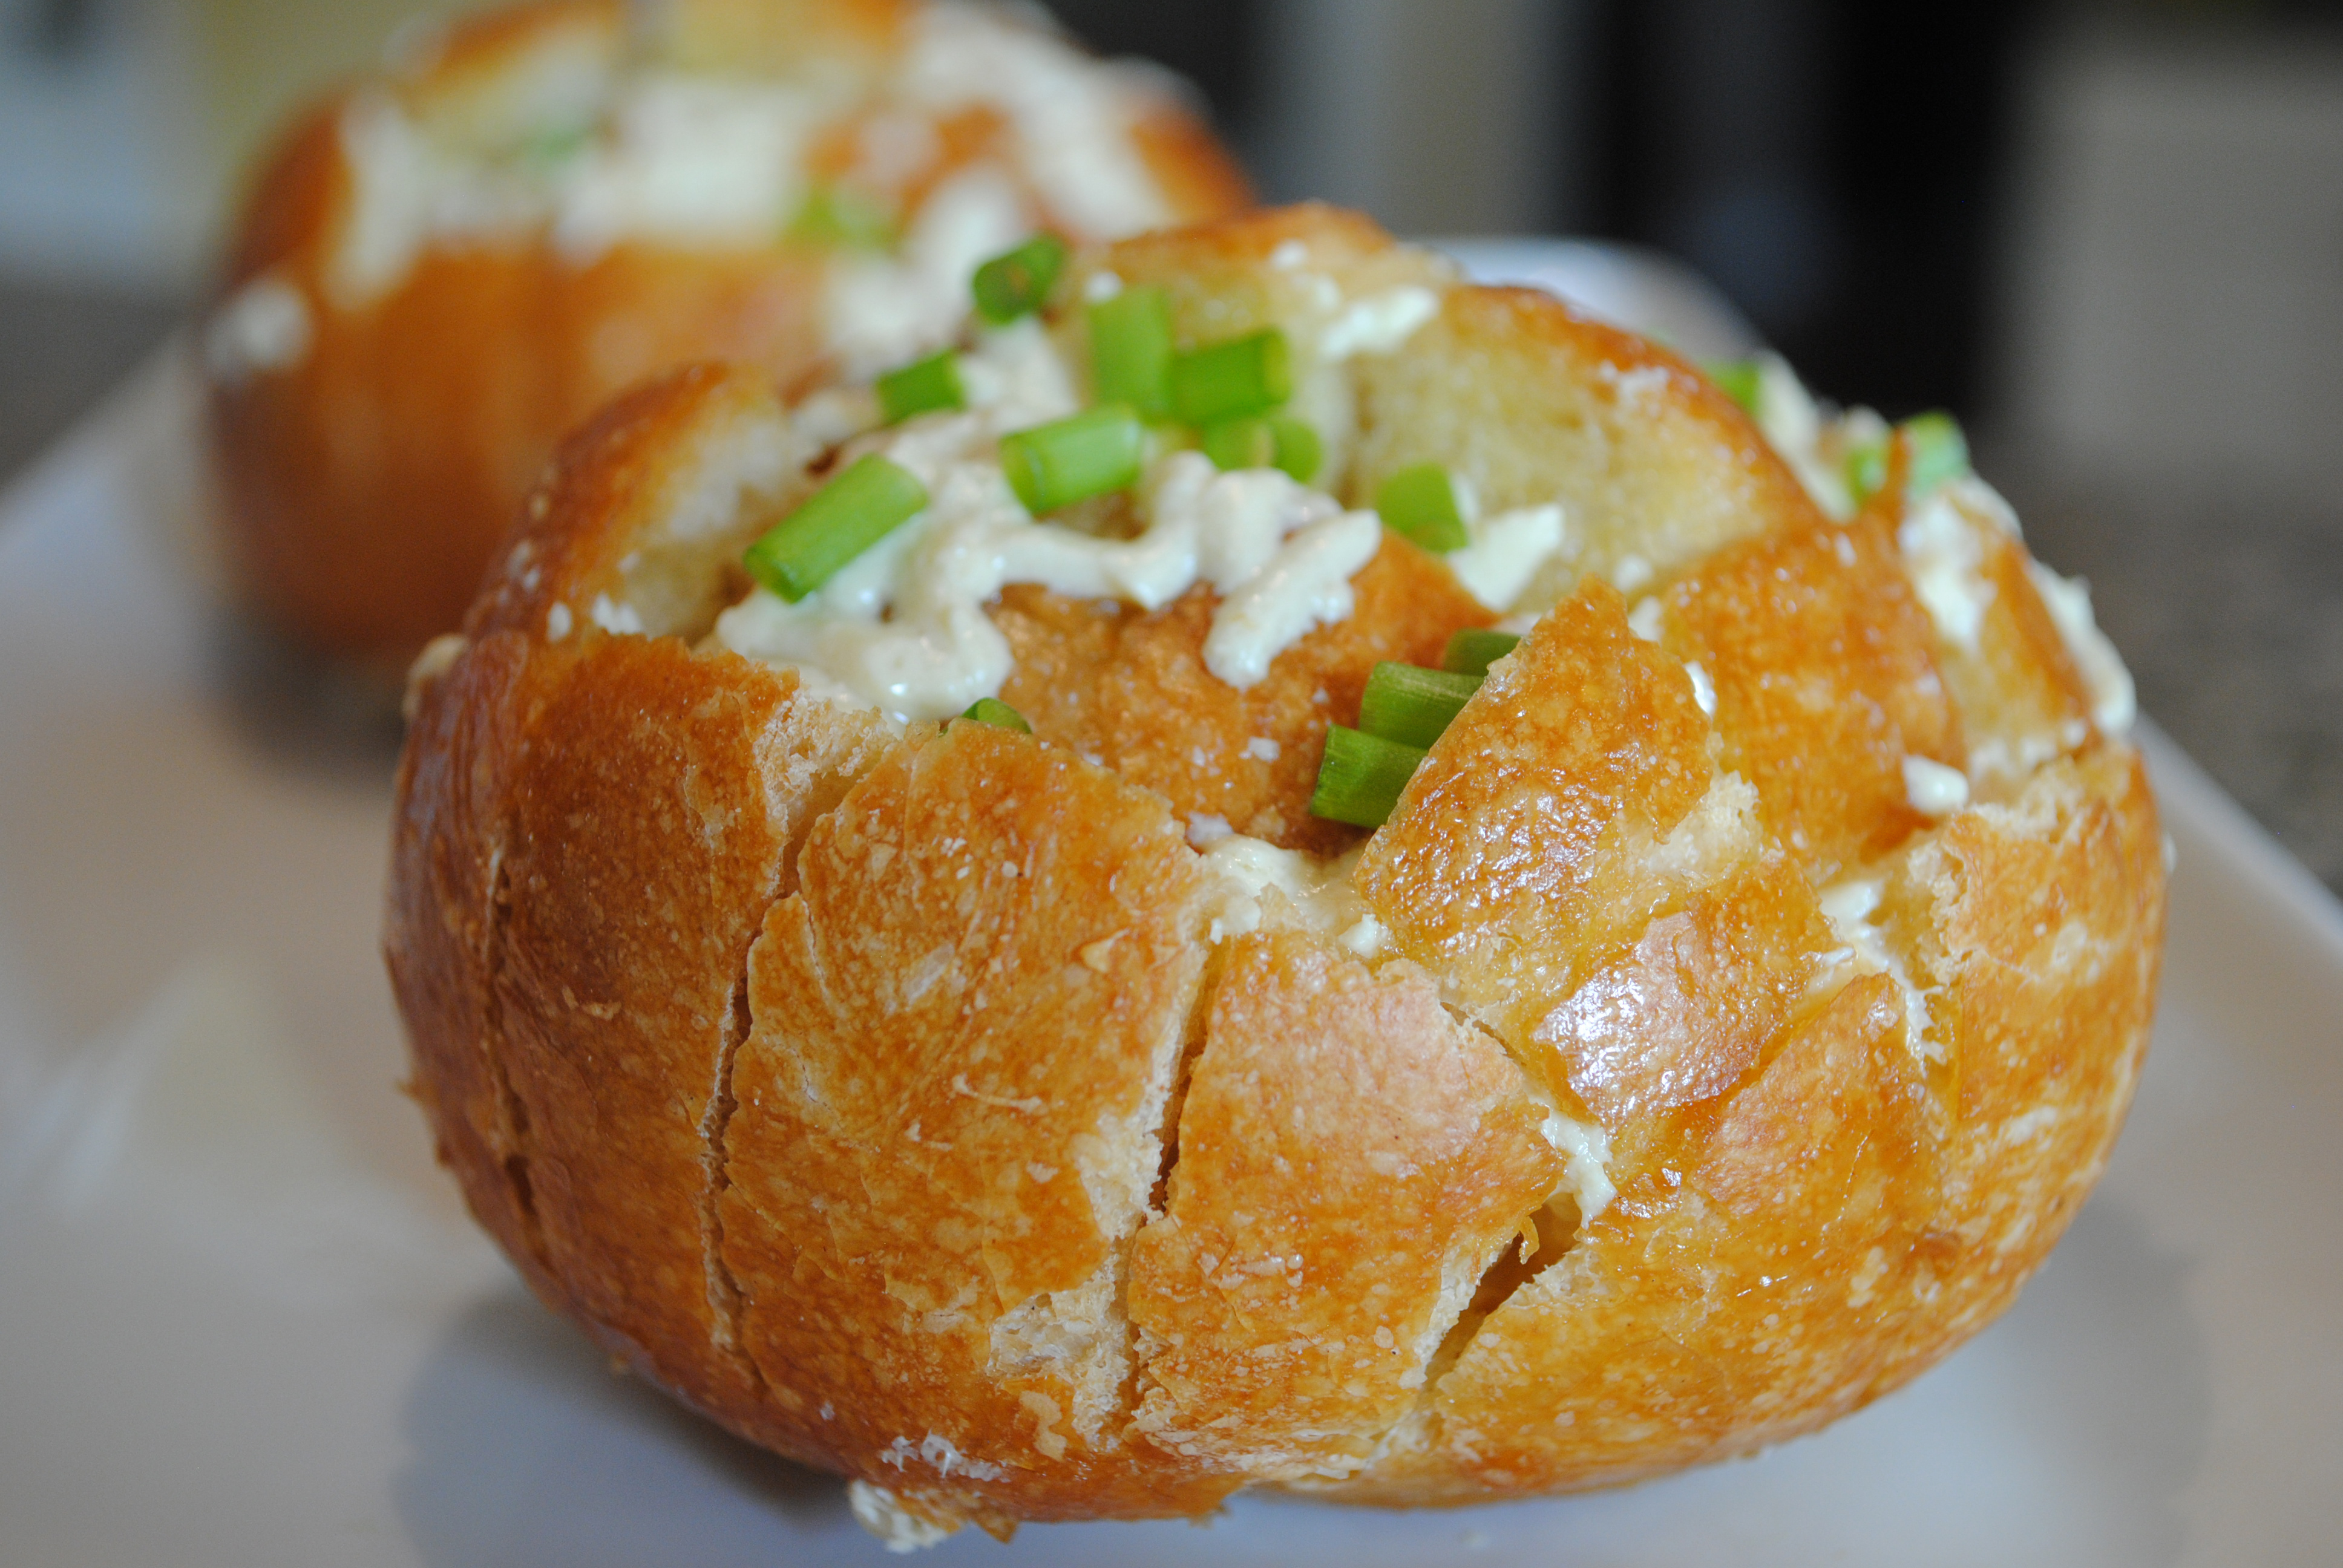
Bloomin’ Onion Bread

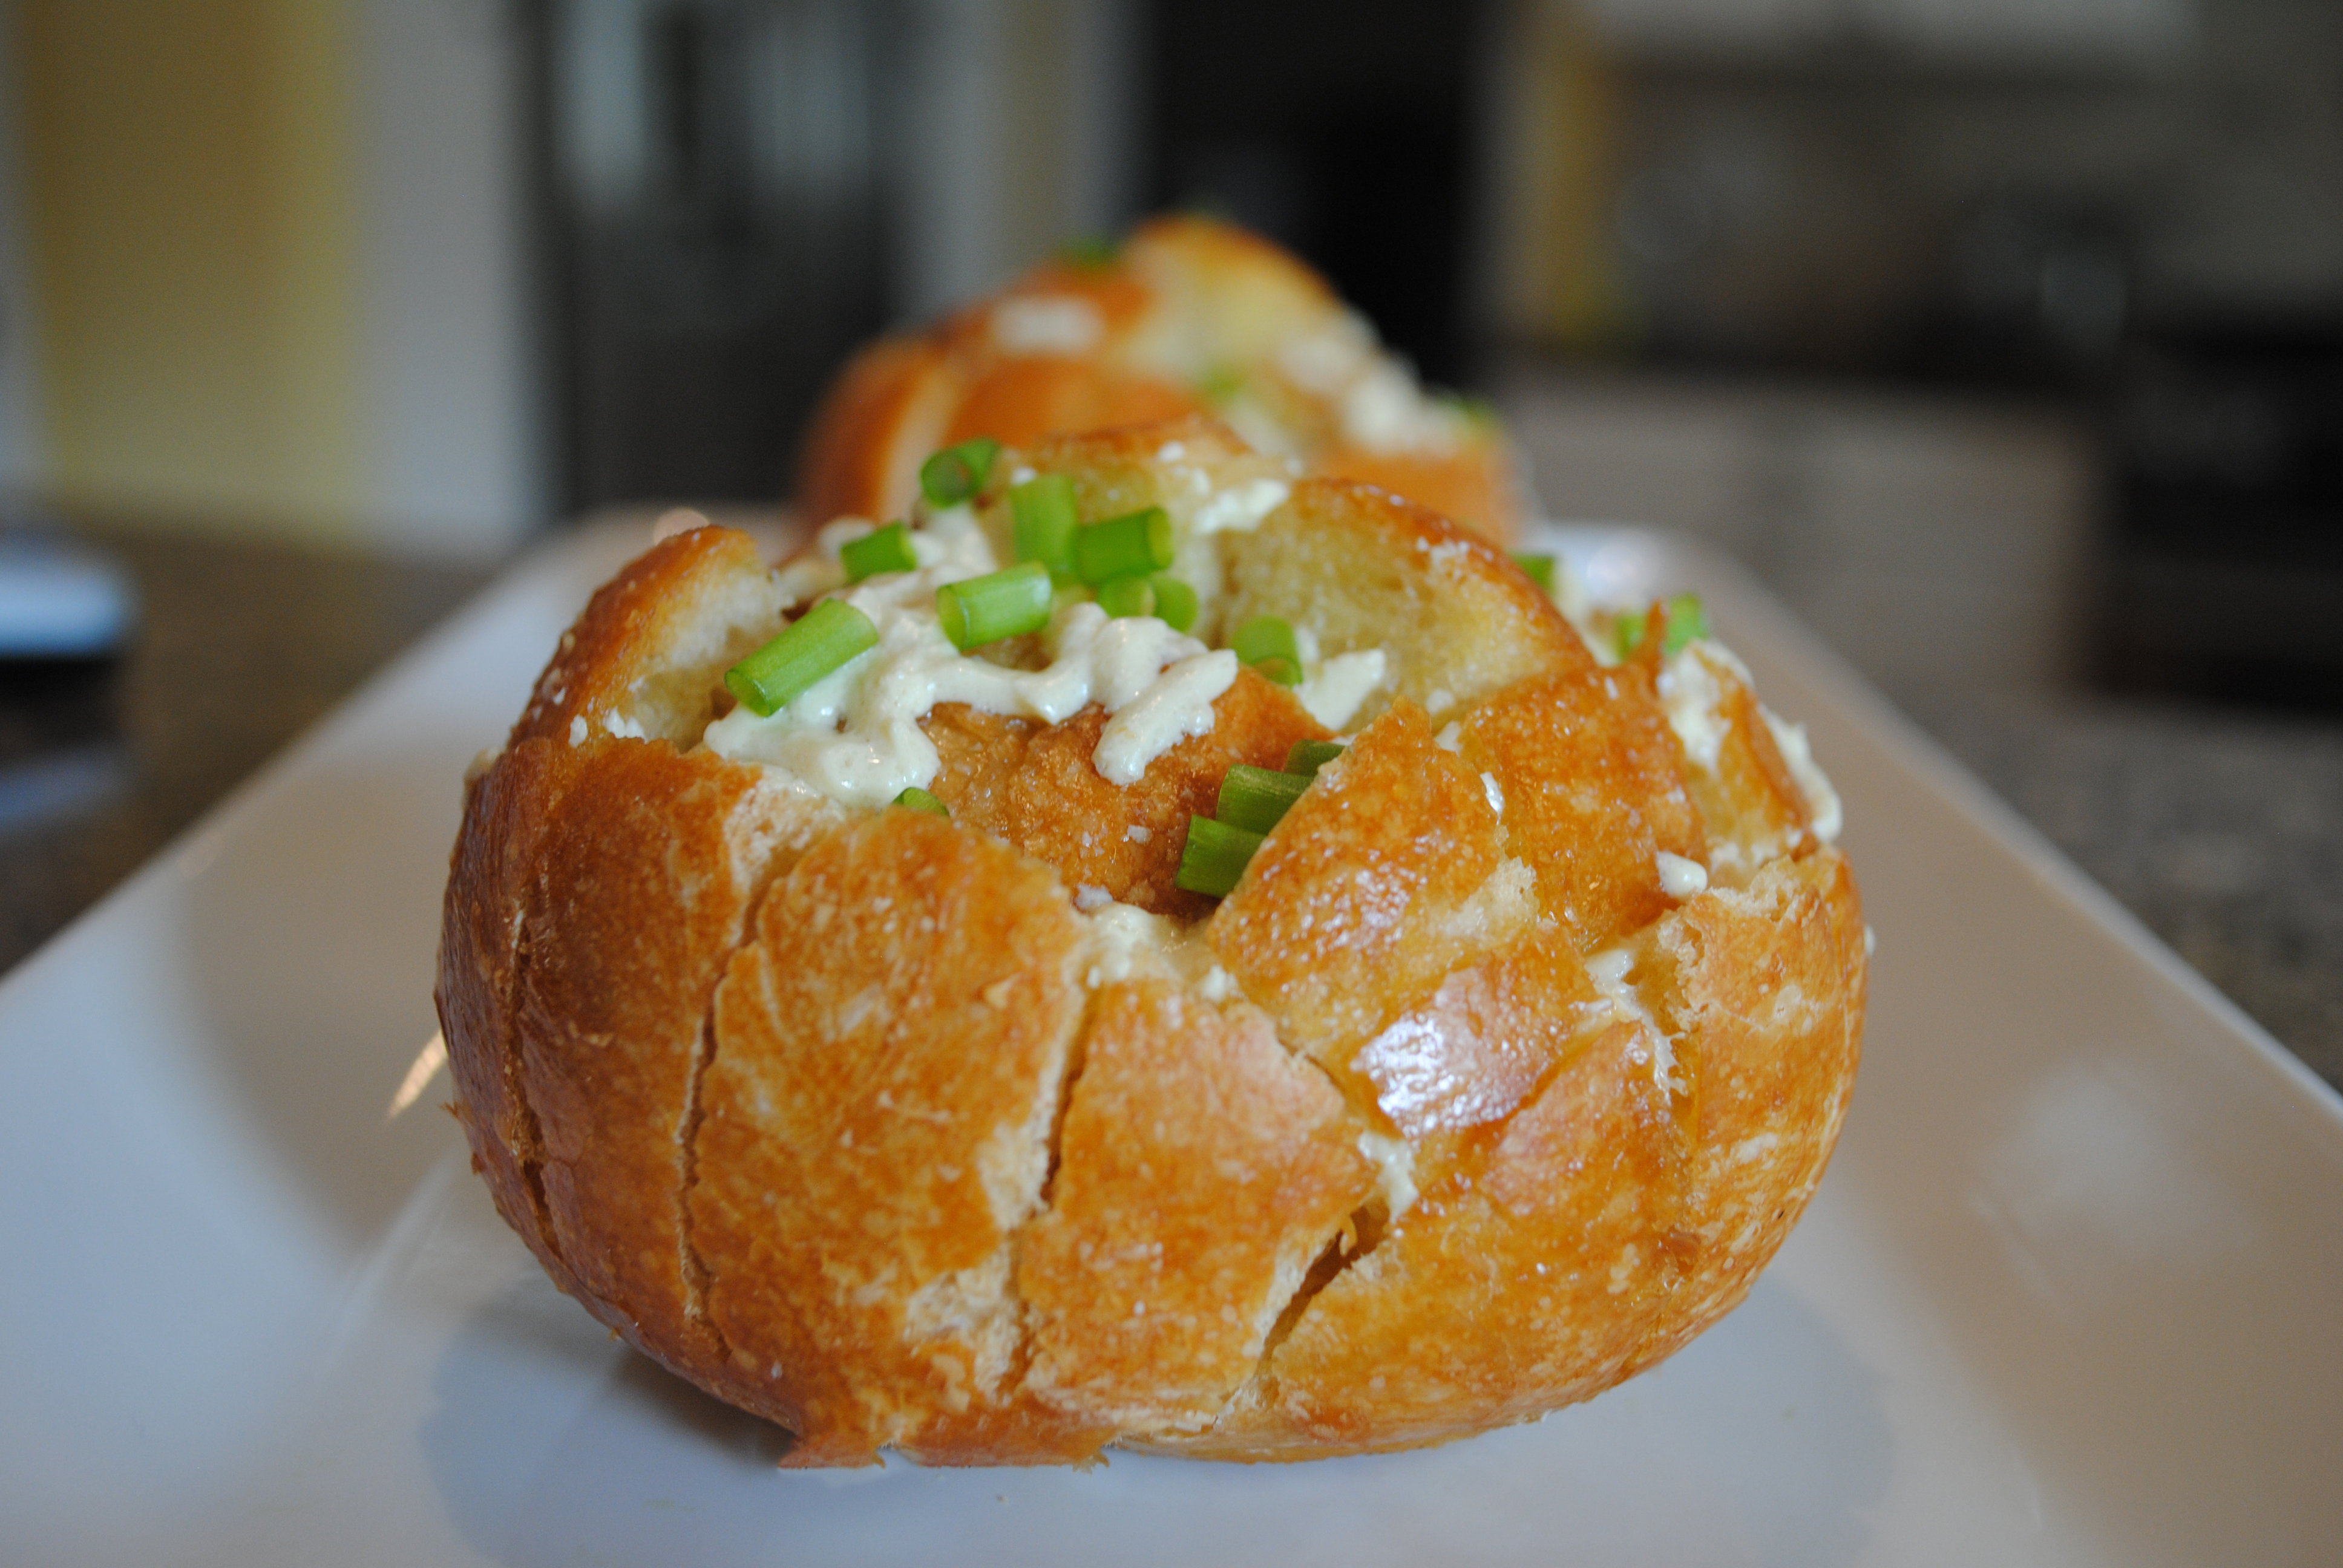
Before I even begin, can I get a big, loud THANK YOU ANNIE from the blogosphere? Our very own Unrefined Vegan put a lot of time and effort into organizing this Virtual Vegan Potluck, and we gotta let her know she’s appreciated 🙂  But you’re not here for a vegan-blogger-lovefest, you’re here to see what I brought to the Potluck… and here it is: the Bloomin’ Onion Bread that’s been sweeping the interwebs, single-serve style.
Vegan Bloomin' Onion Bread

I realize these pictures have no scale, but take my word for it… those are basically dinner rolls. Sourdough rolls from Panera, to be exact.

You might be wondering, why do I need it single-serving style? What’s wrong with just making one great big loaf of it? There’s nothing wrong with it, per se… it tastes delicious either way. But the thing is, this bread is amazing. You, your family, your guests- whoever you made it for- is going to want to dive right into it. Literally. It can get messy and dangerous. What if a Bloomin’ Onion Bread fight breaks out at your house, and someone gets hurt? Do you really want that on your conscience? I didn’t think so.

The solution is to give everyone their own little piece of bread-heaven. This also allows you to make just one or two servings at a time, for when you’re dining solo, or just want it as a snack. When I made these little guys, Jason and I each had our own- an opportunity he took to pick it up and eat it like it was a doughnut or something! Just try doing that with a big one you’re supposed to be sharing with 6 other people 😉

One caveat: I made this using Daiya shreds, before I was able to get my paws on their new slice-able wedges. I think if you used the wedges, you’d be able to get better cheese coverage…

So go ahead and scroll down, take a look at the recipe (and bookmark it!), then continue on your scrumptious Virtual Vegan Potluck tour!
There are links at the bottom of the page that will take you the previous or next dish in the potluck circle. If you hit a broken link somewhere, or just want to see the entire list of participants, visit Vegan Bloggers Unite!


Single-Serving Bloomin’ Onion Bread (Makes 2 servings)

Adapted from this non-vegan recipe

Ingredients:

  • 2 sourdough rolls (I used the ones from Panera)
  • 3 T melted vegan butter (I used Earth Balance)
  • A sprinkle of onion powder
  • A sprinkle of garlic powder
  • 1 diced scallion
  • HEAPING 1/2 cup of Daiya shreds (or vegan cheese of choice- see above)
  • 2 sheets of aluminum foil

Directions:

  1. Melt butter in measuring cup (or anything with a pour spout), then mix in garlic and onion powders.
  2. Slice bread in crossways in both directions, but don’t go all the way through to the bottom. You want to create a bunch of pull-able “bread tabs”, but you want them to stay connected to the roll at the bottom.
  3. Place rolls on sheets of foil, on baking pan (one roll on each sheet).
  4. Pour 2/3 of the butter mixture over the bread, then mix the diced scallion in with the remaining 1/3 butter.
  5. Gently stuff the cheese shreds down in between the slices, spreading it out as evenly as you can (again, this would be easier with sliced cheese). Make sure you get it down deep- you don’t just want it sitting on top.
  6. Pour the remaining butter/scallion mix over the top of the bread/cheese, then fold the foil up over the top of the bread, covering it completely (but not smooshing it against the cheese!)
  7. Bake for 8 minutes at 350 degrees, then pull back the sides of the foil, and bake for another 2-3 minutes until the cheese is completely melted.

Enjoy!

Continue on your tour of the Virtual Vegan Potluck!

{ 34 comments }

pear, bacon, raspberry grilled cheese4

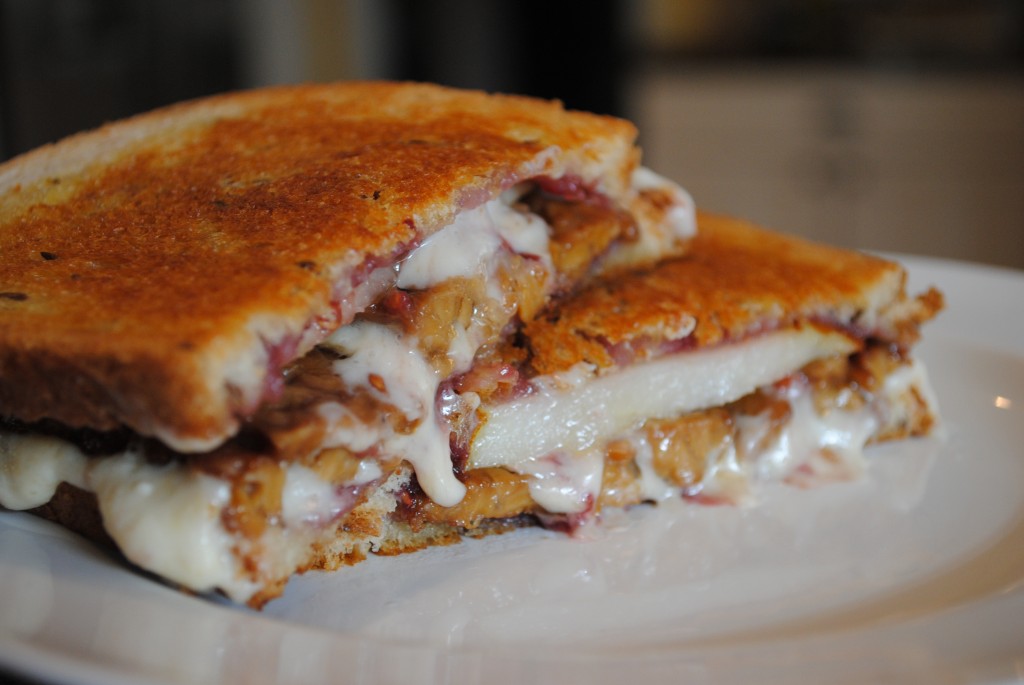
I originally blogged about this sandwich last winter after seeing it (a non-vegan version) on Pinterest. It was insanely yummy, but messy. At the time, my best cheese option was Daiya mozzarella shreds, and although they melted nicely, it was hard to keep them where I wanted them on the sandwich… So when the Daiya wedges came out, I KNEW I had to make this again, using the Jack flavor.

Man oh man, am I glad I did! It was even richer and gooey-er than last time, and just as wonderful as I remembered. The raspberry and pear bring a natural sweetness, while the tempeh bacon (especially combined with a little applewood smoked sea salt!) added a savory layer. I also chose to go with an uber-flavorful bread- a Jewish Rye. Any bread would work, as long as it’s thick and substantial enough to support all these fillings… but I definitely recommend the Rye.

Helllooooo Cheese!

Vegan Pear, Tempeh Bacon, Raspberry Grilled Cheese Sandwich


Pear, Raspberry and “Bacon” Grilled Cheese Sandwich (2 Sammies)

Recipe adapted from Pinch of Yum (non-vegan)

Ingredients:

  • 8 strips of Tofurky bacon (or vegan bacon of your choice)
  • Applewood smoked sea salt
  • 4 slices of bread (the heartier, the better)
  • 3-4 T of raspberry jam
  • 1 ripe pear, thinly sliced (pop any slices that don’t fit on the sandwiches right into your mouth!)
  • About 1/3 wedge of Daiya Jack, sliced
  • 2 T Earth Balance

 Directions:

  1. Preheat pan to medium-high heat.
  2. Heat bacon thouroughly, according to package instructions, sprinkling with a little of the smoked sea salt. Set aside.
  3. Take 2 slices of bread, butter one side of each, and spread 1/4 of the jam on the other side of each, then place in pan EB-side down (jam side up!).
  4. Layer each with the pears, the tofurky bacon and the cheese.
  5. Turn heat to low and cover pan with a lid, to let the cheese get as melty as possible. This should just take a minute or two- you don’t want your bread to burn OR get too soggy!
  6. Once the cheese is melty, spread butter and remaining jam on either side of the two remaining pieces, the add to pan (butter side up), then flip everything over so it can brown on the other side.

Enjoy!

{ 39 comments }

Beanfields Review & AMAZING Giveaway!

This contest is now closed, and the randomly chosen winner is… Noelle, otherwise know as An Opera Singer in the Kitchen! (I sing in my kitchen too, but it’s really not the same thing :)) Congrats, Noelle! Tweet or email me with your address and what kinds of chips you’d like in your case! Thank you to everyone who entered… and if you didn’t win, rest assured I have my next giveaway in the works!

You’ve probably read at least one review of Beanfields by now, but this review is special. Why, you ask? Well, firstly because it’s MY review, and secondly (and most importantly) it’s accompanied by a truly amazing giveaway! But first, the review*.

That Was Vegan Beanfields

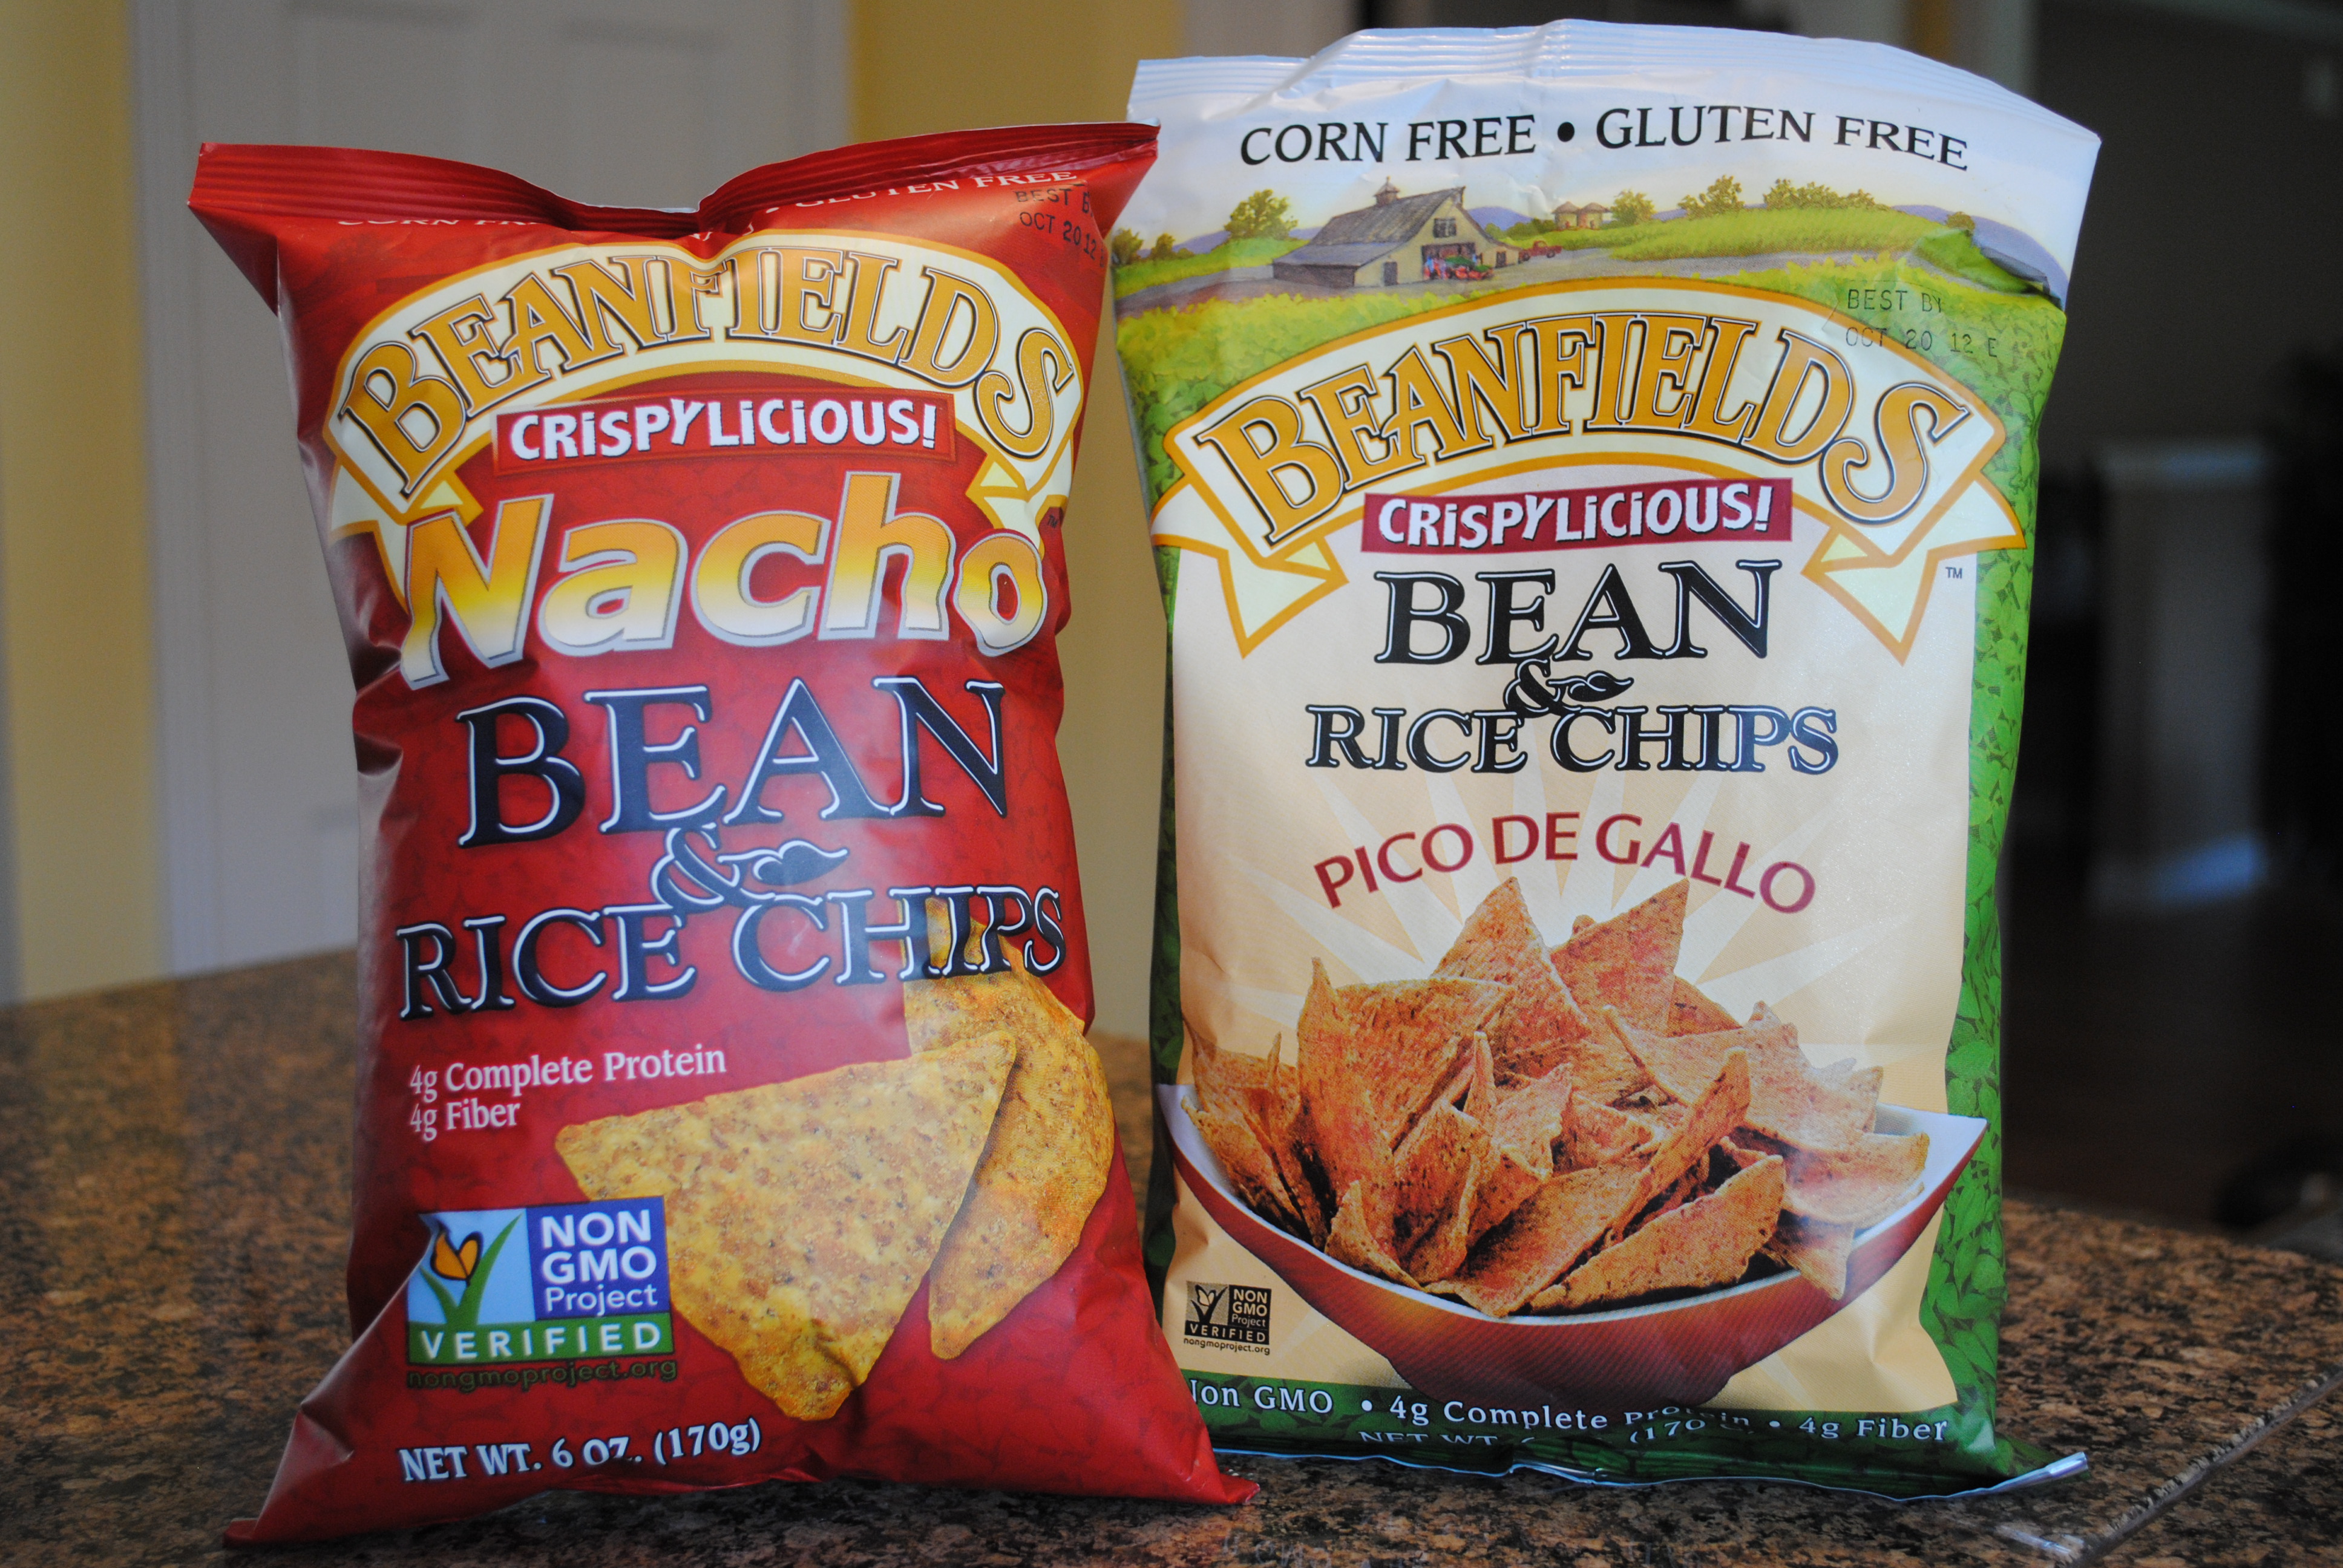
My Two Favorite Flavors!

I had heard there was a vegan nacho-flavored chip set to hit the market, but I knew next to nothing about it. Honestly, I had kind of forgotten about it… until an email from the kind folks at Beanfields landed in my inbox! They asked if I’d be interested in trying and reviewing their vegan chips; I responded with a “Heck yah… and can you throw in a few for my readers as well?

Seriously, am I always looking out for you guys or what!?

The first bag I opened was, of course, the Nacho flavored. My first reaction was how different these looked from that other nacho chip we all used to eat before we smartened up. Right off the bat I could see that these were less processed, less artificial, less.. scientifically engineered. Then I took a bite. THEN I inhaled the entire bag. Don’t judge me- it was one of the single-serving bags, I promise!

The first bite was a little disconcerting to my taste-buds… I suppose I was expecting something more doritos-like, and although these taste very nacho-y, they taste nothing like doritos. The texture was also different from what I was expecting. They’re crispy, but in a different way from corn-based chips that have been fried. This isn’t a bad thing, they’re just different. And different is good! I’ll admit that I plowed through these pretty fast. I had every intention of saving a bag to share with my friend Lauren, but I didn’t. I ate them all. Sorry, Lauren 🙂

The sea salt flavor (not pictured) was the 2nd that I tried. Other bloggers have already mentioned this, and I have to agree- there wasn’t nearly enough salt on those puppies. They weren’t bad, but they didn’t pop for me at all. We ended up using those for dipping, and later on for schmearing Daiya Havarti on. They were perfecto for that! Of the 3 flavors though, those are the ones I don’t think I’d go out and buy for myself.

Last, but certainly not least… the Pico De Gallo! These were actually my favorite of the flavors, a fact which may surprise you. Actually, it surprised me… I was prepared to fall madly in love with the Nacho flavor. The flavor was just so robust with just a hint of spiciness- and no dip needed. And just like with the other flavors, you could just tell these were less processed and much healthier than other chips on the market. These (and the Nacho flavor) I would spend money to buy again!

You should also check out their nutrition facts: For example, each serving has as much complete protein as a 4 oz glass of milk, and as much fiber as a 1/2 cup serving of raisin bran! There’s a lot more, those were just two of my favorite highlights. Clearly this is a company dedicated to providing healthier snack options. Their chips are also free of all the major food allergens, and they’re verified Non-GMO.

Now, on to the important stuff…

The Giveaway

One lucky reader, to be chosen from the comments below, is going to win AN ENTIRE CASE of Beanfields chips! You read that right, an entire case! That’s 12 bags of bean and rice-chippy goodness, yo! As an added bonus, you get to choose how you want your case put together: All Nacho? OK! 9 Nacho, 1 Sea Salt and 2 Pico De Gallo? Sure! To quote the great Roy Orbison: Anything you want, you got it!

The contest is open until Midnight (Mountain time), Tuesday 5/15. The winner will be chosen randomly and announced the following day

To Enter: All you gotta do is leave a comment below telling us how you love to eat chips. You know… straight out of the bag… lying on the couch in your pajamas… crumbled up over your favorite tofu scramble… sticking one corner of the chip in your mouth and letting your dog nibble on it (What? I’ve never done that!)…  

Want more than one chance to win? Go ahead and do any or all of the following, and leave a separate comment for each, letting me know you did it. (Multiples grouped into one comment will only count once!)

  • Follow TWV? on Twitter
  • Tweet about the giveaway (make sure you tag me!)
  • Like TWV? on FB
  • Share the giveaway on your FB status

Good luck!!

*Beanfields provided me with free product to review, but the opinions are 100% mine!

{ 95 comments }

Korean BBQ Quesadillas

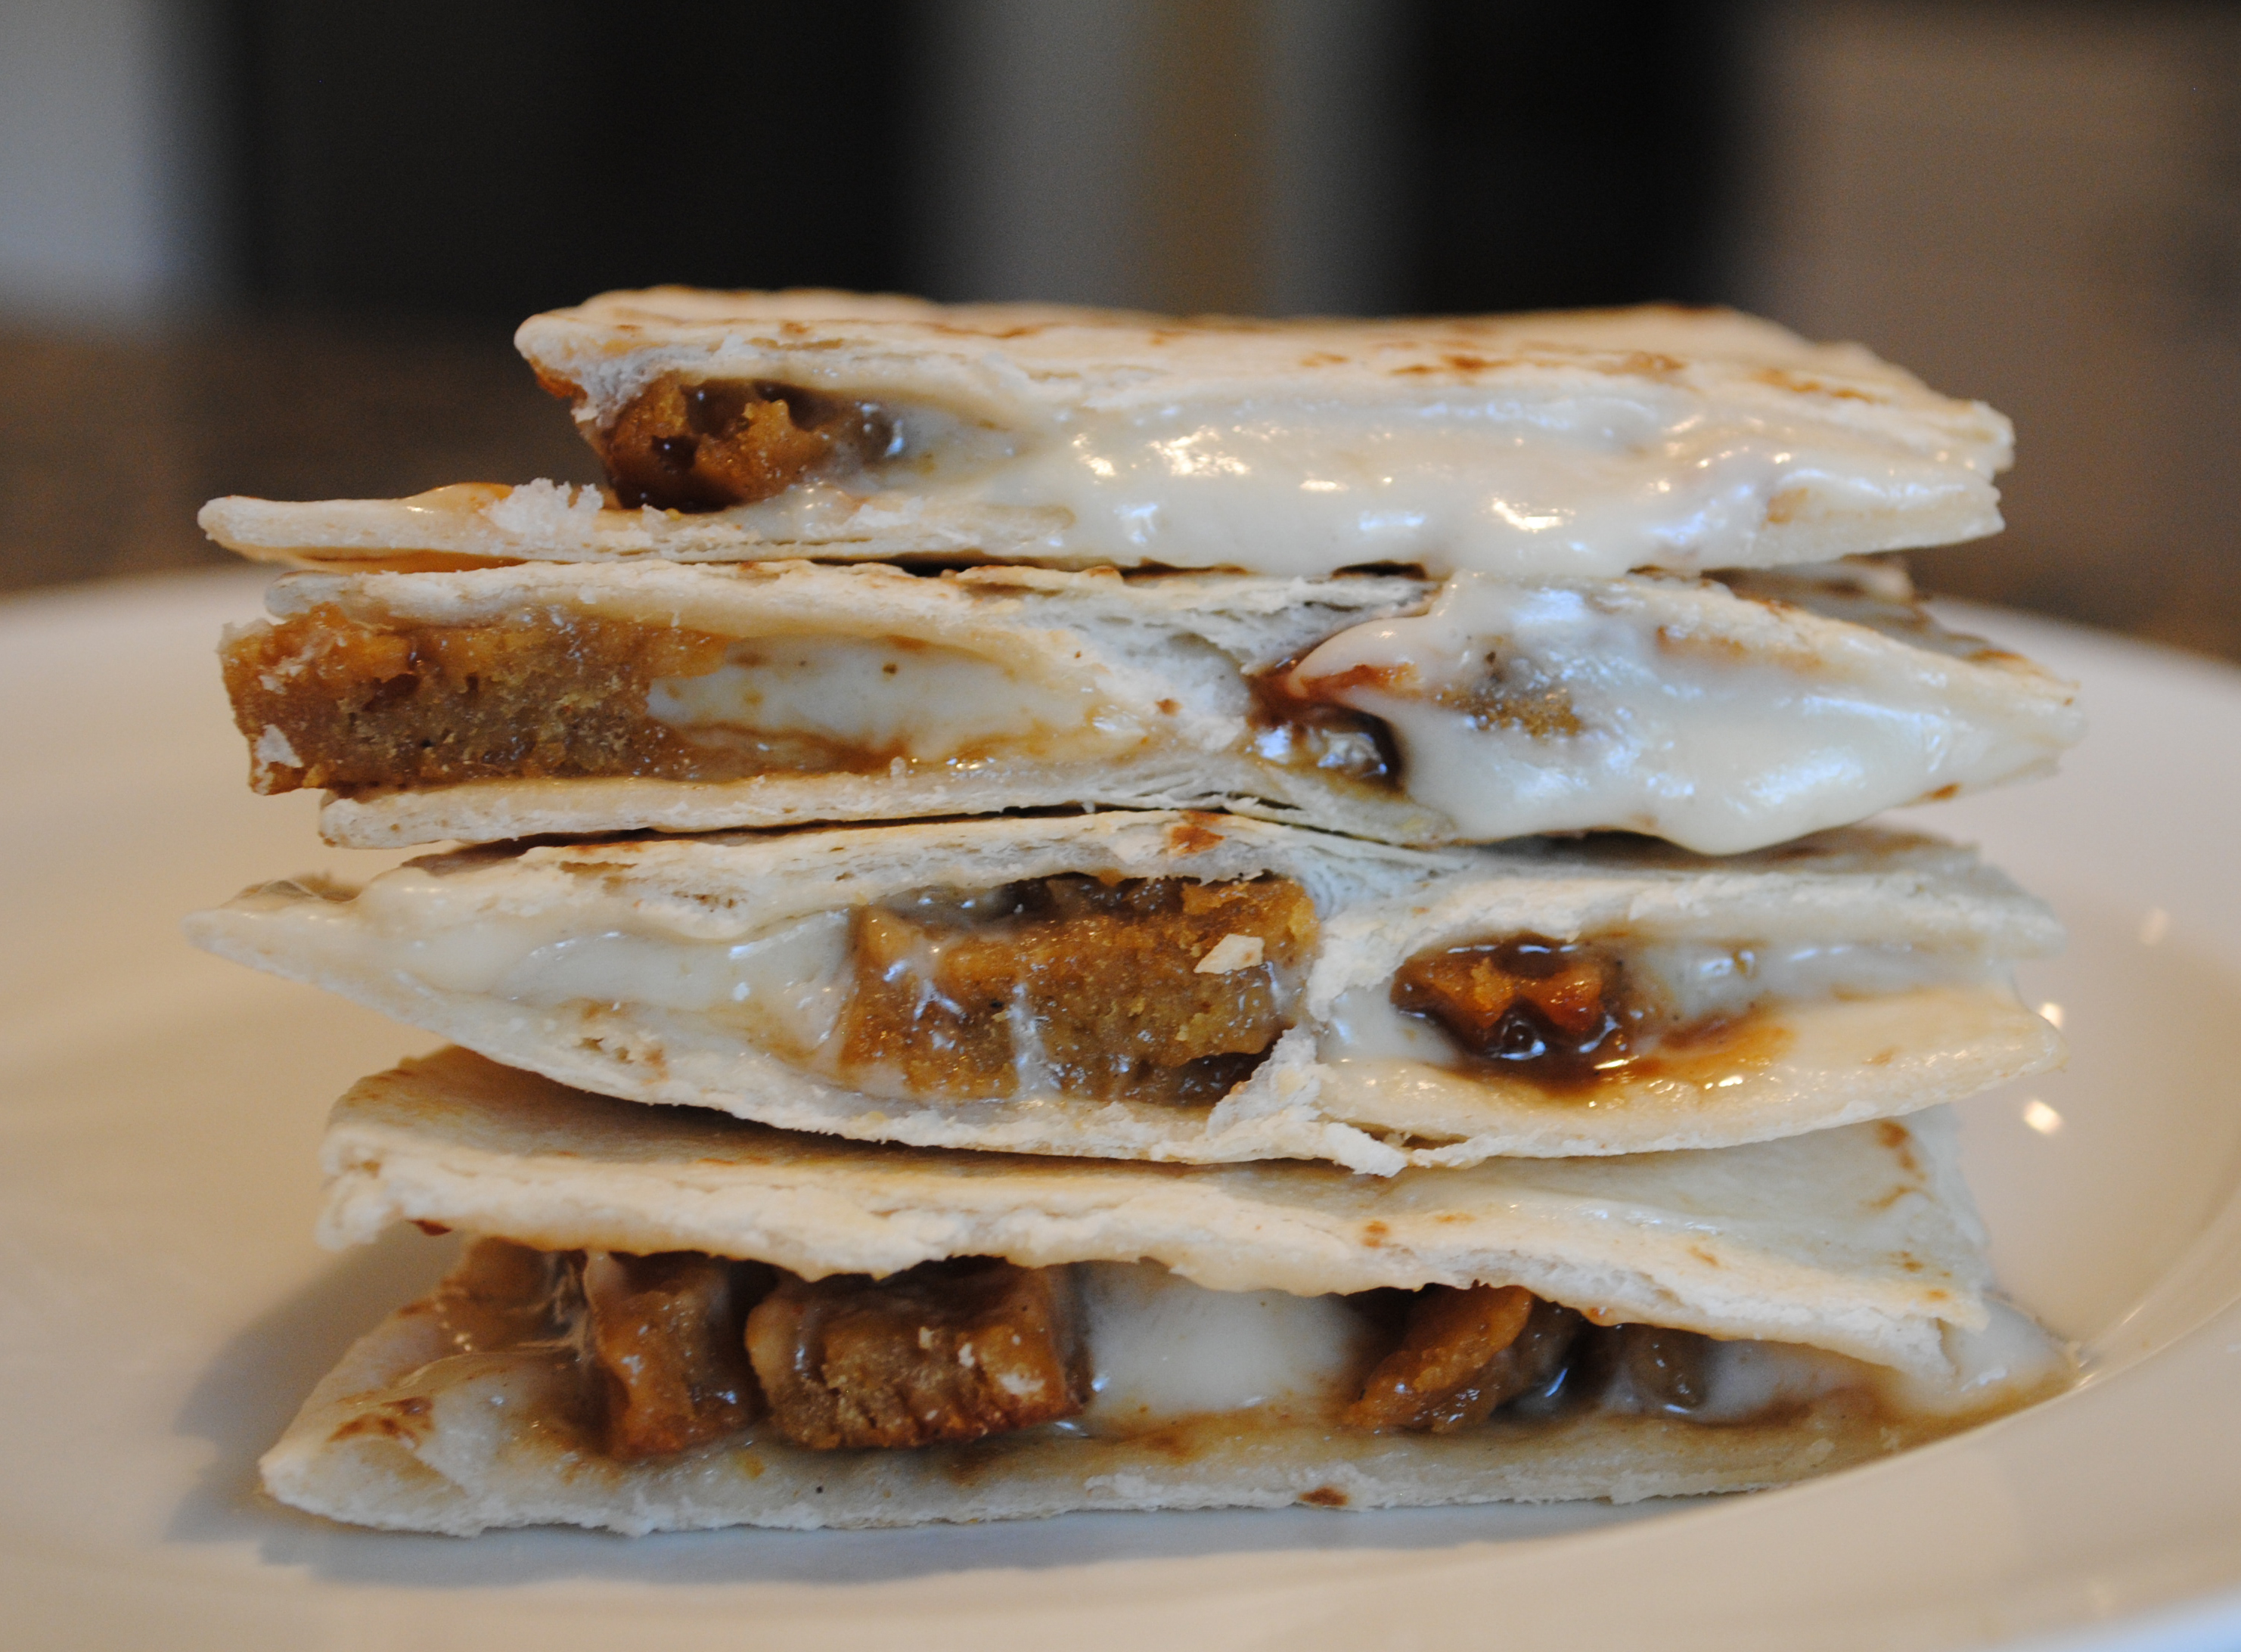
Vegan Korean BBQ (Bulgogi) Quesadilla

Korean BBQ Quesadilla

Korean-Mexican Fusion… Yummmm!

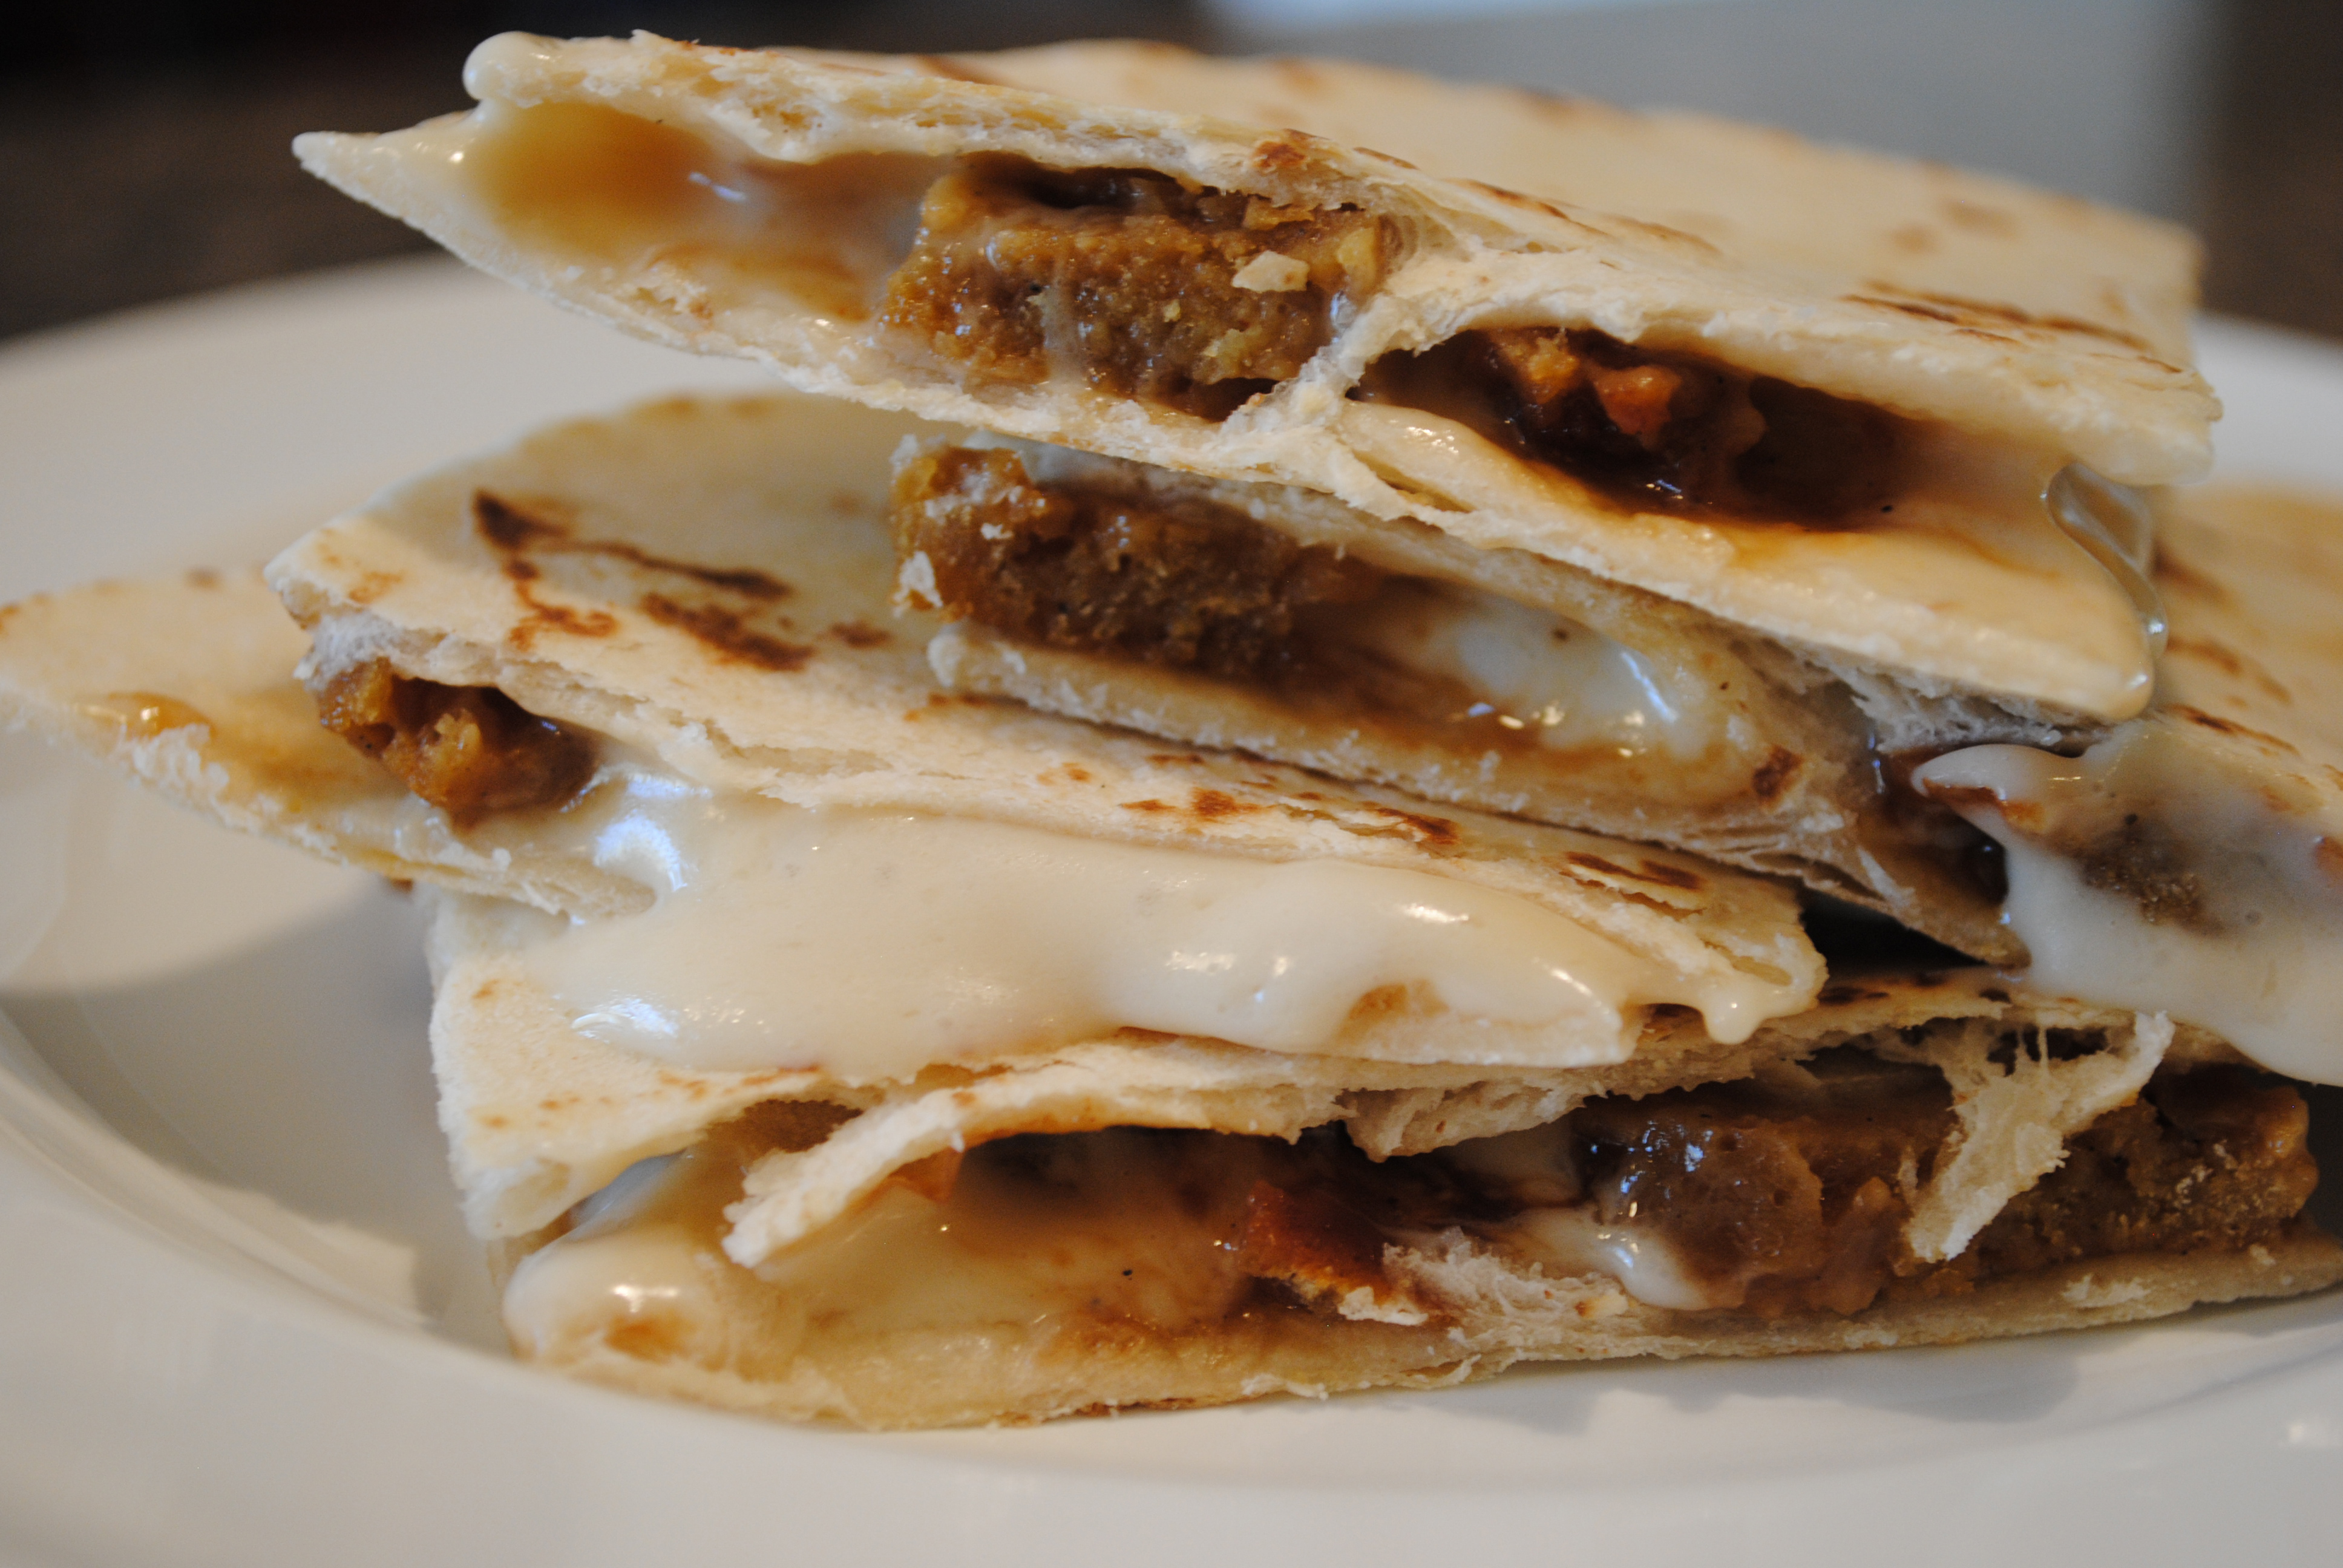
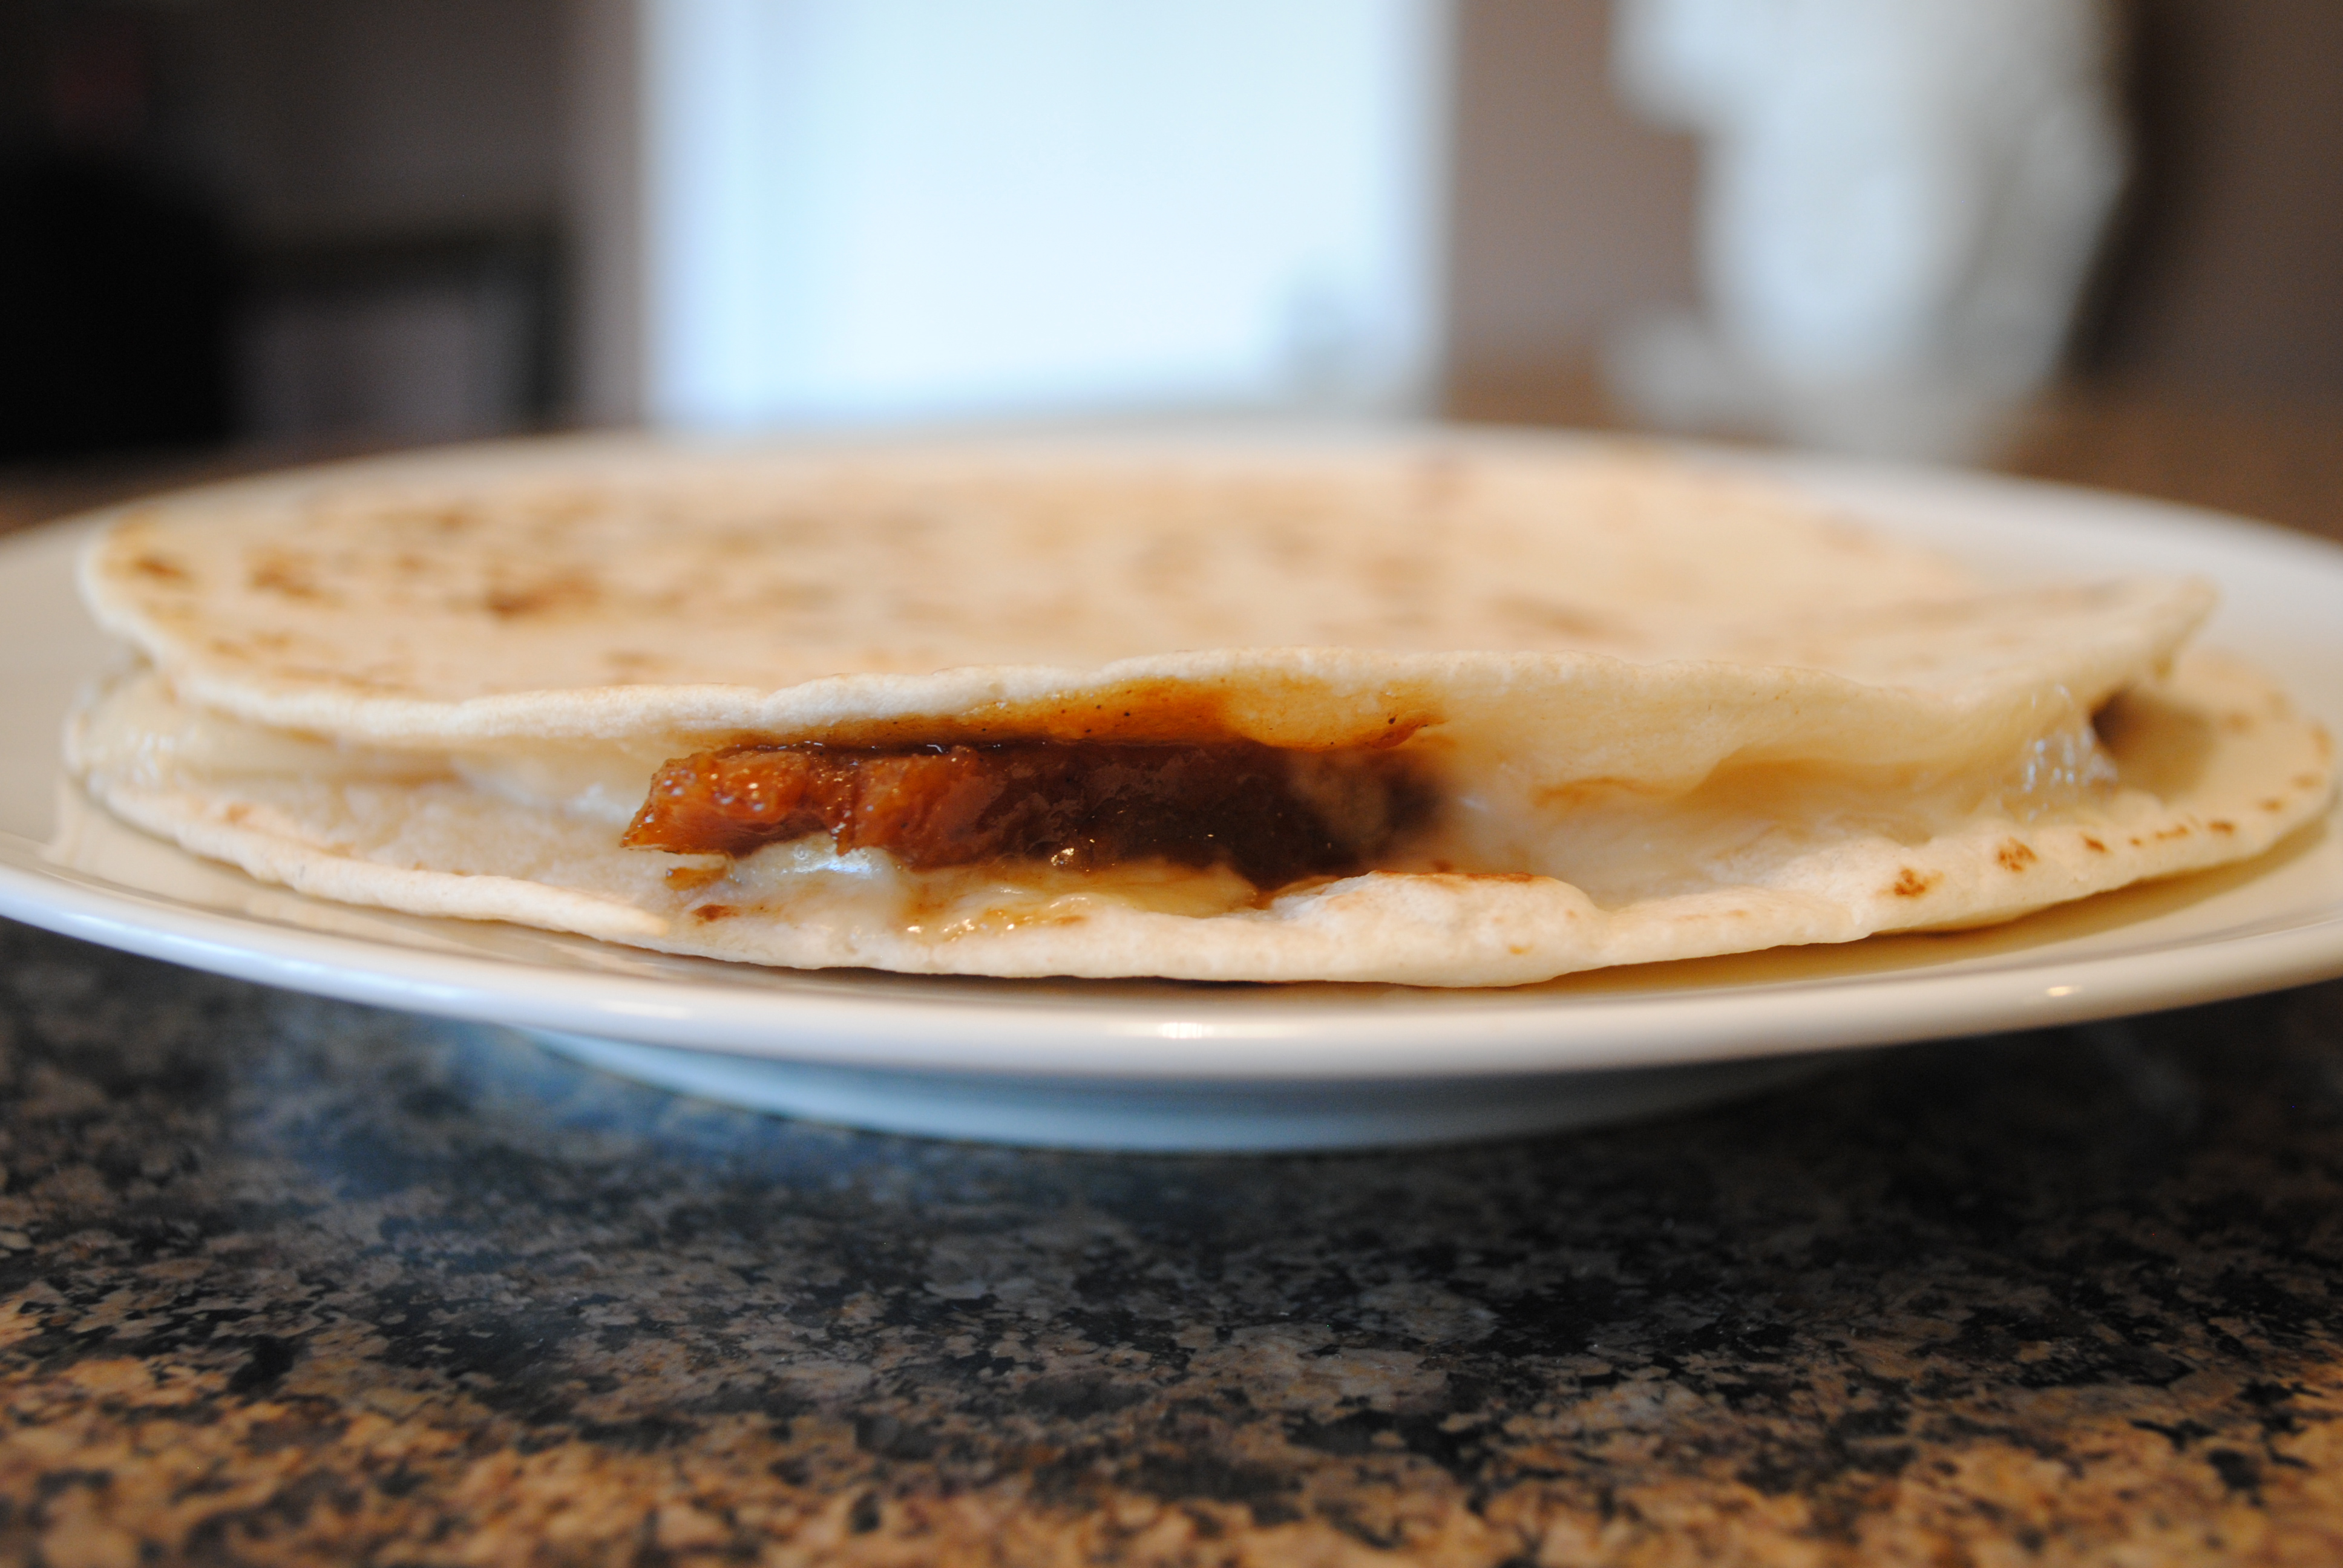
I made these with the leftover seitan from the Korean BBQ (or Bulgogi) Subs, combined with some of that fancy new Daiya Jack wedge cheese… YUM! That cheese melts like magic, and the slightly sharp flavor melds perfectly with the richness of the Korean BBQ sauce. We also really enjoyed the chewiness of the seitan, all tucked away in a bed of gooeyness.

I could easily eat these for lunch every day this week. I wont- I’ll stick to my salads… but I’ll be thinking about these bad boys!

Vegan Korean BBQ (Bulgogi) Quesadilla

This is my favorite shot… that one little piece of seitan is peeking out and saying “Hallo!”

Vegan Korean BBQ (Bulgogi) Quesadilla

Jason had his with a side of (vegan) sour cream and salsa, but I enjoyed mine on it’s own. I also think a side of extra BBQ sauce to dip it in would be yummers.


Korean BBQ Quesadillas (Makes 2)

Ingredients:

  • 4 large flour tortillas
  • 1 loaf homemade seitan, thinly sliced and marinated for at least an hour in Korean BBQ sauce (I used Bibigo brand, but you could also make Bulgogi from scratch)
  • About 1/2 a wedge of Daiya Jack, sliced into 1/8-1/4 inch thick slices

Directions:

  1. In medium/hot skillet, lay out one tortilla.
  2. Layer cheese and seitan, then cover pan and let it sit until the cheese gets melty. Dribble a little extra BBQ sauce over the cheese/seitan.
  3. Remove cover, top with another tortilla, and flip over.
  4. Repeat to make 2nd quesadilla.
  5. Move to plate, and use sharp knife or pizza cutter to slice into quarters.

Enjoy!

{ 18 comments }

Roasted Brussels Sprouts

Vegan Roasted Brussels Sprouts

Roasted Brussels Sprouts

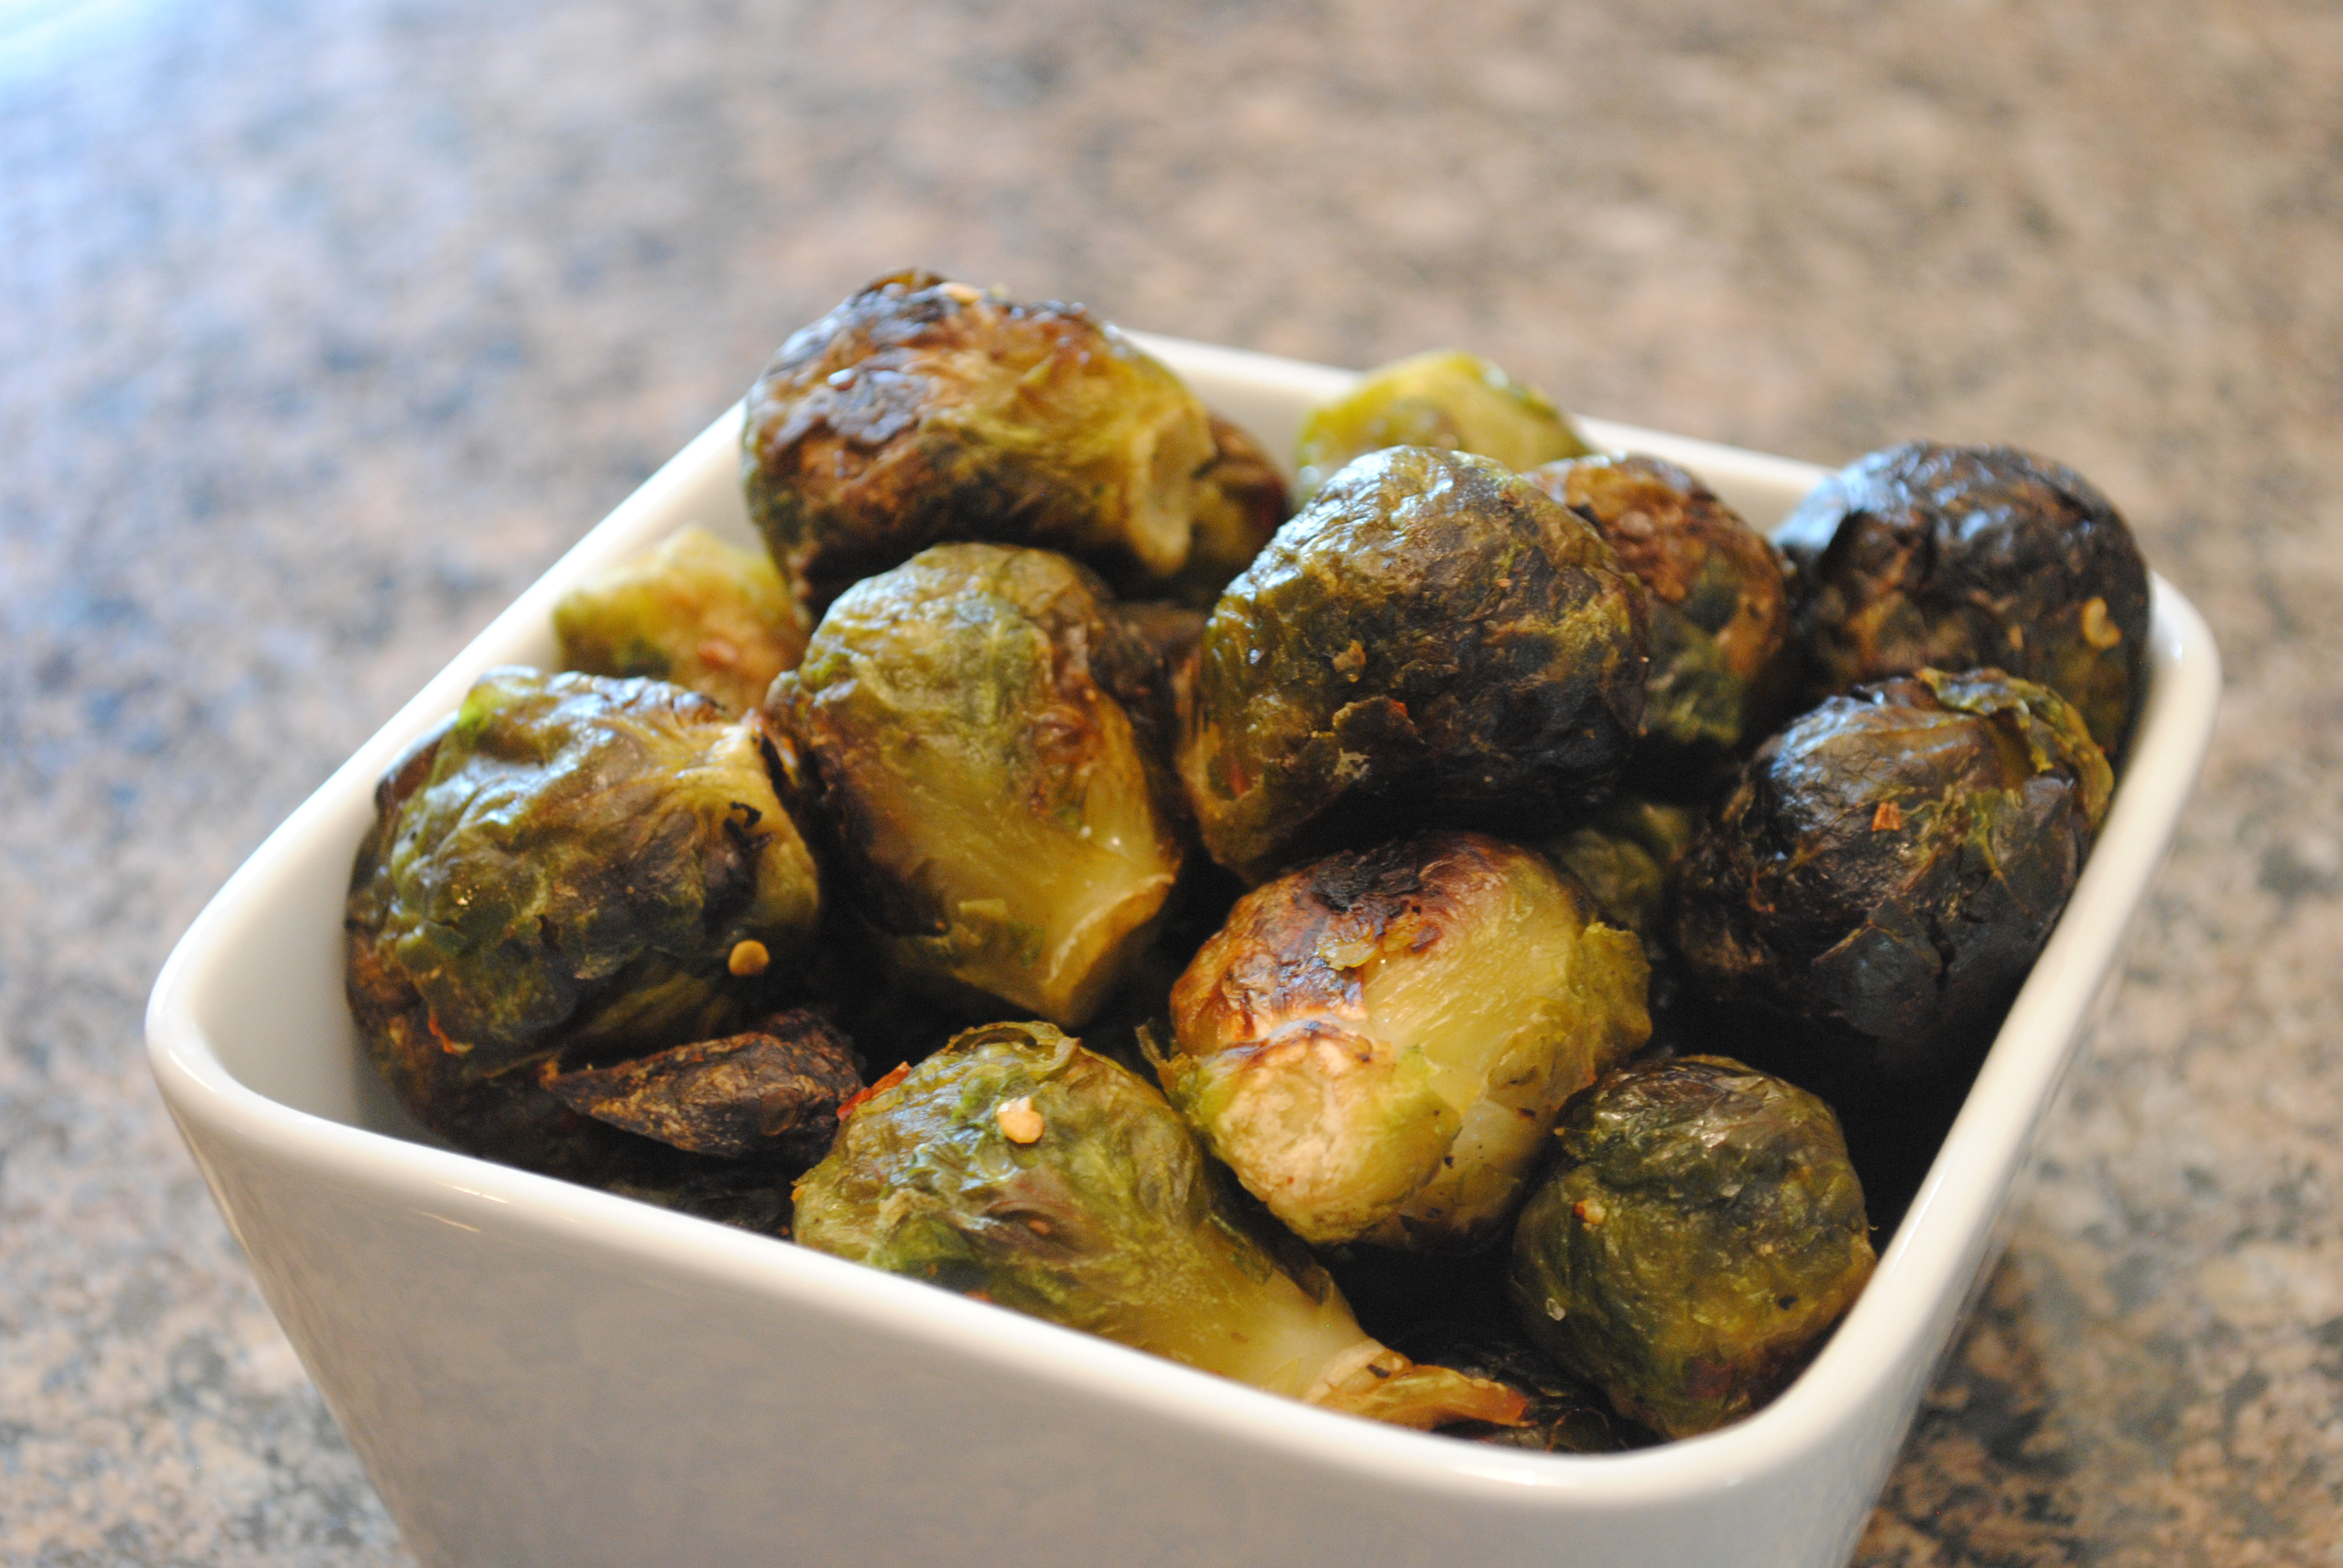
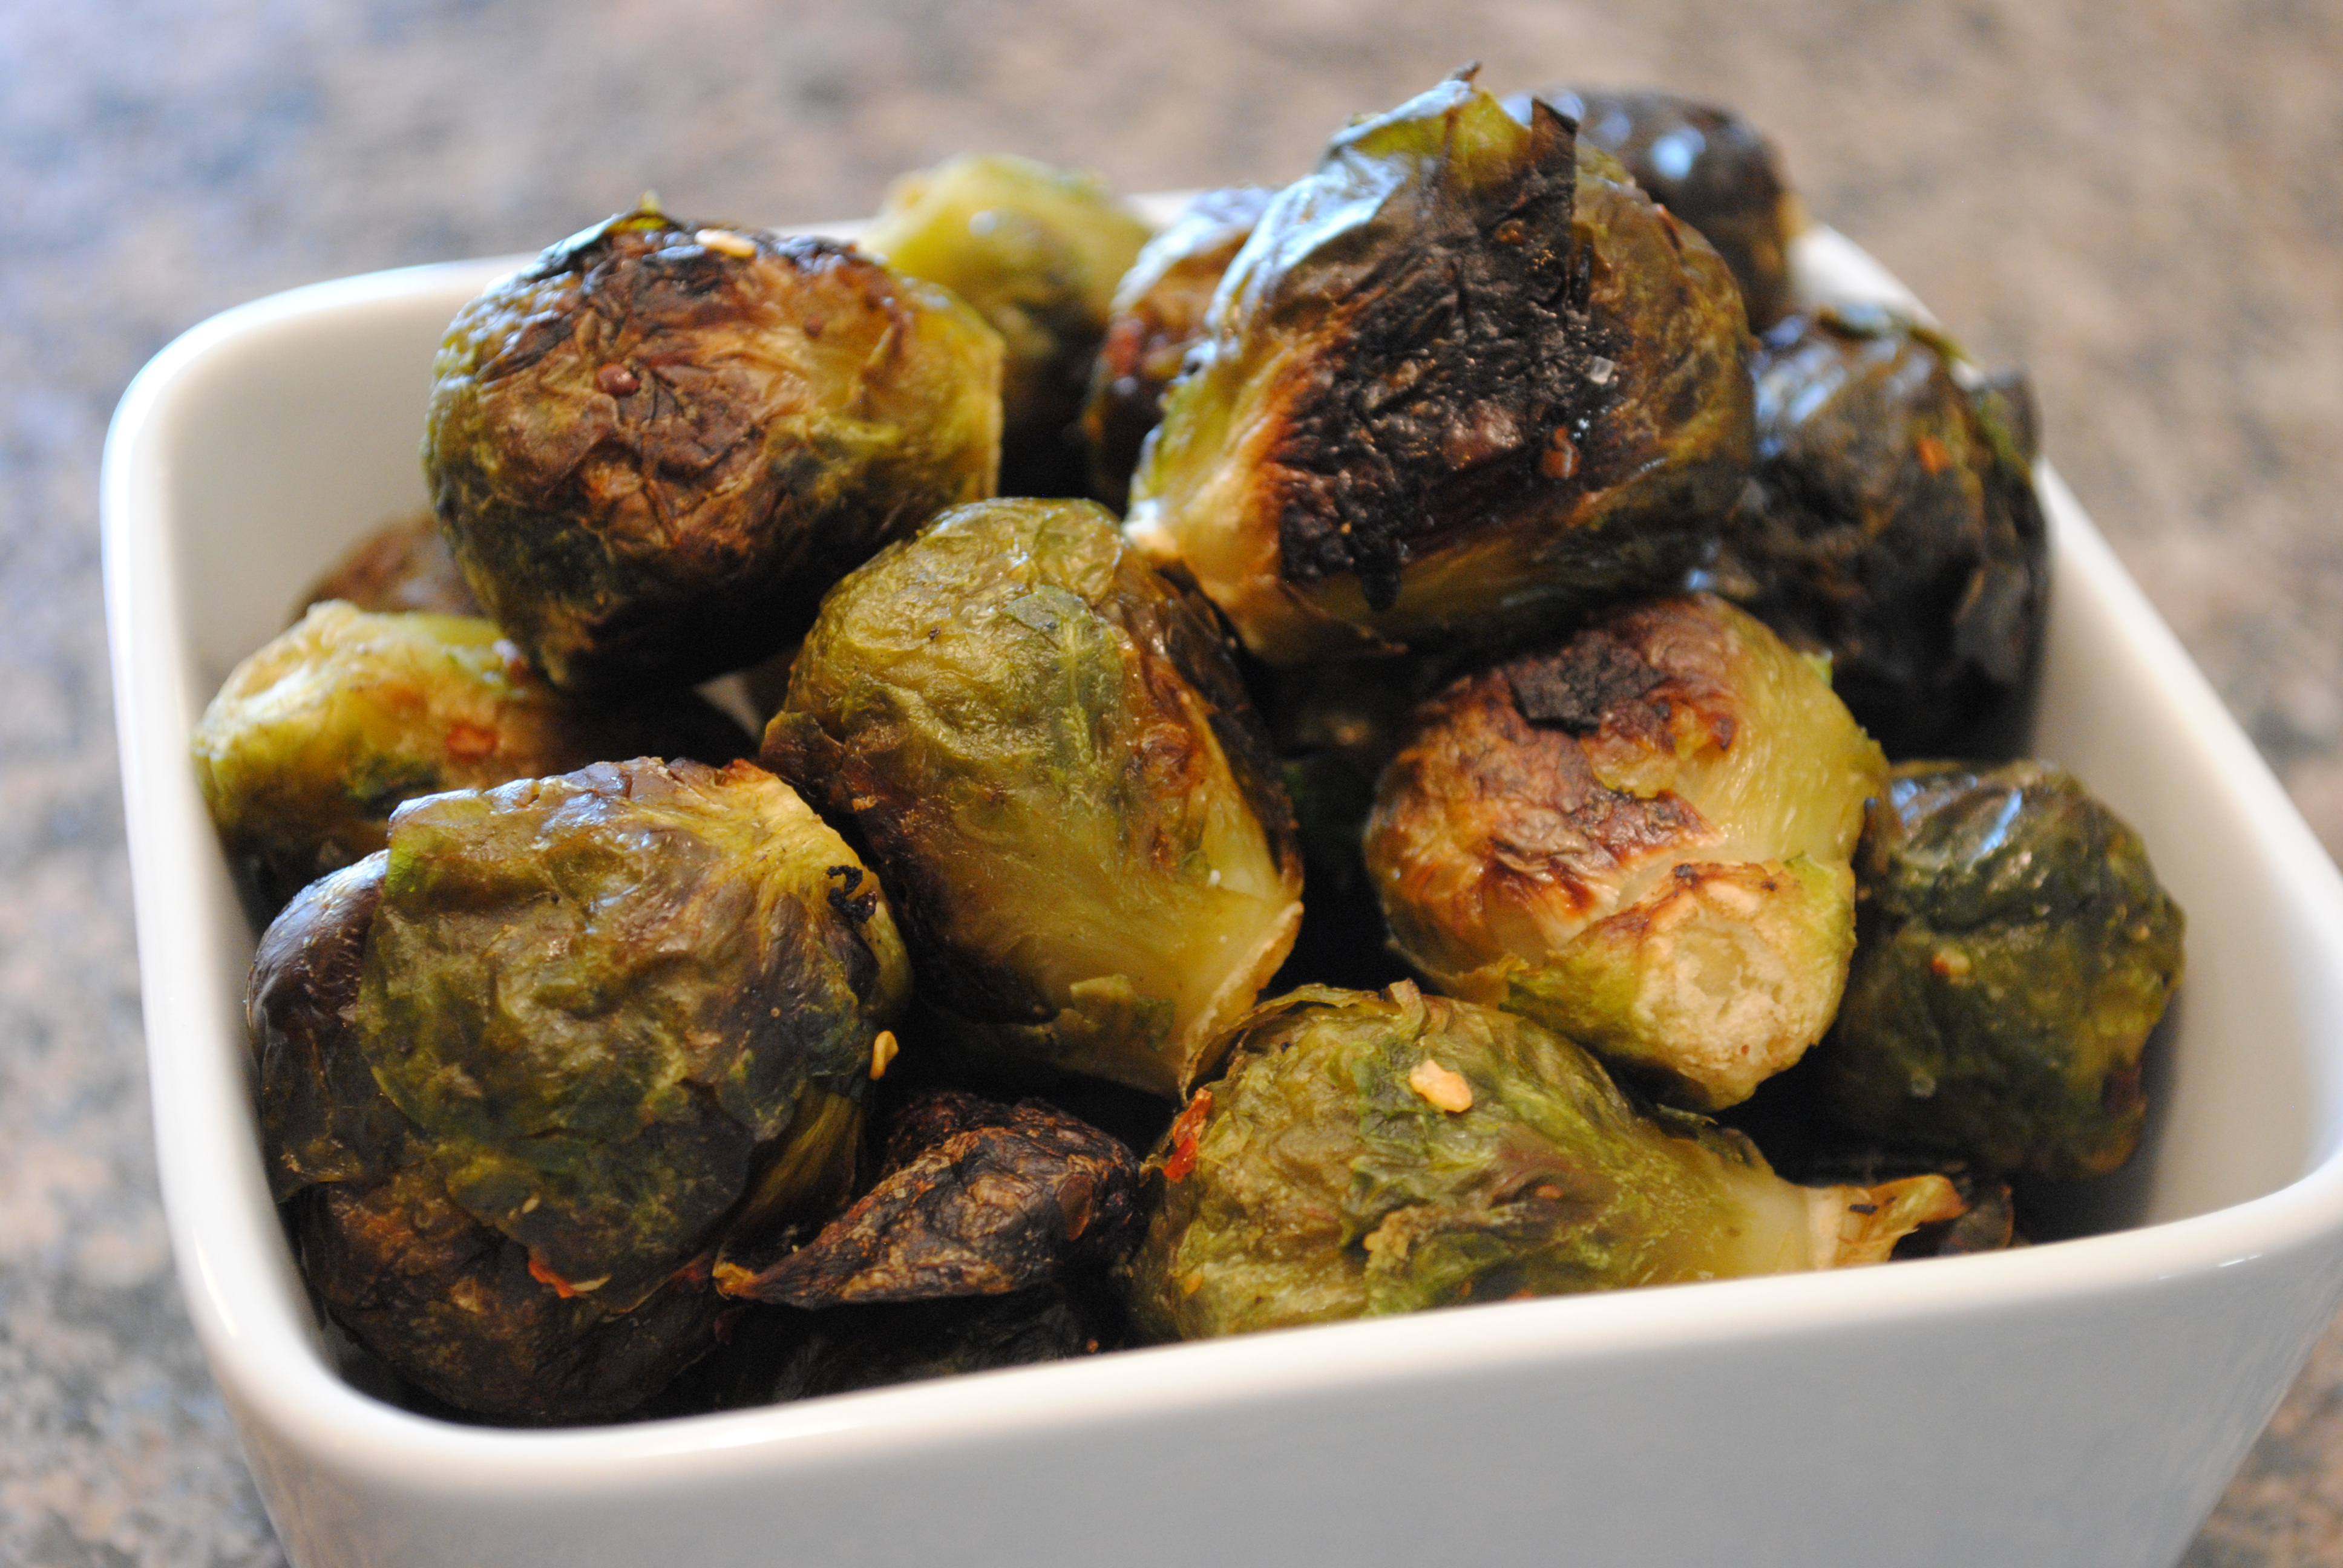
Have you checked out my Buffalo Wing Tacos with Seitan yet? Deeelish, if I do say so myself 😉 However, vegans cannot live on seitan alone… sometimes we need vegetables too! And because of that, I thought I should share with you my recipe for roasted Brussels Sprouts.

But before I do that, let me share with you the one truth about Brussels that no one ever told me: Avoid the frozen kind, no matter what! I don’t care if they’re on sale. I don’t care if they’re free. I don’t care if someone is paying you to take them! They will turn out mushy and gross and you will be sorely disappointed. You will also have wasted the time you spent prepping and baking them, so just don’t do it.


Roasted Brussels Sprouts (Makes 6 servings)

Ingredients:

  • 1.5 lbs FRESH Brussels sprouts, ends trimmed off
  • 2-3 T olive oil
  • 1/2 T red pepper flakes (more to taste)
  • Dash of powdered garlic
  • 3/4 t sea salt (more to taste)

Directions:

  1. Mix everything together in a large bowl until the sprouts are nice and coated.
  2. Spread them out in a single layer on a cookie sheet and roast at 400 degrees for 35-40 minutes, stirring them around 2-3 times during. If you want to add more salt, add it when they come out of the oven. They should be crisp and slightly charred on the outside.

Enjoy!

Vegan Roasted Brussels Sprouts
{ 4 comments }

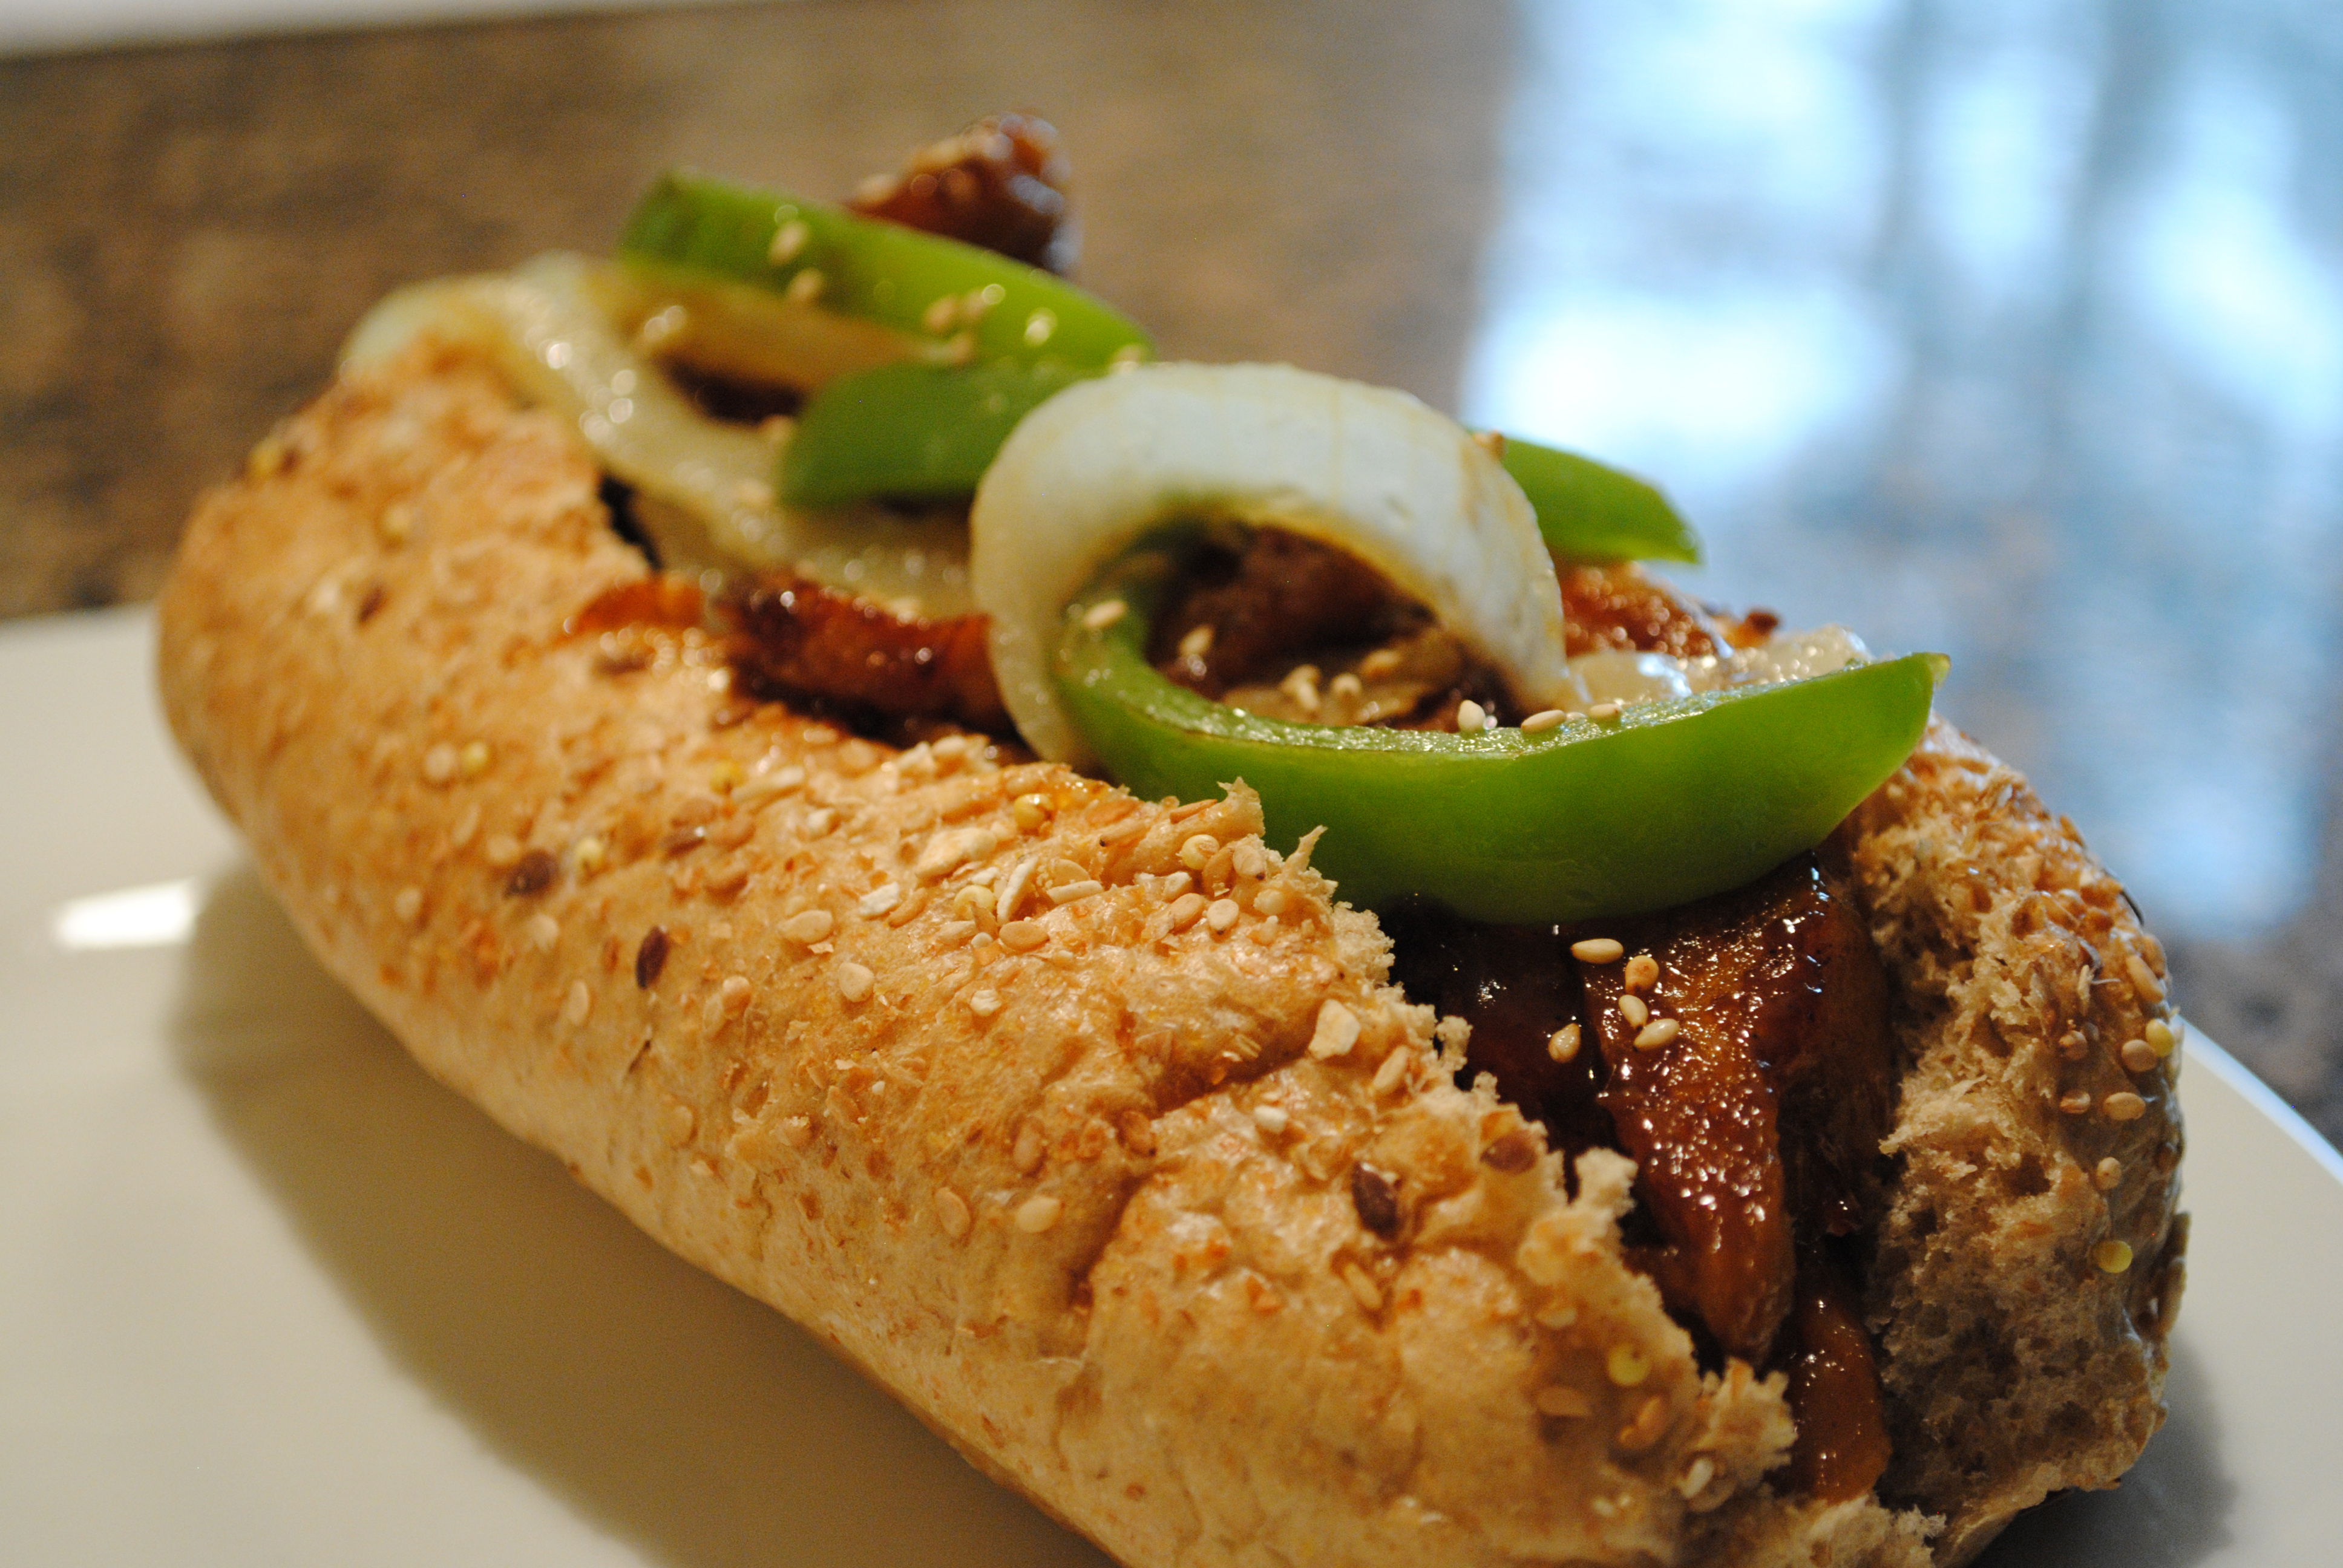
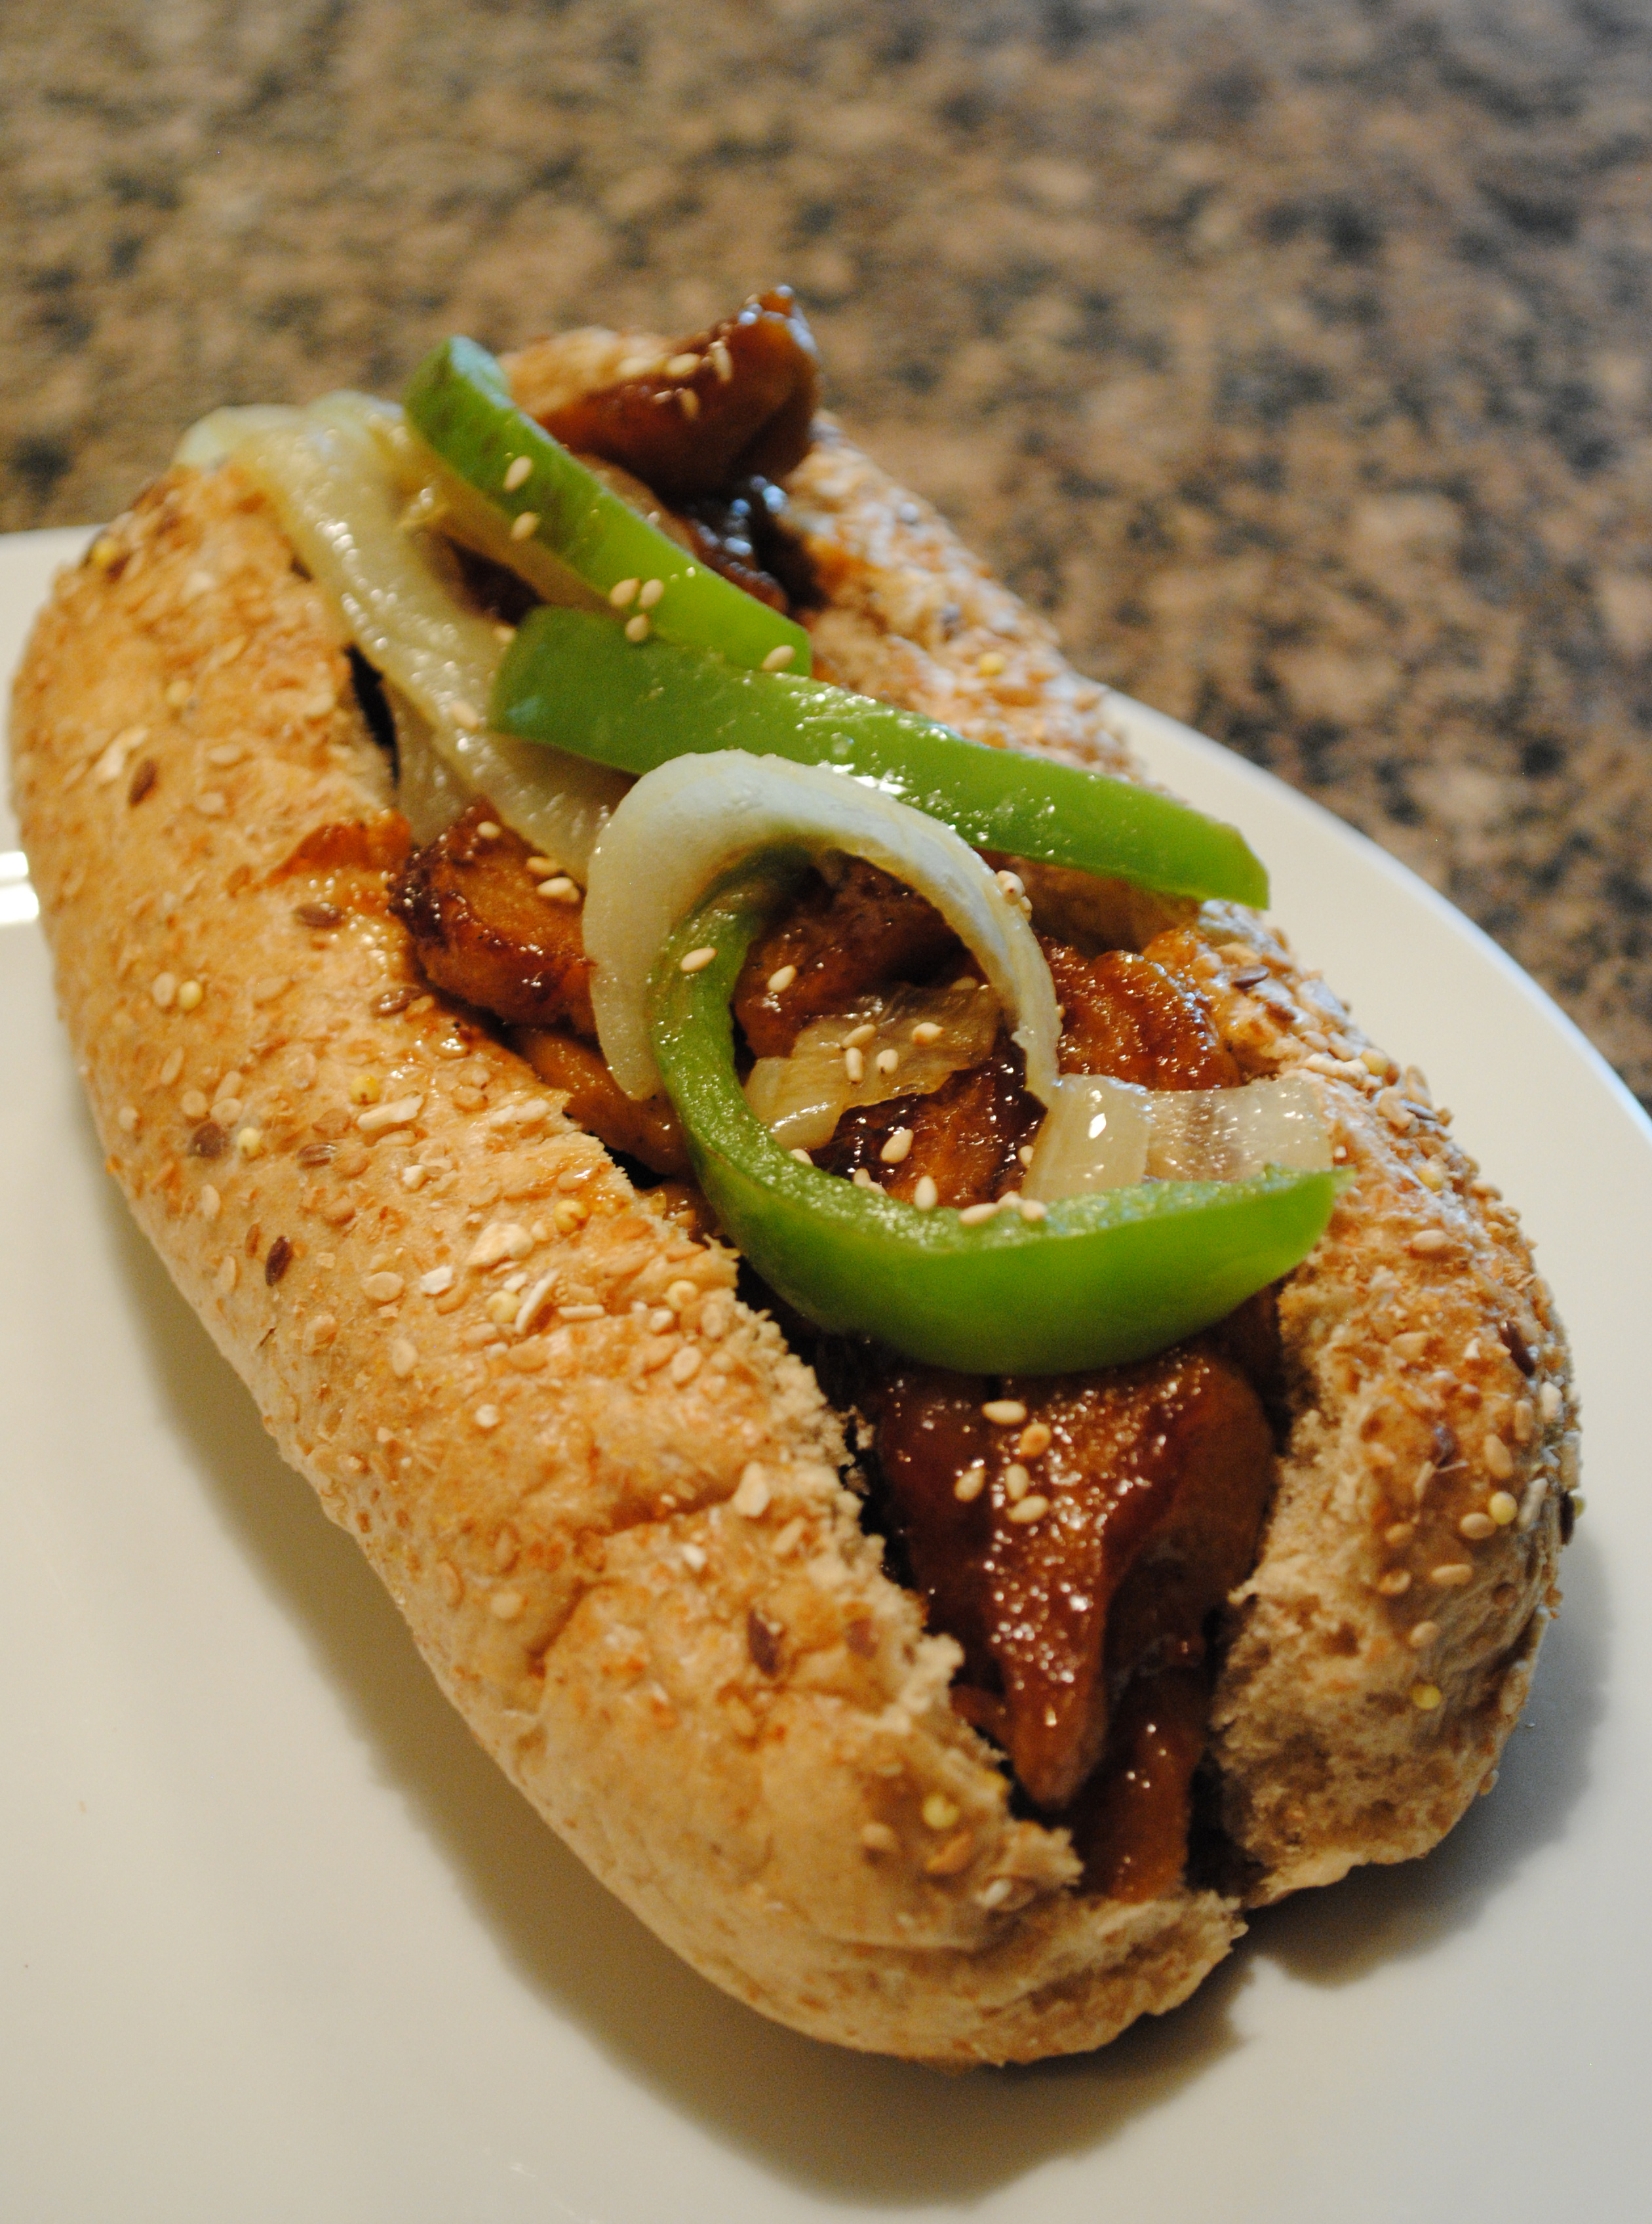
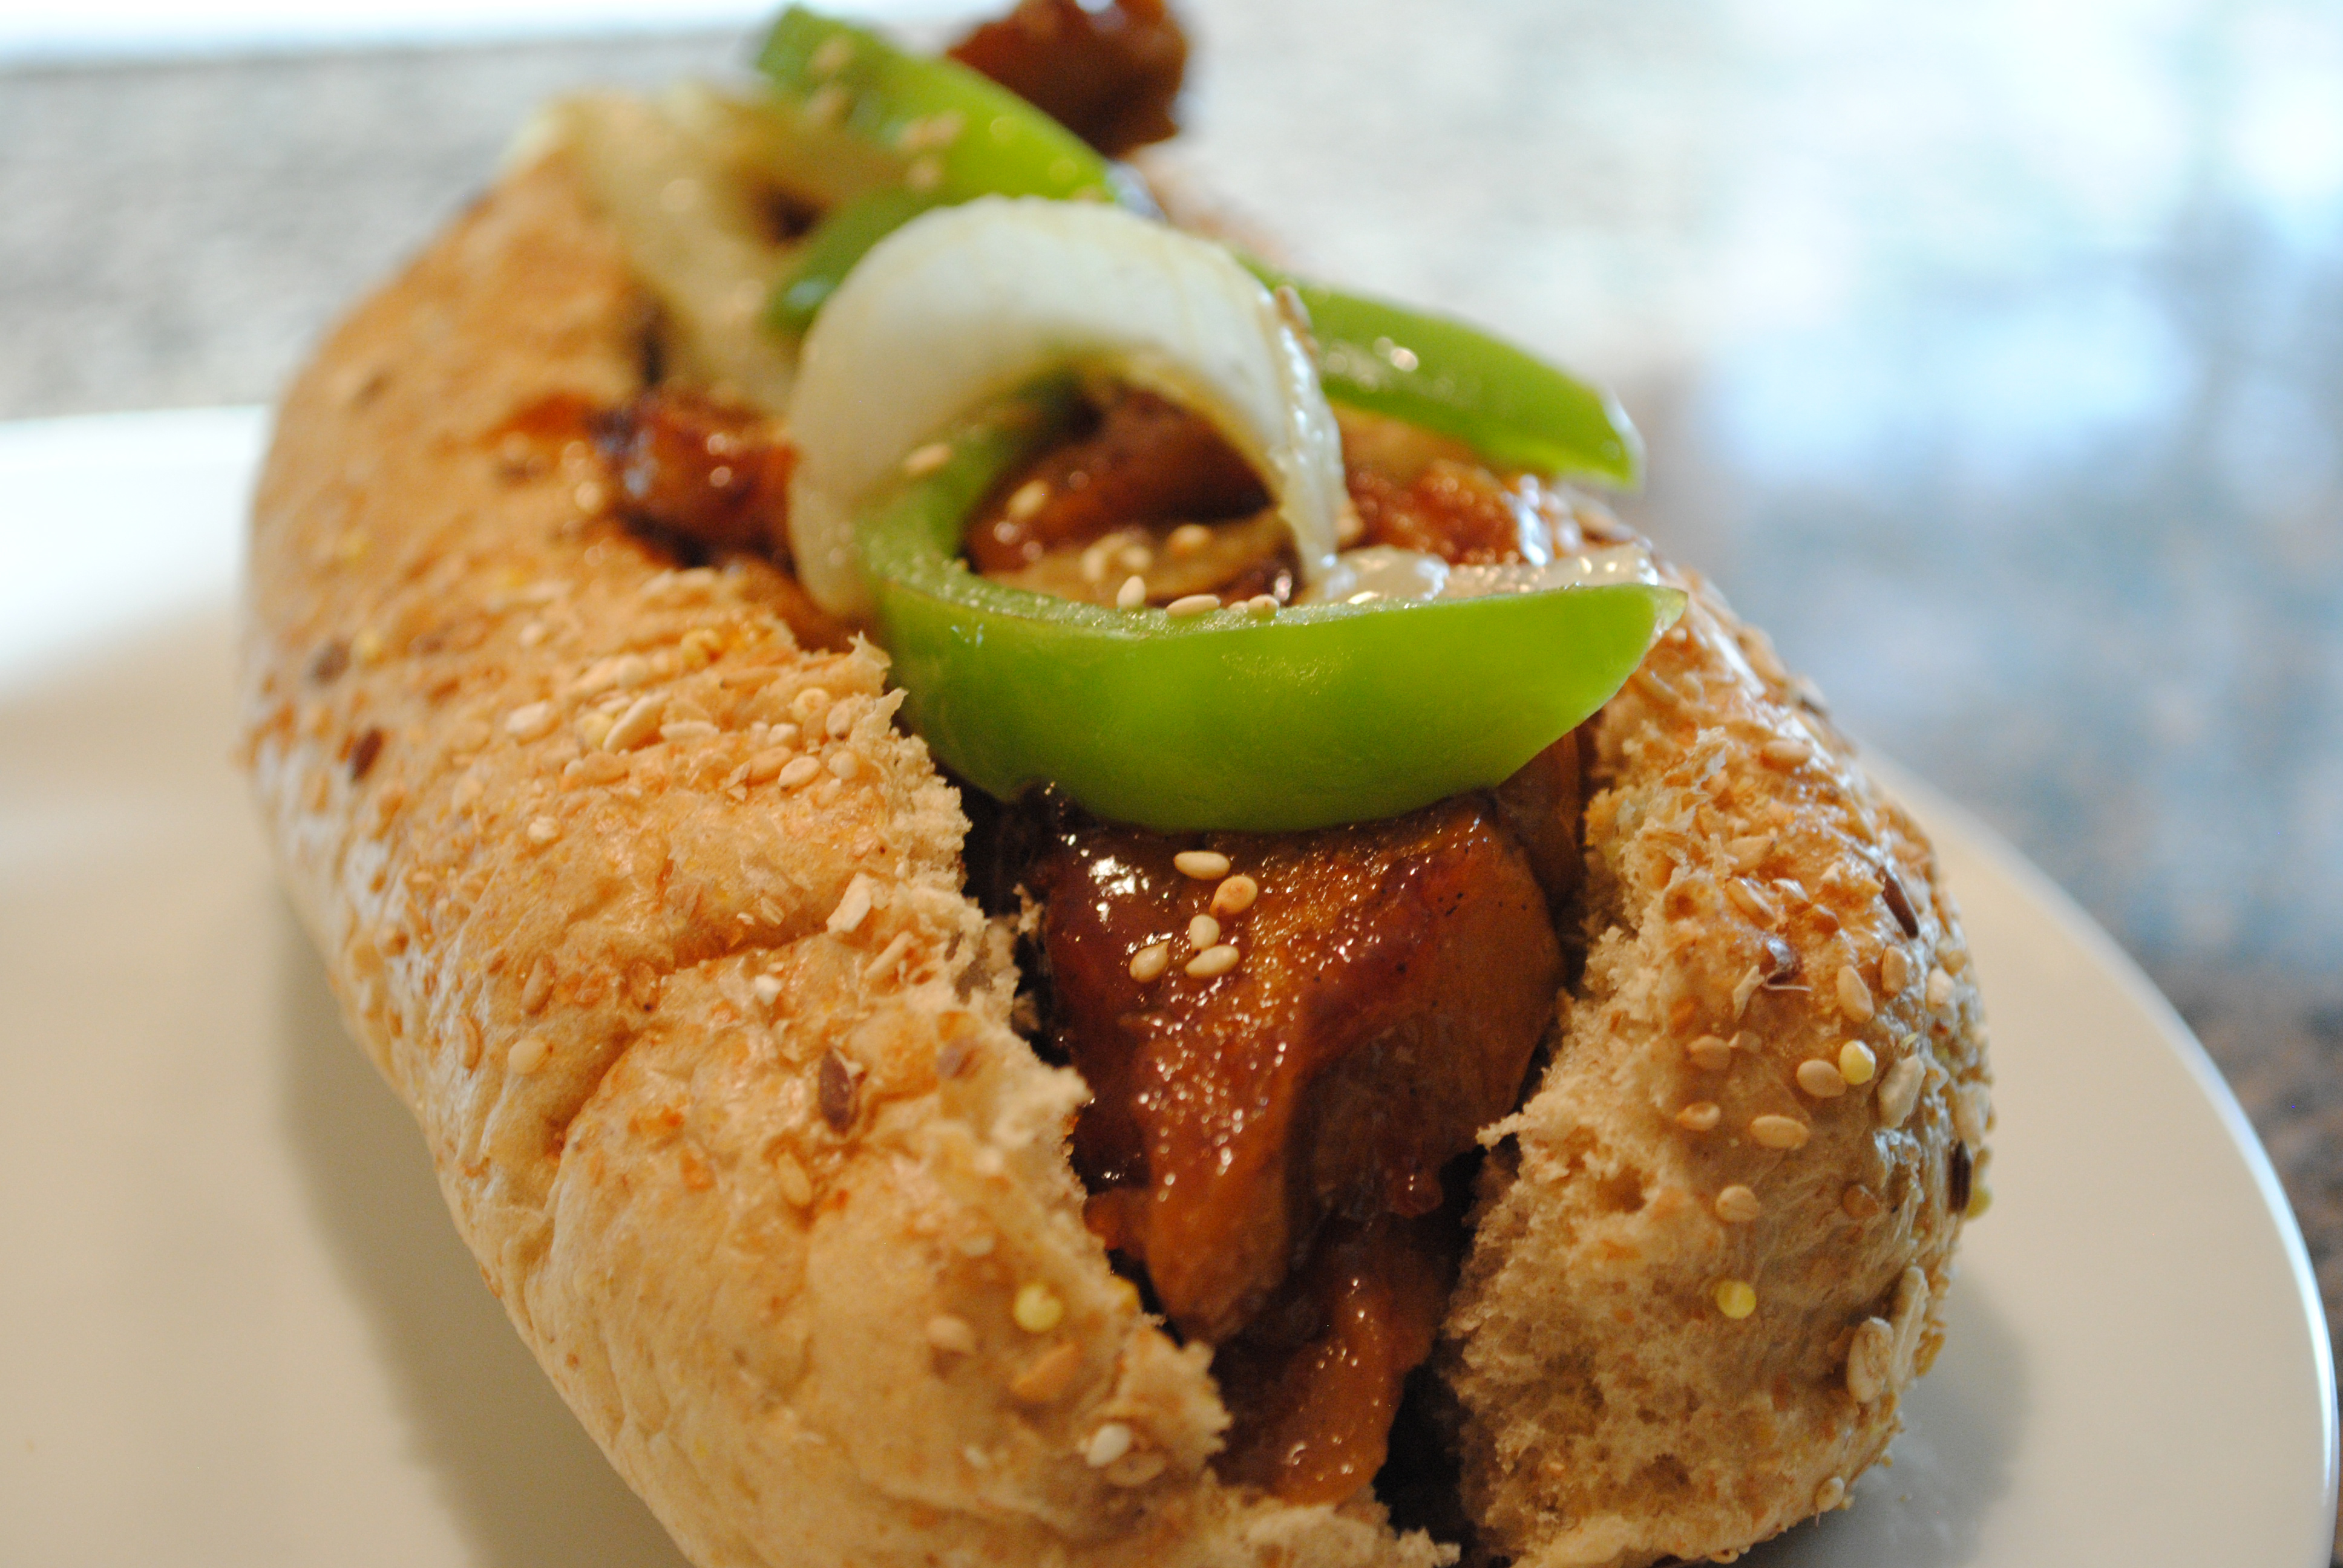
Korean BBQ Subs

Vegan Korean BBQ Sub

Korean BBQ Sub

Interested in trying Korean food, but maybe you’re still a little hesitant? Perhaps the ingredients seem too exotic or maybe the food just seems too different for your family’s finicky palate? If that’s the case, here’s a wonderful starting point… Delicious Korean BBQ wrapped up in the most innocuous of food delivery systems: Bread.

Vegan Korean BBQ Sub

Chewy or crusty, thin or soft… your choice. It’s all good! And as an added bonus, all the ingredients should be available in your local, mainstream grocery store, even the BBQ sauce! Just check your “Asian” aisle.


Korean BBQ Subs (Makes 2)

Ingredients:

  • 1/2 large onion, sliced (I used vidalia)
  • 1 small/medium green pepper, sliced
  • 1 loaf homemade seitan
  • 1-2 T sesame oil for frying
  • 1/2 cup Korean BBQ sauce (I used Bibigo brand, which I bought at my local King Soopers)… You could also make Bulgogi from scratch!
  • 2 sub rolls
  • Sesame seeds, for sprinkling

Directions:

  1. Water saute the onions and peppers until nice and soft, then set aside.
  2. Heat a small amount of oil in the same pan, then cook the seitan over medium heat for 6-8 minutes until it starts to get crispy.
  3. Remove from heat, then stir in the BBQ sauce, and let sit for a minute or two. Don’t let it get cold though!
  4. Transfer the seitan to your rolls, and top with the veggies and seeds.

Enjoy!

Vegan Korean BBQ Sub
{ 7 comments }

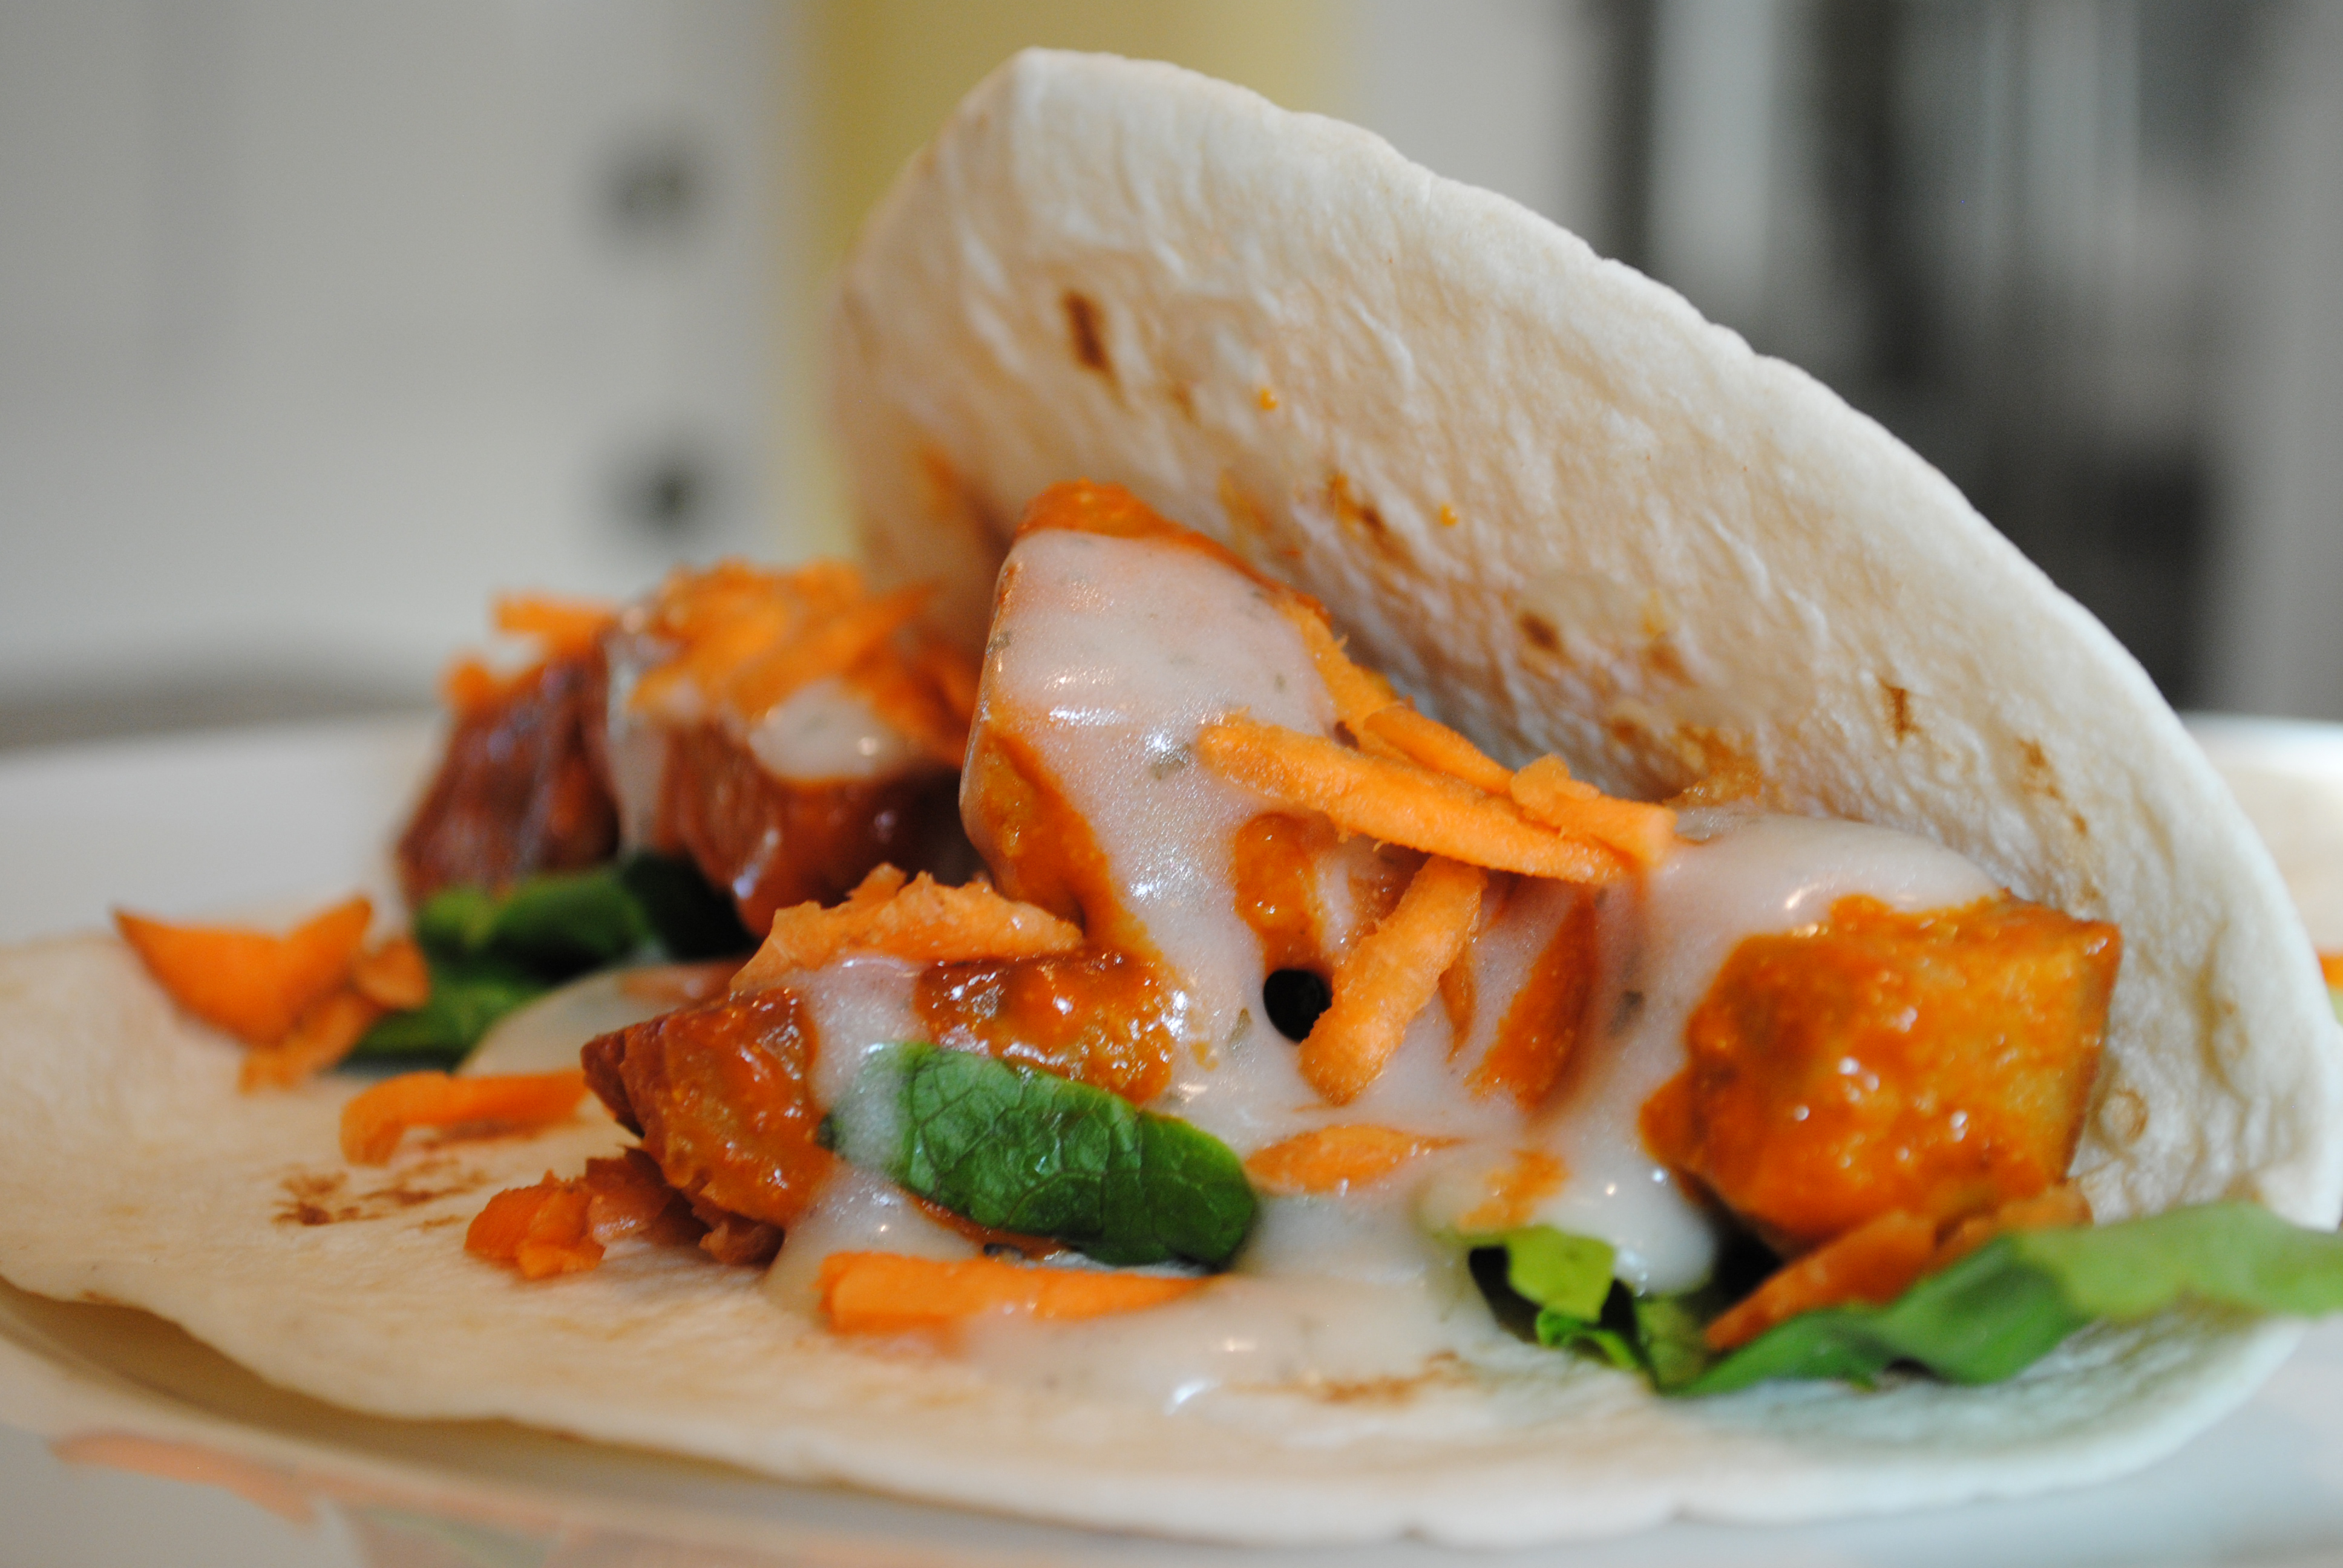
Buffalo Wing Tacos with Seitan

Vegan Buffalo Wing Tacos with Seitan

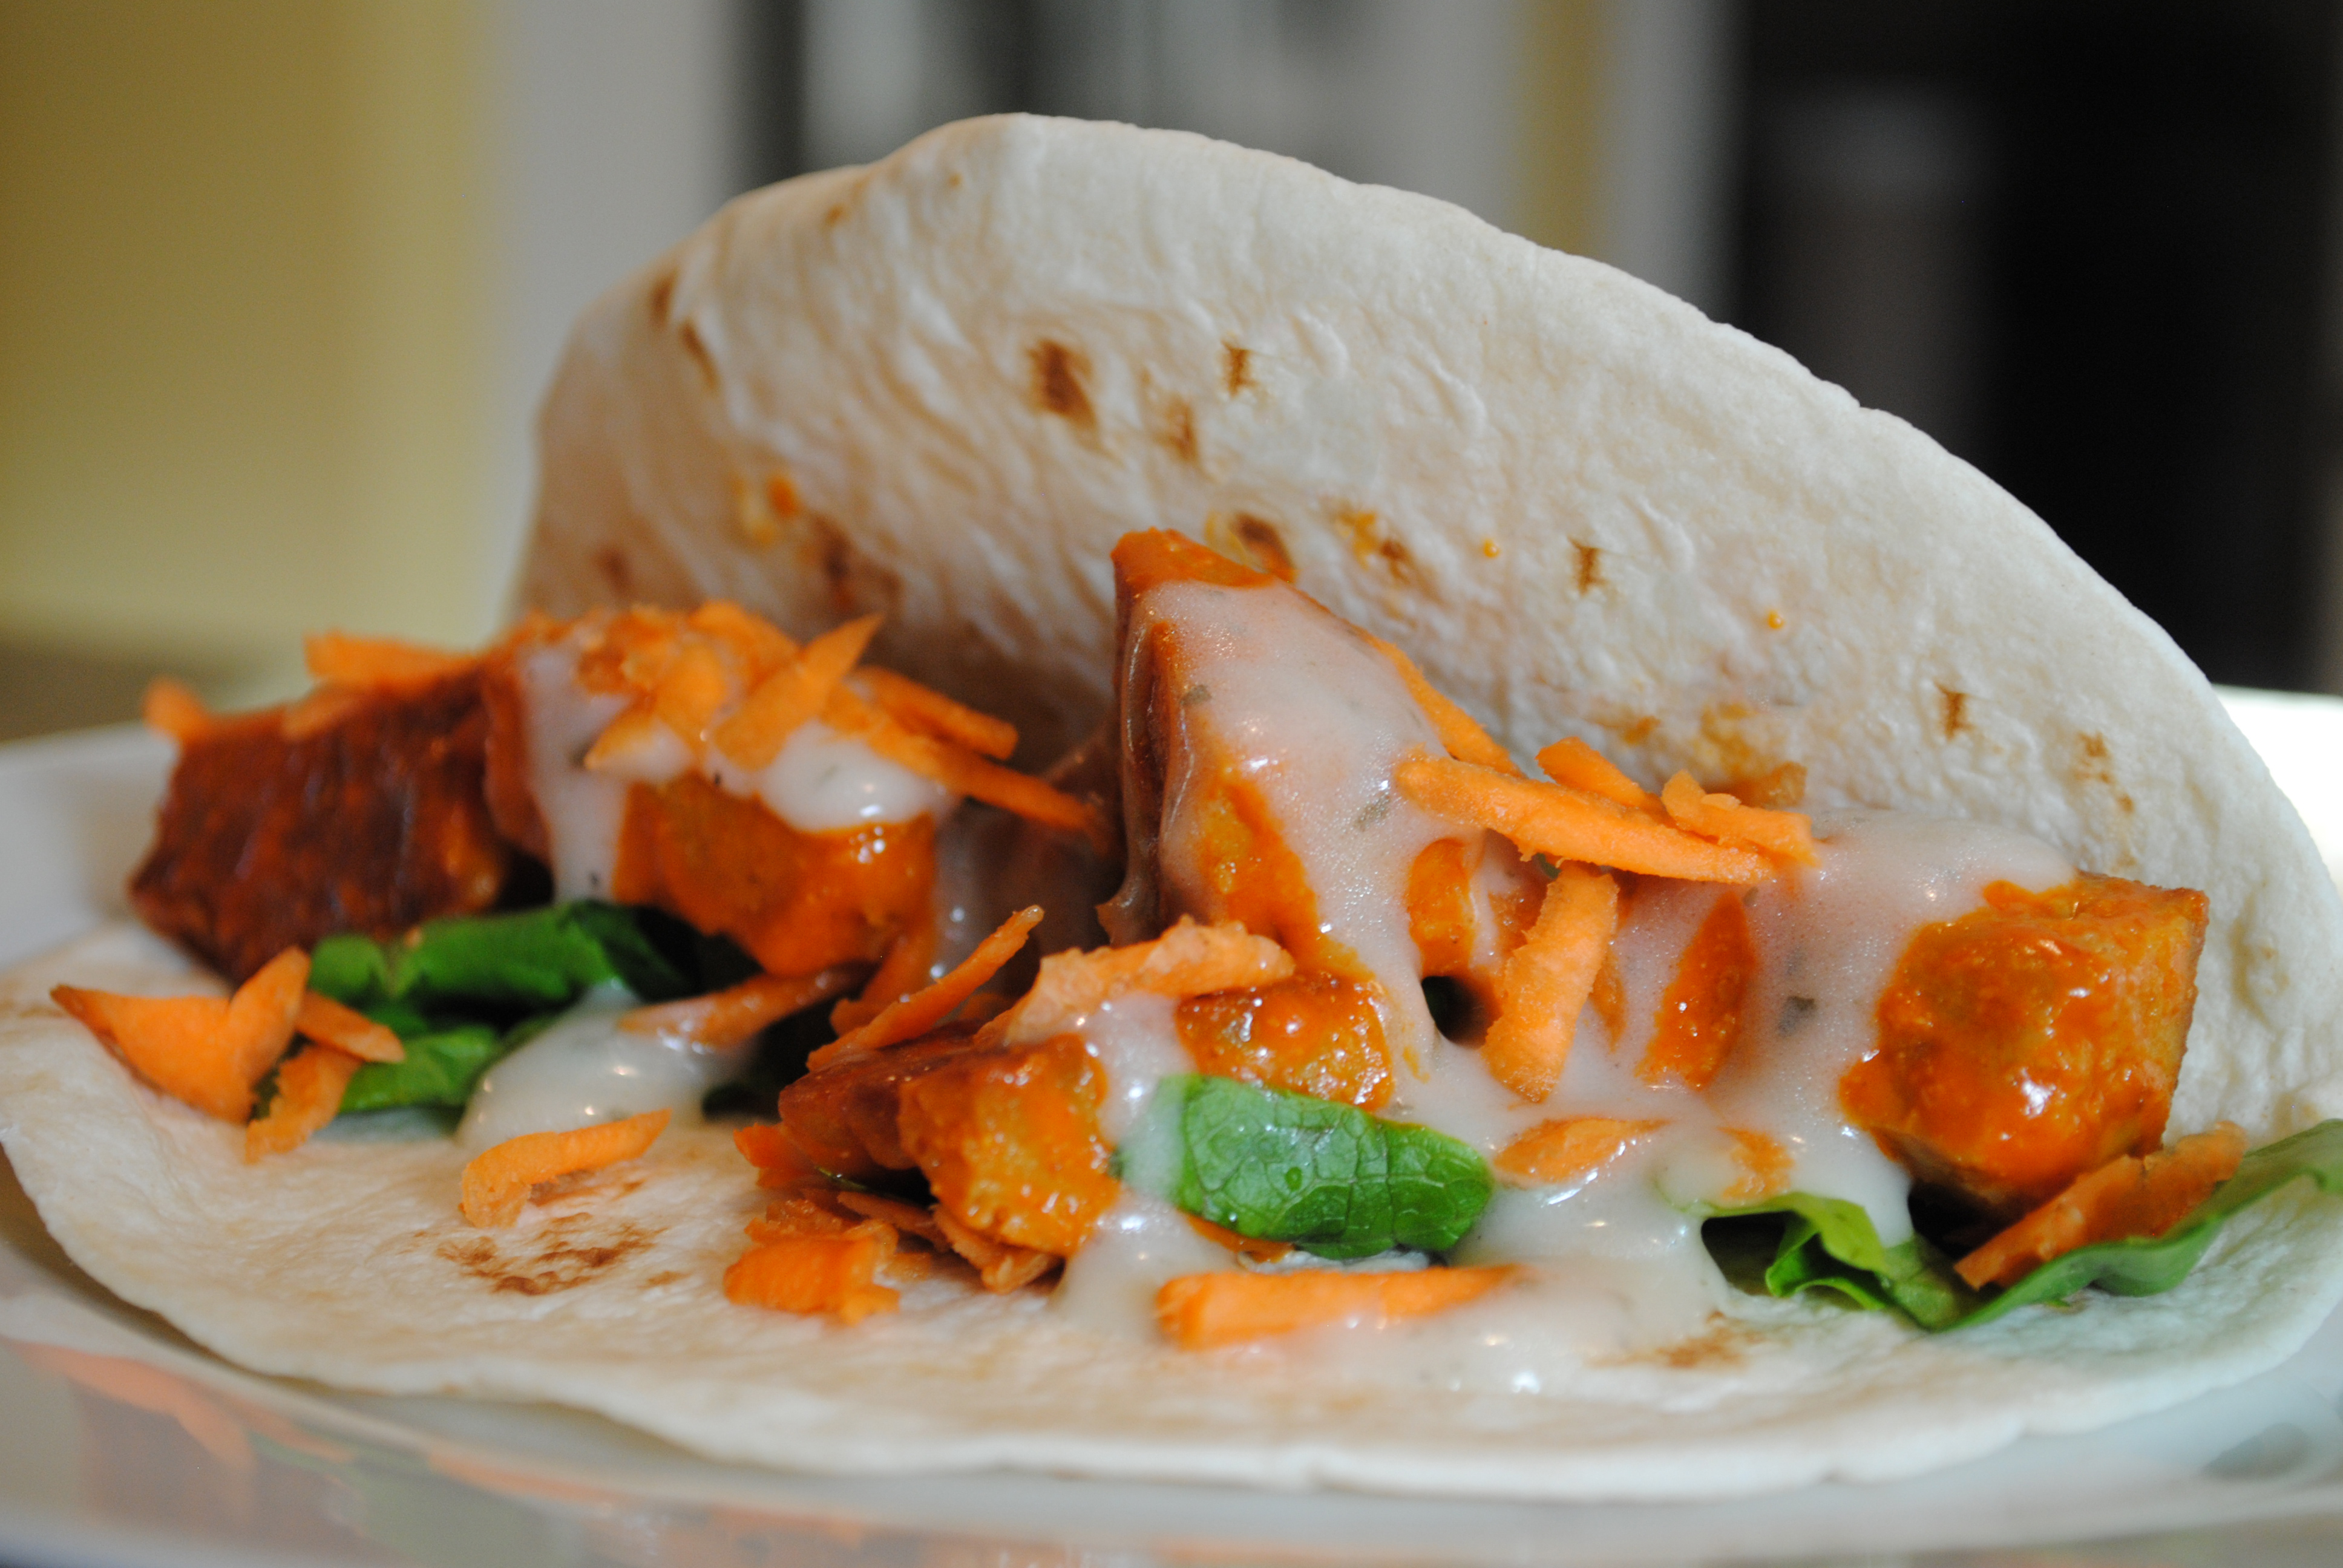
Buffalo Wing Tacos

If people still said things like “That was tha bomb-diggety, yo!“, I would totally say that about these tacos. I wish I knew what the hip new saying was, something to convey how amazing these tacos were, but I’m no expert. I mean, I still say “totes adorbz“, and that’s so 2011!

What’s so great about these tacos, you ask? They have everything you love about buffalo wingz all wrapped up in a neat little taco package. The crispy seitan smothered in spicy buffalo sauce. Lettuce and grated carrots, representative of the veggies traditionally served alongside the platter of wingz at your favorite vegan friendly sports bar, and of course, vegan ranch dressing. Did I mention it was neatly wrapped up? No orange mess to clean out from under your fingernails after this feast, I promise you! They were inspired by a picture I saw on Pinterest (of the gross, non-vegan kind), but it wasn’t linked to a recipe. I didn’t need a recipe to veganize though, the idea was inspiration enough for me!

Dang those are some pretty tacos!

Vegan Buffalo Wing Tacos with Seitan

Also pretty? The tulips that managed to pop up in my front yard. Those bulbs have been in the ground since before we bought the house in 2007, and have never really done anything. I’ve actually tried to dig them all up, but clearly I missed a few (hundred).

That Was Vegan Tulips

That Was Vegan Tulips

My lilacs are also having a banner year (banner for a black thumb like myself, that is)- this is the first year they’ve really bloomed for me. Not sure what’s changed, but I’m happy to see them.

That Was Vegan Lilacs


Buffalo Wing Tacos with Seitan (Makes 5-6 tacos)

Ingredients:

  • 2 loafs of homemade seitan
  • 2-3 T oil for frying
  • Frank’s Buffalo Wing sauce (not the original Red Hot, the kind that says “Buffalo Wing” on the front of the bottle)
  • 5-6 small flour tortillas
  • 2 large carrots, grated
  • 2 leafs of romaine lettuce, chopped
  • Vegan ranch dressing (I used Organicville)

Directions:

  1. Slice the seitan. Standing it upright on your cutting board, slice longways down the center. Keeping the 2 halves together, lay it on the cutting board and slice it lengthwise down the middle again, the, going the other direction, slice it into bite-sized chunks.
  2. Heat oil in a frying pan over medium heat, then add the seitan, cooking until it starts to get crispy, 5-7 minutes. Remove the pan from the heat and let it cool for just a minute, then add in the buffalo sauce, stirring well. (You could also mix in a separate bowl, but this way leaves you with one less dish to clean). Just make sure the pan isn’t too hot.
  3. Lay out your tortillas, and layer: Lettuce, carrots, seitan, ranch, extra buffalo sauce (if desired) and more carrots.

Enjoy!

{ 17 comments }

Agave-Chili Baked Walnuts

Agave Chili Baked Walnuts

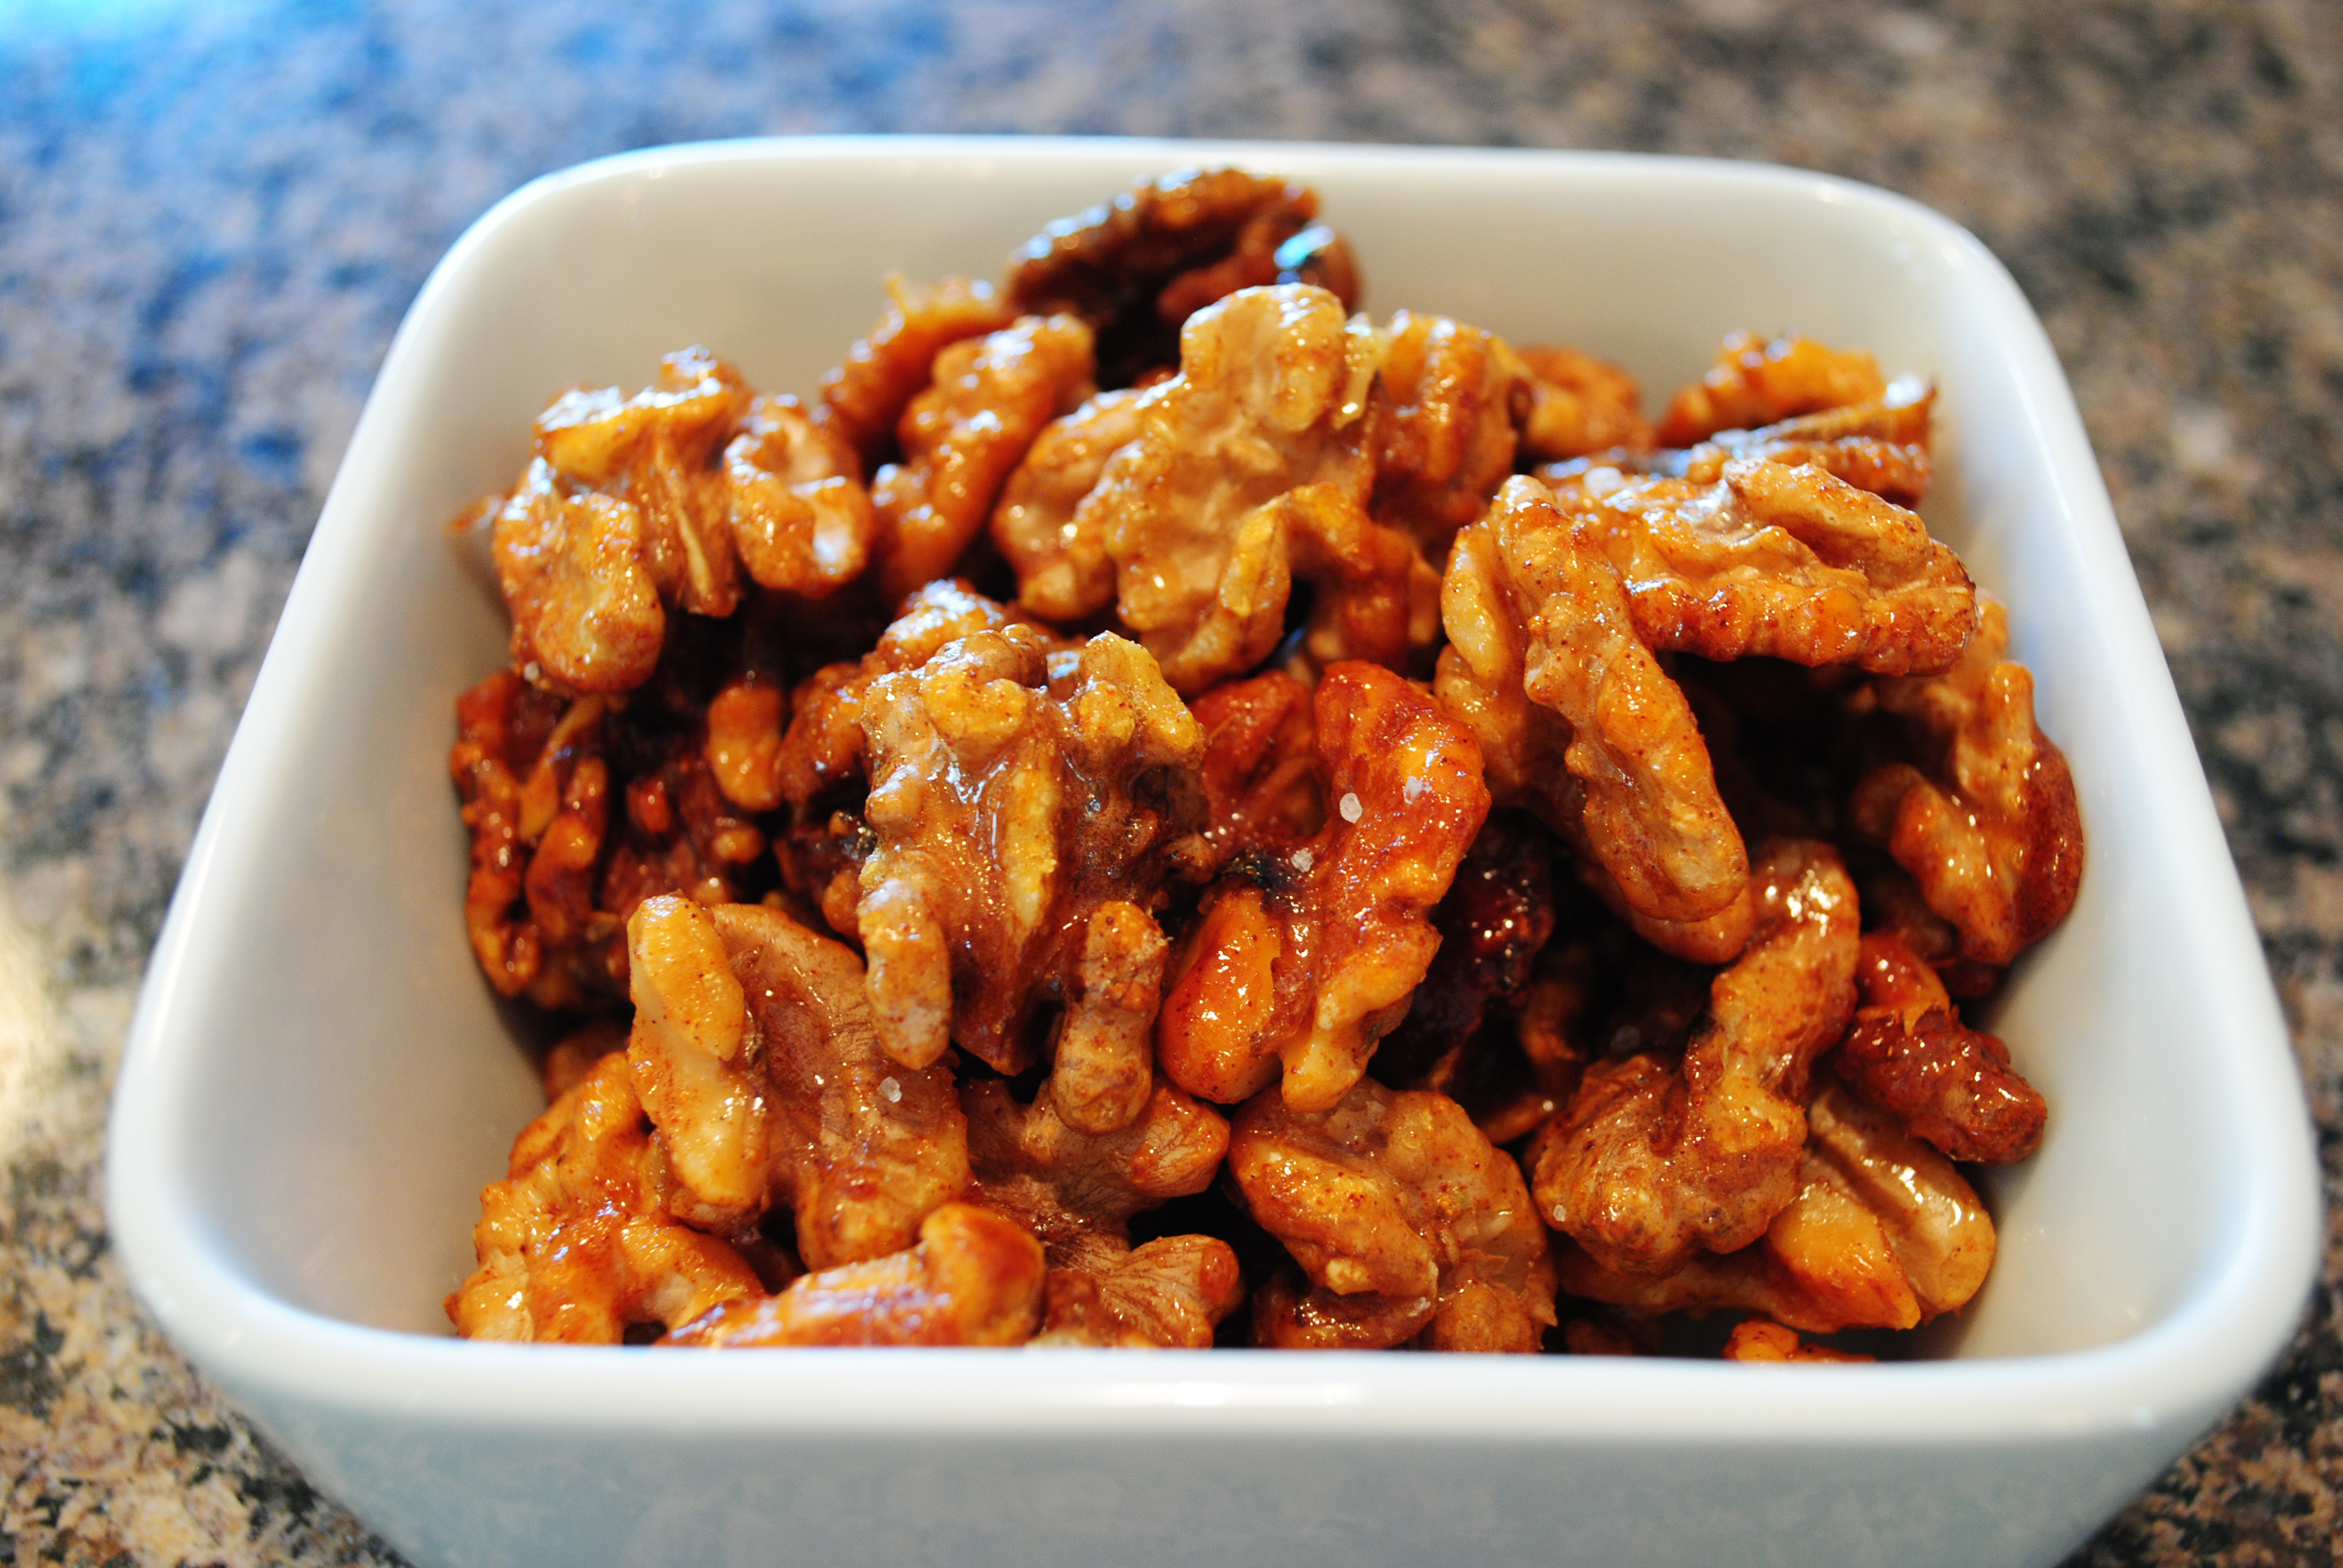
Agave-Chili Baked Walnuts

In my last Make That Salad Better post, I shared with you a little about how many salads I eat. TONS. I’m not complaining- since I’ve started incorporating more raw veggies into my diet, I’ve never felt better! But chewing that much lettuce can get all sorts of monotonous, so I like to add fun toppings to keep things interesting. We’ve all had walnuts similar to these in restaurants, and although a recipe probably isn’t needed, I still wanted to share.

These baked walnuts are quick and easy to make, and use minimal ingredients. If you have walnuts on hand, you probably already have everything you need! These also make an excellent snack, sans lettuce 🙂

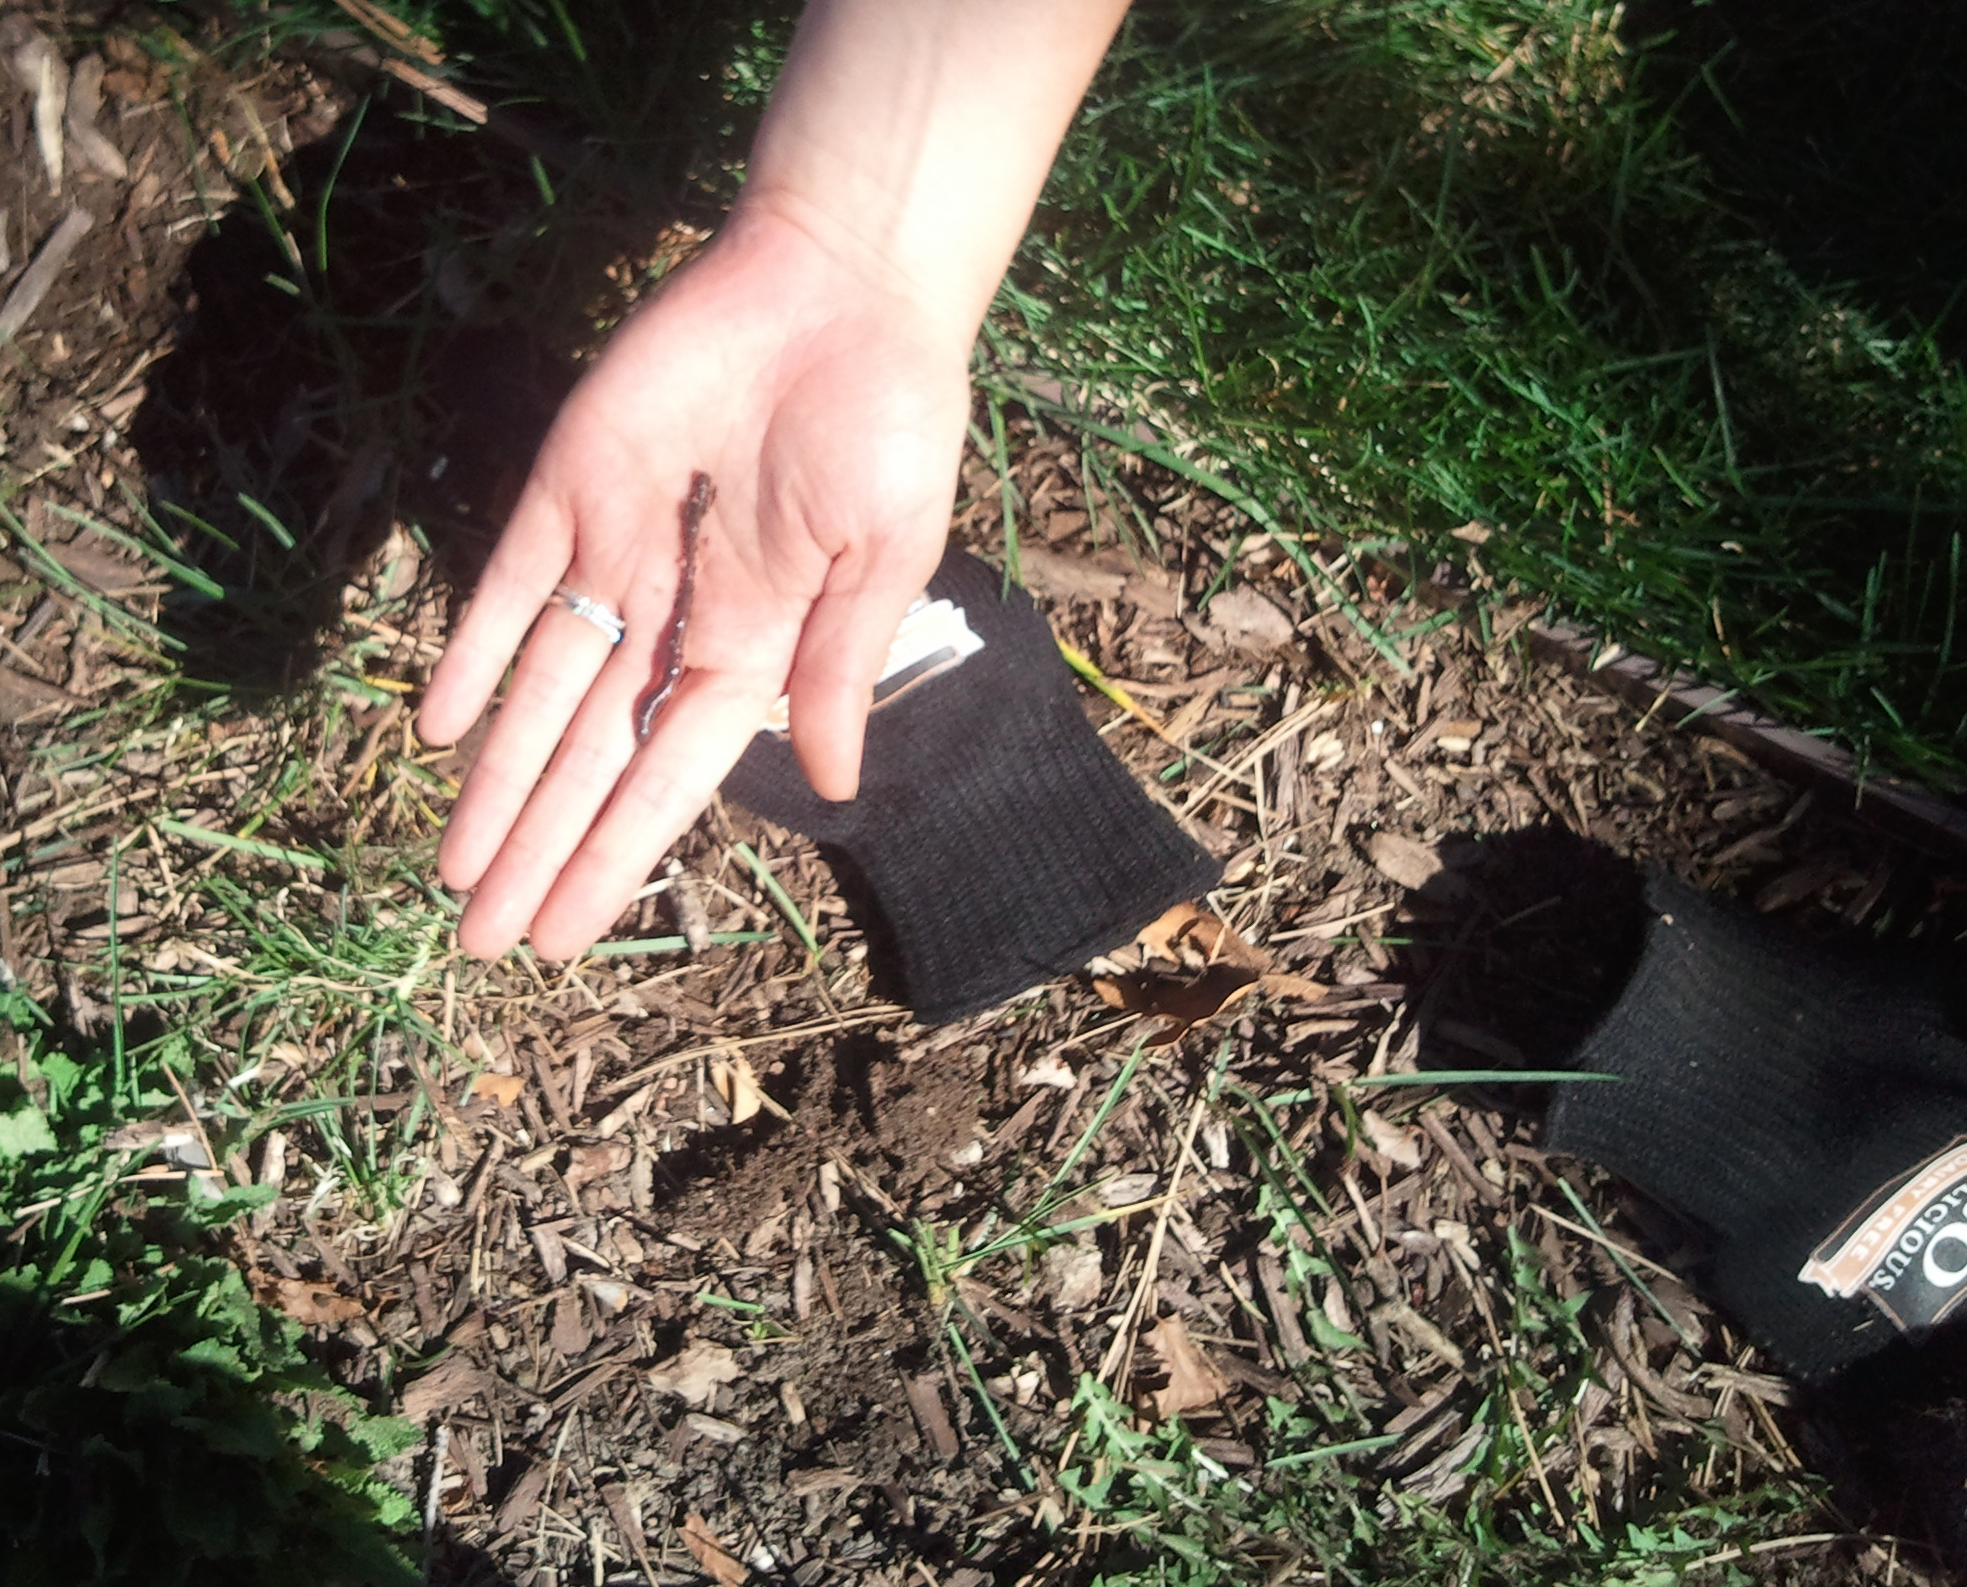
Also, I wanted to thank everyone who shared their thoughts with me on bugs! It was an interesting discussion, and I’m glad to know I’m not the only vegan who struggles with this. And lest anyone suspect I’m heartless to all of the creepy-crawly creatures, I wanted to share a picture of my pal William. We met while I was weeding last weekend:

Worm

I actually found a ton of those little fellas while I was digging around with my little garden tools. It reminded me of that scene in Seven Years in Tibet, when HHDL made Brad Pitt stop digging so they wouldn’t accidentally kill any worms. I was very careful, and every worm I came across was moved to a nice shady spot. And the next morning when I saw the robins eating worms in that nice shady spot, well… I just tried not to think about it.

And yes, those are So Delicious gloves! They came with my ice cream shipment, and I’ve been using them around the house every since.


Agave-Chili Baked Walnuts (Makes enough to top 4-5 salads)

Ingredients:

  • 1 cup walnuts, roughly chopped (or just halved, whatever you prefer)
  • 2 T plus 1 t Agave
  • 3/4 t chili powder (I used a NM blend)
  • 1/2 t (plus more if you’d like) sea salt
  • Dash of cinnamon
  • Parchment paper

Directions:

  1. In a small pan, heat the agave over low heat just until it gets thin and liquid-y, then stir in the chili powder, salt and cinnamon.
  2. Stir in the walnuts, just until they’re pretty evenly coated.
  3. Pour onto a parchment paper-covered baking sheet, making sure they’re not too clumped together and aren’t piled upon one another.
  4. Bake for 15-20 minutes at 350 degrees, stirring 2-3 times. Keep an eye on them though- you don’t want them to burn.
  5. While they’re in the oven, cover a plate with another piece of parchment paper. When the walnuts are done, pour them immediately onto the plate. Sprinkle with a little extra salt, if you’re a salt fiend like me. Once they’re cool, you can break them apart and store them in an airtight container.

Enjoy!


{ 7 comments }

Annie, the talented mastermind blogging over at An Unrefined Vegan, has had a fabulous idea: Why not create a Virtual Vegan Potluck!?

From her invitation:

“…wouldn’t it be nice to gather this warm community of eating, baking and cooking bloggers for a feast?  One day where we all come together to share favorite recipes as if we were really sitting down – plates balanced on knees, juggling glasses – to eat together?  A virtual vegan potluck.

Here’s what I’m thinking: participants would select a course out of the usual suspects (beverages, appetizers, salads, soup/stews, sides, main course, breads, desserts – any I’m forgetting?) and on the date selected, they would publish a post of their recipe with photos.  A “button” would guide readers to the preceding post and the following post.  A blog circle.  The circle would be set up so that it starts with the appetizers and moves through the courses.”

Virtual Vegan Potluck

I’ll be contributing an appetizer (I already have it planned, it’s going to be soooo good!), and I think Reia over at The Cruelty-Free Review is planning to share a dessert. Annie is still looking for other bloggers to participate, if you’re interested you have until the 30th to sign up. You don’t even need to know what recipe you’ll be sharing, just what type: main dish, salad, etc. Check out the page for more info.

Whatever else you do, make sure you check back on May 12th to see my app along with tons of other amazing dishes!

{ 3 comments }

Green Chile Black Bean Burgers

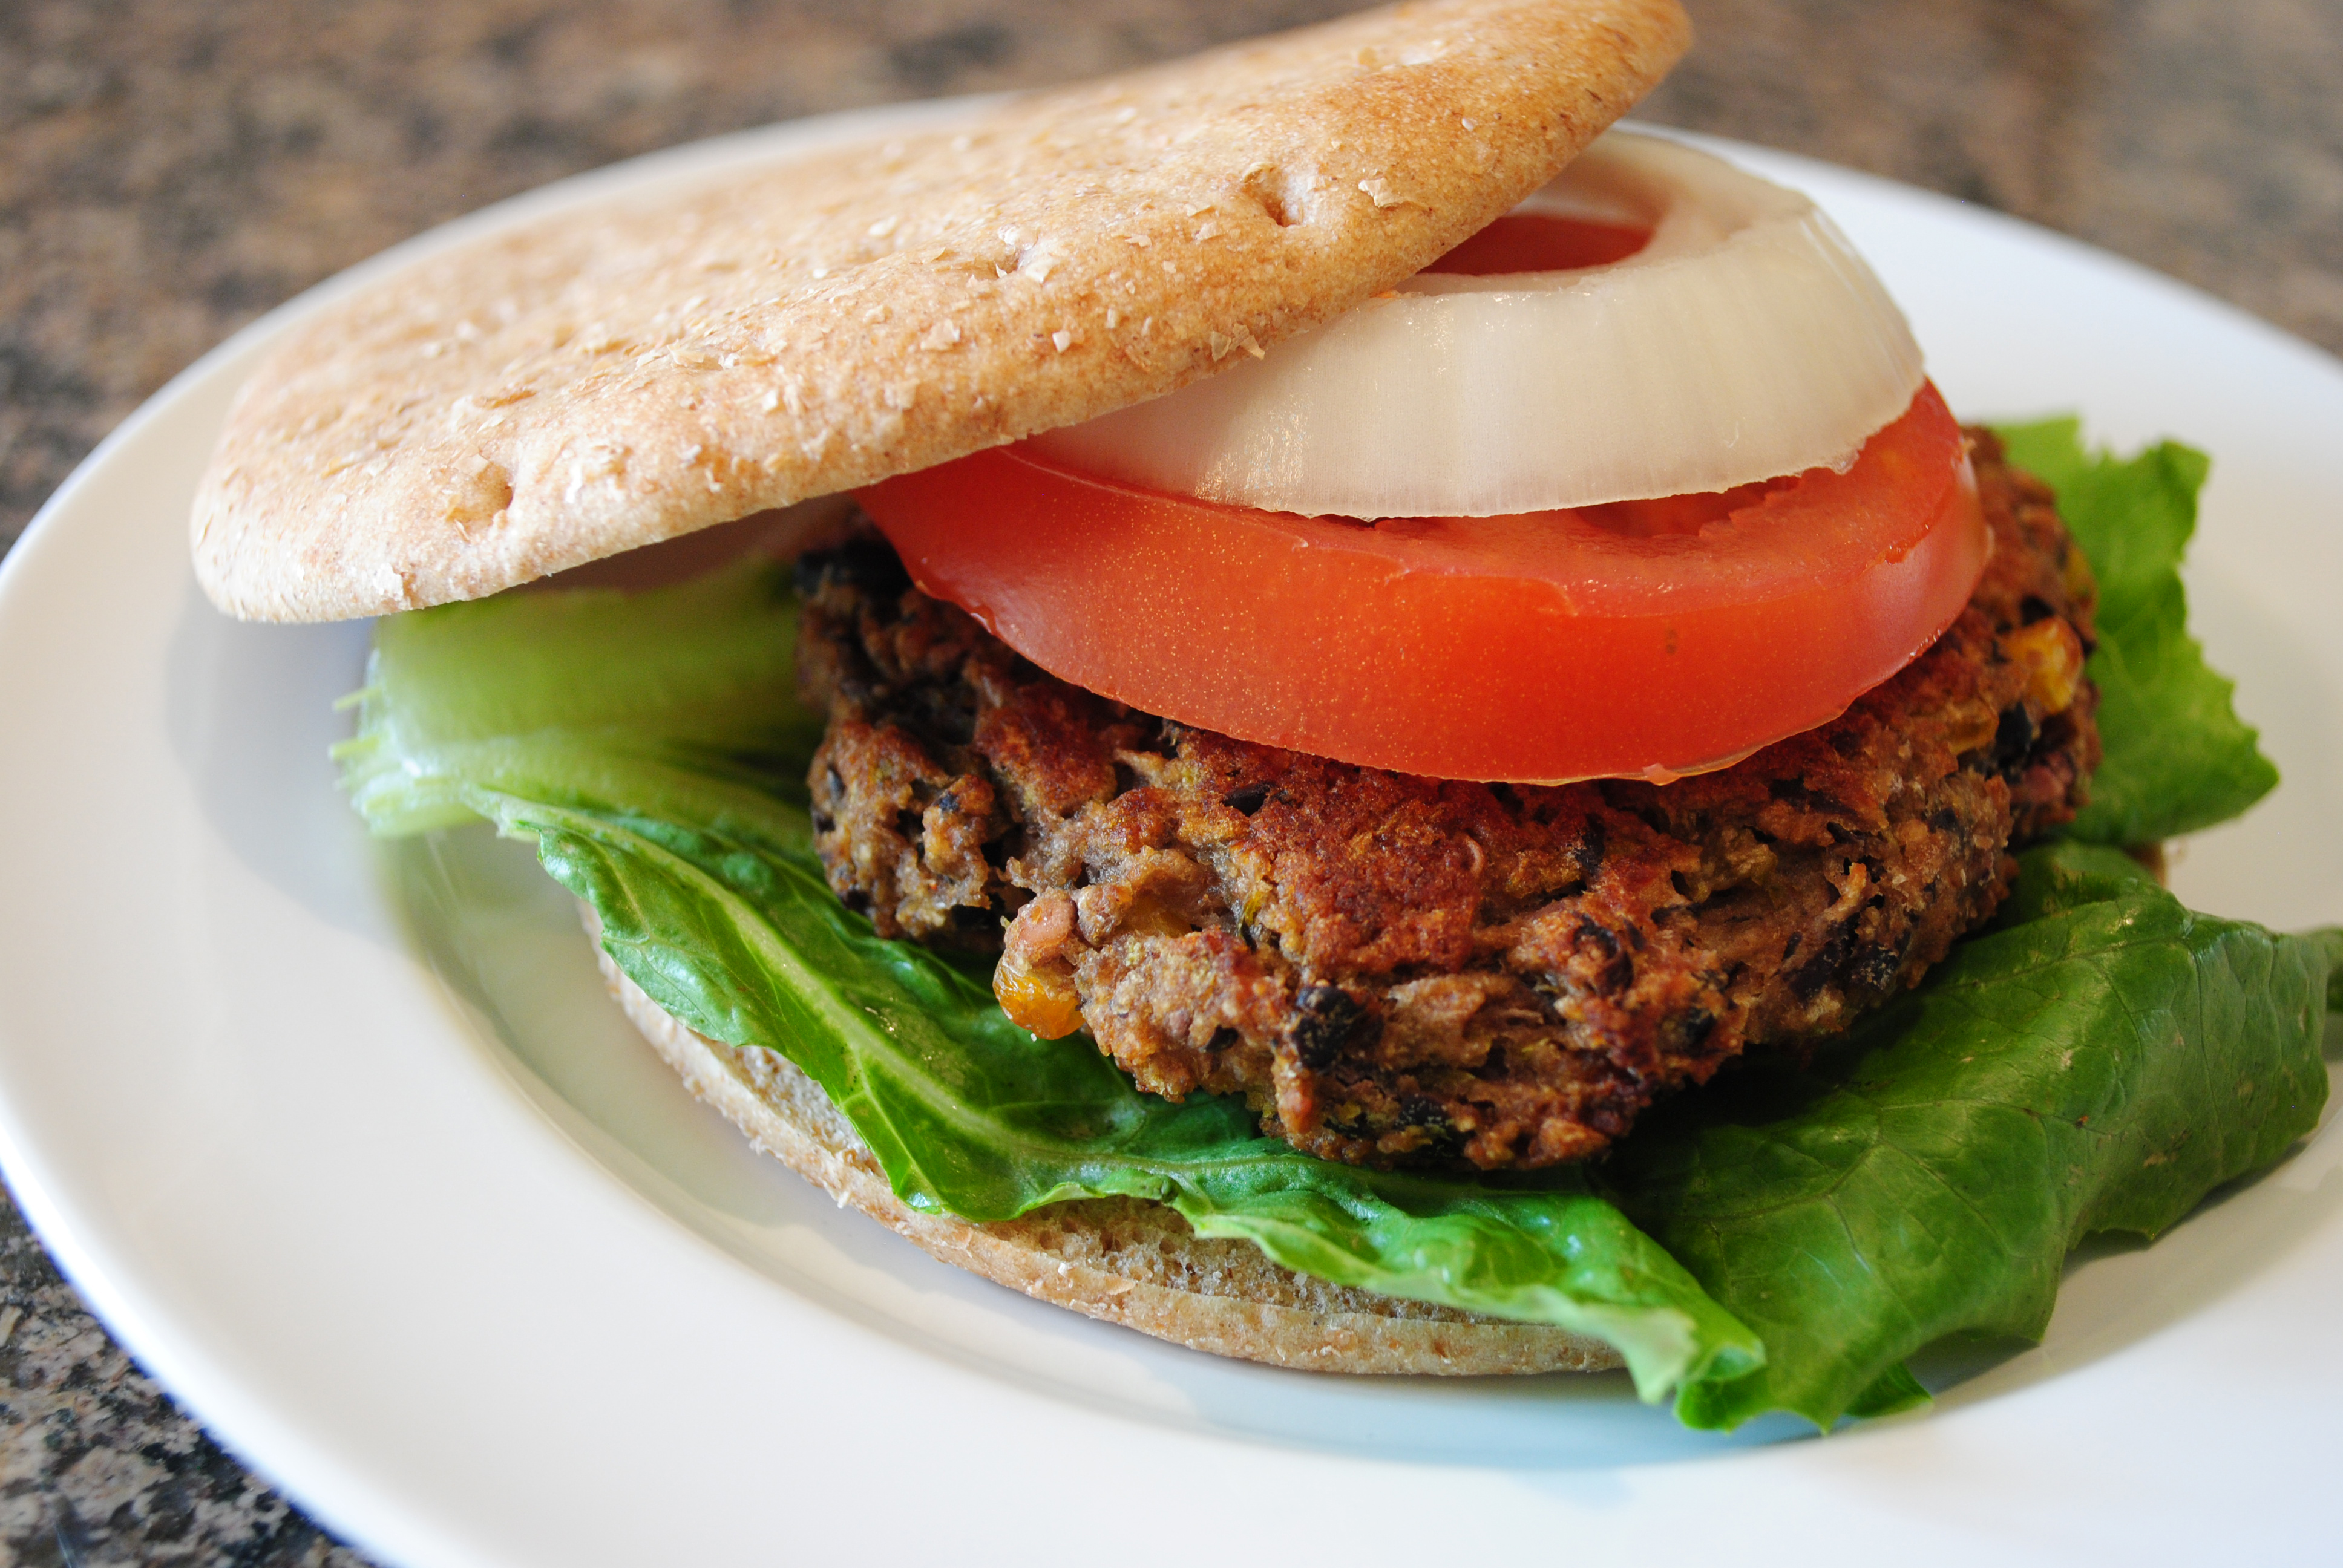
Vegan Green Chile Blackbean Burger

Green Chile Black Bean Burger

April is on its last legs, and summer is almost here. Sure, the weather has been a bit ditzy lately- 80 degrees one day, snowy the next… but that’s just how it is up here in the Rocky Mountains. Besides, I don’t need the weather to tell me when summer is approaching- I have those nasty Miller Moths to do that! For those of you who don’t live in Colorado/Kansas/Nebraska/Wyoming, miller moths live out on the eastern plains. Every spring they migrate up into the mountains, and in the fall they make the trip back to the plains to lay their eggs. When you look outside around dusk, the air is just thick with them. There are hundreds everywhere you look! I suspect my neighborhood has more than our fair share, because of all the trees and flowers and open space, which is unfortunate because I have an insane fear of them. I shriek and dive for cover anytime one buzzes at my head, I can’t fall asleep if I suspect one is in the room with me, and even as I’m typing this I’m pretty sure there might be one looking at me, plotting his attack. I know what you’re all thinking… “What’s wrong with her? Why is she so scared of bugs that are outside?”. If these bugs would stay outside, we could call an uneasy truce, no doubt about it. But they don’t stay outside. These little jerks insist on invading my home, coming into my territory and torturing me while I’m trying to relax in front of the TV. Monday night was the absolute worst. The seal where the doggie door meets our sliding glass door was compromised, and we ended up with 40 or 50 of them in our family room over the course of the evening.  Lets just say there was some serious shrieking going on 🙂

For those of you who don’t know me, I’m an ethical vegan. I went vegan for the animals, and I’ll stay vegan for the rest of my life for the animals. For example, I’m also afraid of spiders, but I maintain a strict “Catch and Release” policy at my house. That is, I see one and scream, then Jason has to catch it and release it outside.  Nope, not even bugs die on my watch.

Usually, that is. The 2-3 weeks of the springtime miller moth migration are another story entirely. Sure, Jason will still catch them and throw them outside, but if he’s not around… well, I’m ashamed to admit it but this morning alone at least 6 moths met their  untimely end thanks to my Dyson. And that was just this morning. The migration started on Sunday, so I could have another 2.5 weeks 9or more!) of this torture. It’s enough to make me drink. At work. At 7:30 in the morning.  (I’m totally kidding, mom!)

I’m curious about my readers though… for those of you who consider yourselves ethical vegans (or vegetarians), do your ethics include bugs? Do you shoot to kill, or catch n’ release? Should I just suck it up and live with them, or should my Dyson continue to suck them up?

Okay, okay, enough about bugs. Let’s get back to SUMMERTIME!

To me, summertime means shorts, light fizzy cocktails, and eating dinner outside. Oh, and cooking dinner outside too! And there’s nothing better to throw on that ol’ grill than a thick, spicy burger full of summertime flavors. Black beans and corn make a wonderful couple, but throw some green chile into the mix and you’ve got an pretty great party going on. Add more of the chile if you want to up the flavor a bit (or if you really want it hot, switch them out for red chile!),  and if you’re feeling motivated you can grill the chiles and some corn on the cob first, before adding them to your burger mix. That would give you an amazing, deep grilled flavor!

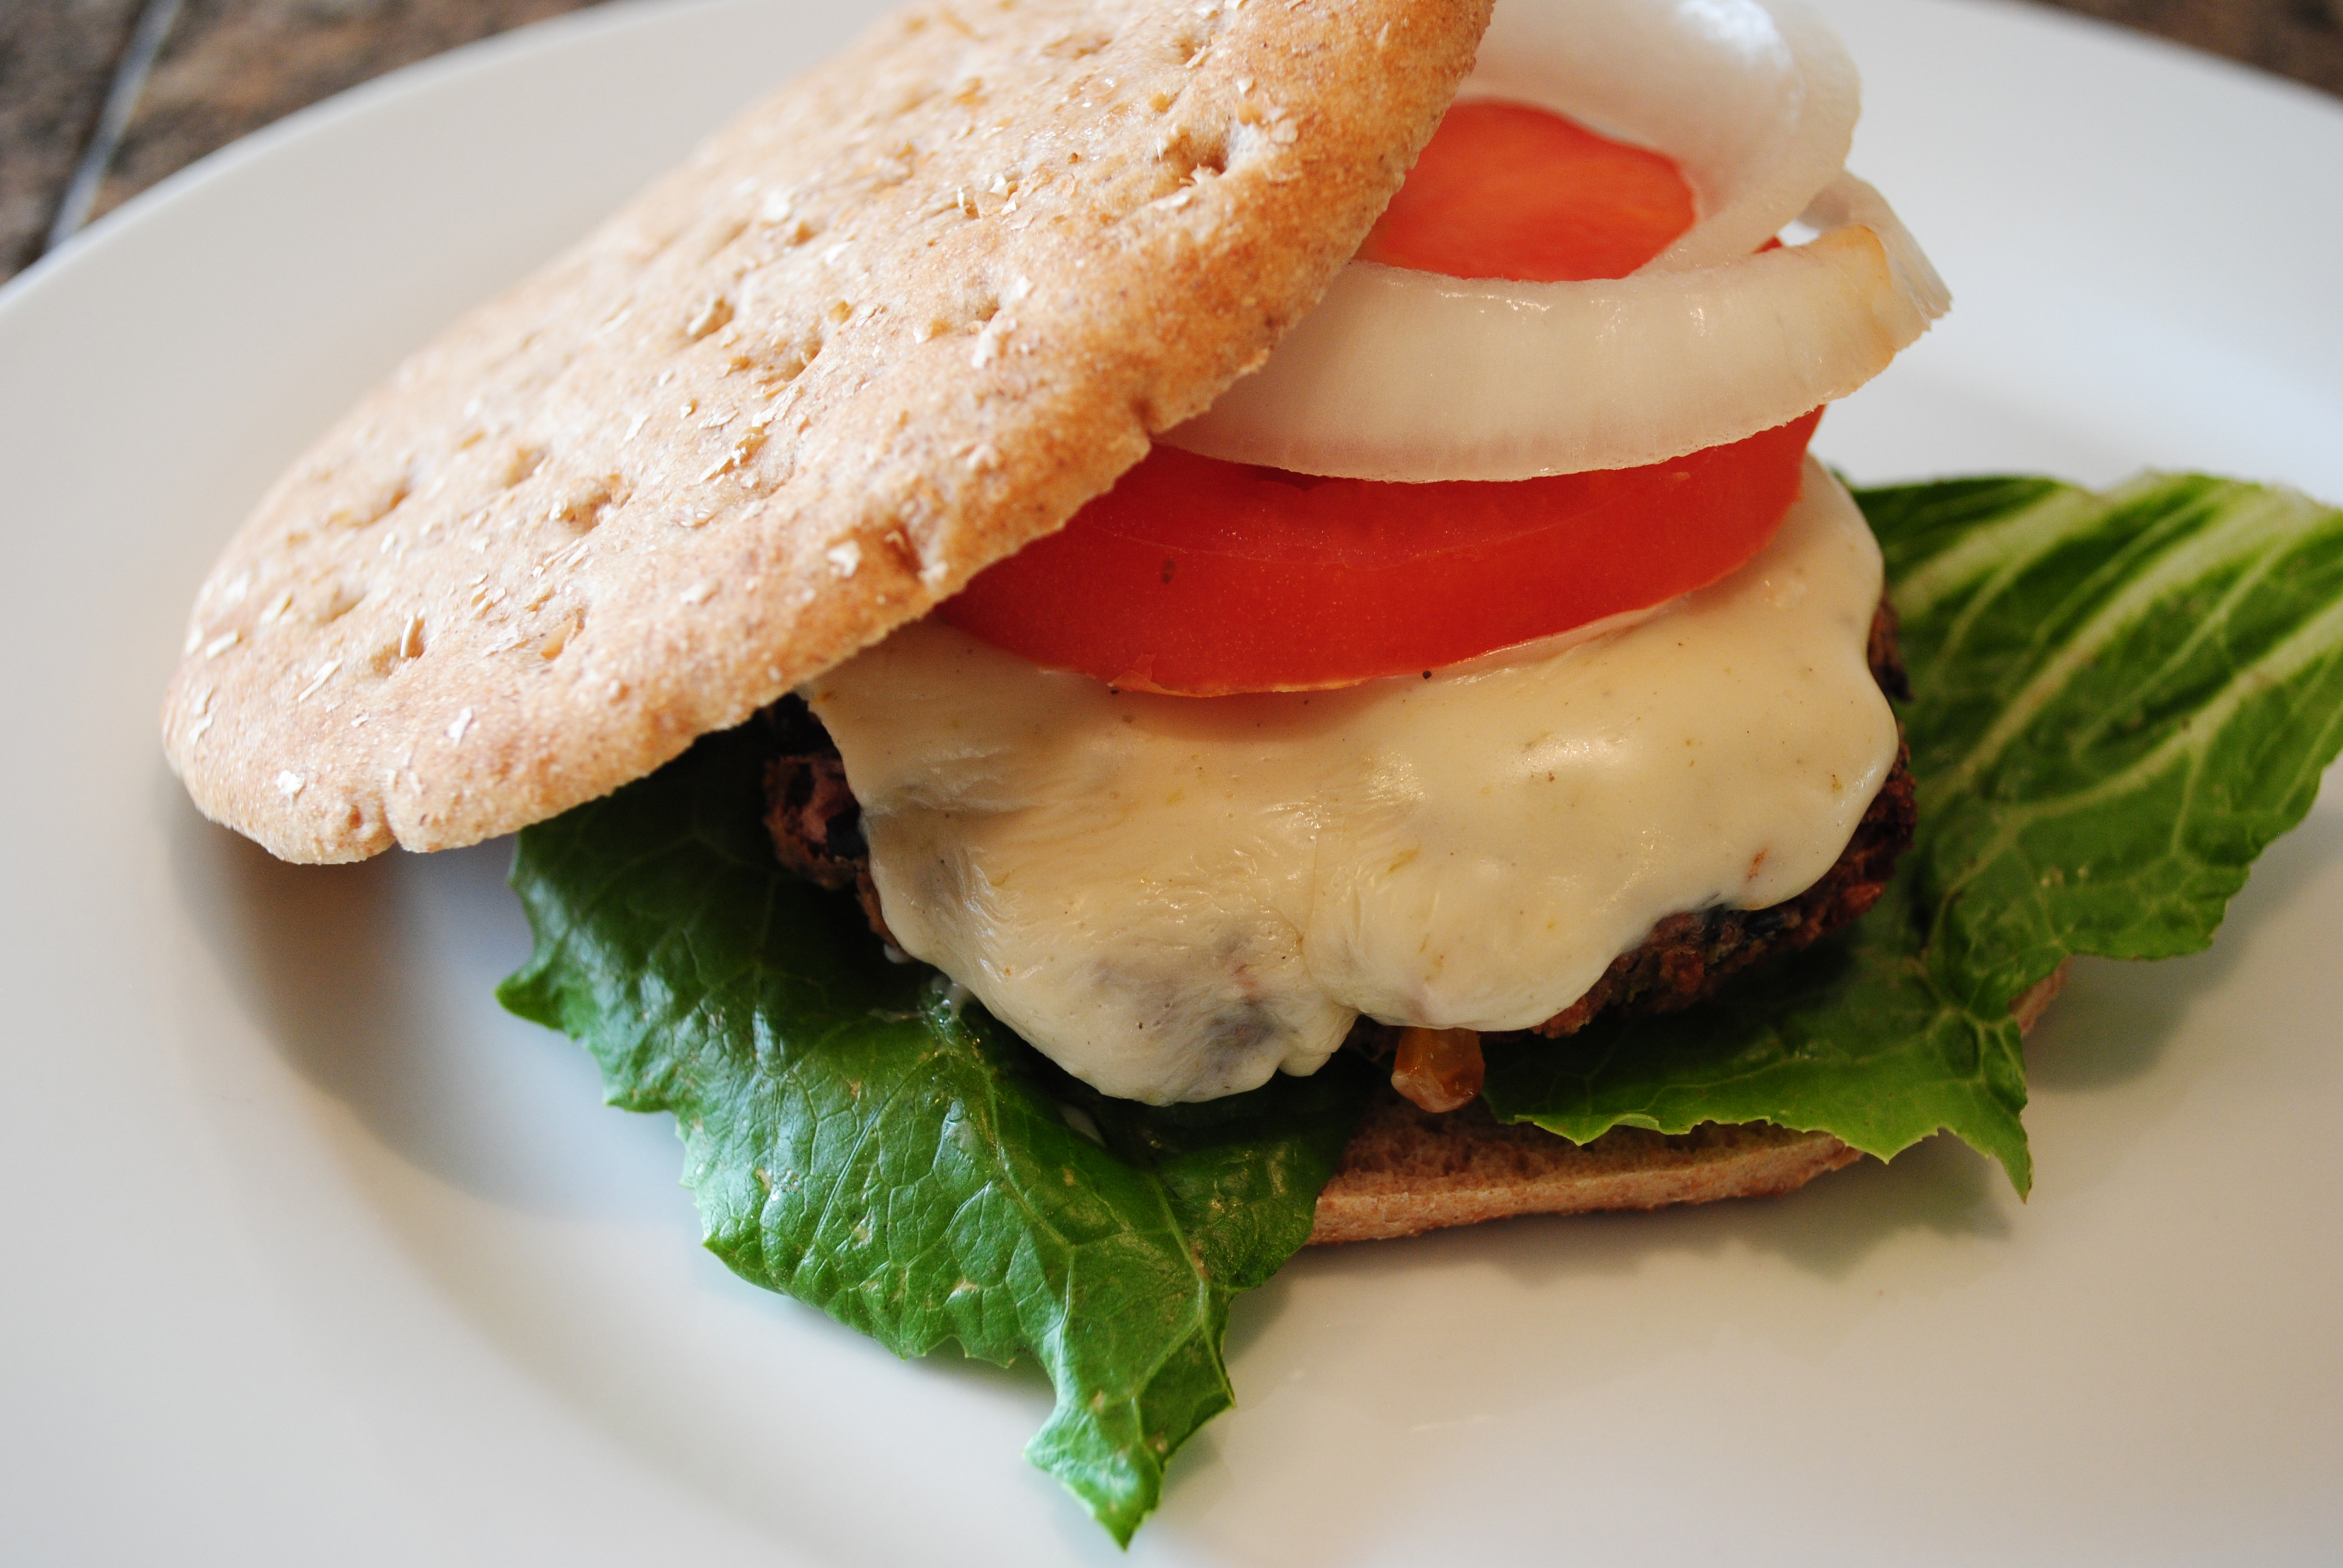
Here’s another shot, this time smothered in Daiya Havarti!

Vegan Green Chile Blackbean Burger

Green Chile Black Bean Burgers (4-5 patties, depending on size/thickness)

If you’d like a little more heat, just add more green chiles! And be mindful as you’re adding in the breadcrumbs… you want to be able to work with the mixture, but you don’t want it so dry that it falls apart.

Ingredients:

  • ½ green bell pepper cut into large chunks
  • ½ large red onion, cut into large chunks
  • 1 can (or equivalent) of black beans, cooked/ drained and rinsed
  • 1 chia “egg”
  • 1 t garlic powder
  • 5-6 T green chiles, chopped (I used canned)
  • 1/4 cup corn
  • 1/2 + cup bread crumbs (you may need to had more, depending on consistency)
  • Pinch of sea salt
  • Vegan cheese for topping, if desired

Directions:

  1. Drop bell pepper and onion into food processor. Blend for just a few moments until the pieces are smallish, but not minced.
  2. Pour in beans, and blend until everything is all mixed n’ mashed together (just a few seconds, really). You do not want the beans completely broken down, otherwise your mixture will be too moist and wont cook well.
  3. Pour entire mixture into medium bowl and add the rest of the ingredients (except the cheese), including a scant 1/2 cup of breadcrumbs. Mix with your hands until everything is completely blended. Add more breadcrumbs if needed- you want this to be sticky and you want to be able to form patties that will hold together.
  4. Place entire bowl into the fridge for at least 20 minutes. It gives the chia egg time to gel.
  5. Divide into patties (4-5 depending on your bun size).
  6. If you’re grilling, I recommend foil or a veggie tray. These can also be cooked in a pan on the stove top, use a tiny bit of oil and give them about 5 minutes on each side.

Enjoy!

Related Posts Plugin for WordPress, Blogger...
{ 27 comments }
Social media & sharing icons powered by UltimatelySocial