≡ Menu

Mexican Stuffed Shells – Red Chile Style

Vegan Mexican Stuffed Shells- Red Chile Style

Mexican Stuffed Shells – Red Chile Style

Maybe these should be called ‘Red Chile Enchilada Shells’, because that’s really what they are. I’ve been on a bit of a “veganizing” kick lately, and when I saw the original recipe online I knew I was going to make a version I could enjoy.

Loyal readers know my vegan-adjacent husband is from NM, and basically has red chili running through his veins. In that crazy state, you can go into any restaurant and order absolutely anything, and the server will ask you “red or green”- as in, what kind of chile do you want. There’s no possibility that you don’t want any chile at all. I’m pretty sure you could walkinto an IHOP in Albuquerque, and they’d try to put red or green chile on your pancakes- it’s that serious.

I wouldn’t say I’m a fan of NM cooking… it’s way too spicy for me. Plus they’re not known for being healthy or compassionate. But Jason is (healthy, compassionate and a fan of NM cooking!), so this recipe is for him!

Just be forewarned: This is much spicier than my usual recipes! And really, red chile is an acquired taste. If you like it, you’ll love this shells. If you’re not a fan of red chile, my feelings wont be hurt if you skip this one 😉  I’m going to come up with another, milder version… I’m thinking taco sauce, black beans and kale! ETA: Check out that version here!

One trick I use when stuffing shells, to make sure they all come out about the same and so I don’t run out of stuffing before shells (or vice versa), is to divide the filling in my pan using the spoon, into halves or quarters, depending on how many shells I have. That way you can easily eyeball it and know how much filling to give each shell!


Mexican Stuffed Shells
Serves 5
Spicy and full of red chile, these are the New Mexican version of the shells you're used to!
Write a review
Print
Prep Time
20 min
Cook Time
40 min
Total Time
1 hr
Prep Time
20 min
Cook Time
40 min
Total Time
1 hr
Ingredients
  1. 1 package Boca crumbles
  2. 1 package taco seasoning
  3. 1 teaspoon chili powder
  4. 5-6 oz. vegan cream cheese
  5. 14-16 jumbo pasta shells
  6. 1 cup chunky salsa
  7. 1 8oz package of red chile enchilada sauce (I used "Mexican Everyday Frontera" brand)
  8. 3 green onions, chopped
  9. Daiya cheddar or pepperjack for topping
  10. Vegan sour cream, if desired
Instructions
  1. Cook shells according to package, minus 1-2 minutes.
  2. Heat Boca crumbles in a pan. When heated through, mix in taco seasoning and chili powder, then add cream cheese and stir until melted and thoroughly mixed.
  3. When the shells are cooked, remove from water and lay on cutting board until they're ready to be stuffed (this keeps them from sticking together).
  4. Spread about 1/3 of the enchilada sauce and all the salsa on the bottom of the baking dish. Stuff each shell and with the Boca mixture, and place into your baking dish.
  5. Cover will aluminum foil and bake at 350 for about 30 minutes. Remove foil and add Daiya, then bake uncovered for another 10 minutes or until the cheese is melty.
  6. Serve sprinkled with green onions and sour cream, if desired.
Adapted from The Way To His Heart
That Was Vegan? https://www.thatwasvegan.com/


{ 10 comments }

(Not My Mom’s) Corn Chowder

Thick, creamy, delicious corn chowder from www.thatwasvegan.com

(Ed. note: this recipe was updated January 2017!)

Corn chowder (or “chowdah”, if you hail from the Northeast!) was my mom’s signature dish. Well, that and cheesecake… but growing up the chowder was my absolute favorite, and when she’d make it, I’d eat at least 2 huge bowls for dinner. Her version had corn and potatoes, just like mine does, but it also had ham and velveeta. My sweet mama has since gone vegetarian so if she were to make it today she’d nix the ham, but it would probably still have that gawdawful, orange, scientific-experiment-gone-horribly-awry velveeta in it. (Updated: The recipe now includes an optional 3 slices of vegan cheddar, just to make the soup a little richer. Still totally delicious without it, though!)

Of course, if you knew my mom you’d also know that she really doesn’t cook anymore- an ironic twist because she now has the most amazing kitchen I’ve ever seen. I suspect she just doesn’t want to get it dirty. But, being the wonderful mom that she is, she’s always willing to let ME get it dirty when I visit 🙂 (Updated: Mom now lives in Denver and she COOKS!)

Thick, creamy, delicious corn chowder from www.thatwasvegan.com

So this is my homage, if you will, to the corn chowdah of my youth.  A healthier, more compassionate version that still makes me want bowl after bowl… and none of the ingredients were created in a lab! In another healthy twist, I did away with the roux,  saving us all some calories, and I got the idea to add more vegetables to it from a “Healthy Vegan Cooking” class I attended at Whole Foods.  It’s not as thick as I remember the non-version being, but the blending step does make it nice and creamy. I make this 4-5 times during the winter, and I get away with that heavy rotation because Jason really likes it too. Serve it with some crusty bread or on it’s own- it’s satisfying either way. It also reheats nicely for workday lunches.

Okay! Get out your immersion blender and let’s make some chowder!


(Not My Mom's) Corn Chowder
Serves 4
Thick and creamy corn chowder, (almost) like my mom used to make!
Write a review
Print
Prep Time
15 min
Cook Time
15 min
Total Time
30 min
Prep Time
15 min
Cook Time
15 min
Total Time
30 min
Ingredients
  1. 3 tablespoons earth balance
  2. 1 small sweet onion, diced
  3. 4 tablespoons flour
  4. 2 cups veggie broth, 1 cup water
  5. 3 medium russet potatoes, peeled and chopped bite-sized
  6. 3 stalks celery, sliced
  7. 1 large carrot, grated
  8. 12 oz bag frozen corn
  9. 1 cup unsweetened non-dairy milk (I used almond)
  10. 1.5 teaspoons sea salt, more to taste
  11. Salt & pepper to taste
  12. 2-3 slices vegan cheddar cheese, optional
Instructions
  1. Melt earth balance in a soup pot over medium/high heat. Add the onions and saute for 1-2 minutes. Stir in the flour mixing well with the margarine, and cook for another 2-3 minutes.
  2. Whisk in the broth and water until the roux dissolves, and bring to a simmer. Add the potatoes and celery, and simmer covered for 10-12 minutes, stirring occasionally. You want the potatoes to be *almost* soft enough.
  3. Remove from heat and add the corn. Use your immersion blender to blend about half the soup.
  4. Return to low heat and stir in the milk and salt, and the cheese (if you're using it). Taste and add more S&P to taste.
That Was Vegan? https://www.thatwasvegan.com/
{ 15 comments }

Lemon Couscous with Sweet Potatoes and Kale

Lemon Couscous with Sweet Potato and Kale | www.thatwasvegan.com

There’s no big story behind this recipe. Jason and I got home late from work after a particularly painful commute (we have a loooong commute!), and I had no idea what to make for dinner.

A little background: I’m pretty high-maintenance about menu planning. I usually start on Wednesday by checking the weekly ads for my 3 favorite markets. I start my shopping list (by store) with our regular must-haves (coconut yogurt, spinach, salad fixin’s, etc) then I start to play around with new recipe ideas based on what’s on sale.  Then on Saturday morning (or Friday, if it’s our flex week) I sit down with my laptop and some cookbooks and just browse. I look at what I’ve pinned on Pinterest that week and I thumb through my favorite books looking for meals to add to my menu. I put together the weekly menu, then I shop. Yes my weekly menu is highly formatted and pretty, but I’m not totally OCD about it… I mean, I don’t assign a day to each meal in advance. I allow some leeway based on what sounds good when we get home from work… So, see? I’m totally normal! 🙂

Lemon Couscous with Sweet Potato and Kale | www.thatwasvegan.com

Anyhoo, that one particular night last week, nothing from the menu sounded quick and easy enough. We’ve all had those nights when delivery sounds like the only option- except we had gotten Indian take-out the night before, and I try not to do that very often. So I started rooting around in my cabinets and found some Israeli couscous and sweet potatoes and I knew I had some kale in the fridge that was dying to be used (literally), and this dish just sort of came together on it’s own.

The lemon and cumin are a great combination that I’ll definitely be using again.  The earthy, warm taste of the cumin added a depth to the dish, and the lemon and gave it a light and almost perky layer. The sweetness of the potatoes round it out nicely. And of course the Israeli couscous, which is actually a pasta, made it quite filling.

Lemon Couscous with Sweet Potato and Kale | www.thatwasvegan.com


Lemon Couscous with Sweet Potato and Kale
Serves 4
Write a review
Print
Prep Time
10 min
Cook Time
25 min
Total Time
35 min
Prep Time
10 min
Cook Time
25 min
Total Time
35 min
Ingredients
  1. 2 medium-large sweet potatoes, chopped
  2. Olive oil
  3. Sea salt
  4. 1 large bunch of kale, torn or chopped
  5. 2 cups uncooked Israeli couscous
  6. 2 cups vegetable stock (plus extra for steaming kale, if desired)
  7. 1 tablespoon cumin
  8. 2.5 tablespoon lemon juice, plus zest
  9. 1 tablespoon dried parsley
  10. S&P
Instructions
  1. Spread the diced potatoes on a baking sheet, drizzle with olive oil and a pinch of sea salt, and bake at 350 degrees for about 15 minutes (or until tender and starting to brown), stirring at least once.
  2. Saute the kale in a pan with water or vegetable broth until tender. If you have it covered, it should only take about 2-4 minutes.
  3. Heat a large pot over medium heat, and add 1-2 T olive oil. Once heated, add 2 cups couscous and toast for about 5 minutes, stirring every minute or so. Make sure they don't burn!
  4. Add 2 cups vegetable broth to the couscous, reduce heat to lowish, and cover. Let it simmer for 8-10 minutes but DO NOT lift the cover to check on it for at least 8 minutes! Then stir and make sure the liquid is gone and the balls aren't clumping.
  5. Add the kale and potatoes into the couscous and mix. Then mix in all the spices. Add S&P as your tastes dictate, and that's it!
Notes
  1. Serves 4 adults, or more if you're using this as a side!
That Was Vegan? https://www.thatwasvegan.com/


{ 12 comments }
Vegan Blueberry-Coconut Bundt Cake

Blueberry-Coconut Bundt Cake

But… before we get to the cake, please indulge me for a moment…

In January 2009 I was at the National Mill Dog Rescue kennel, dropping off some donations. I decided to take a quick spin down the main aisle, which has kennels on both sides… and in the very first kennel on the right I saw this white and tan cocker, curled up in a ball. Her name was Sally, and she was 3 yrs old. I asked about her, and in return was asked if I would foster her. Theresa, NMDR founder, said that Sally was the most damaged dog she had ever seen rescued from a puppy mill. She described her as “not even knowing she was alive”, and I’d have to agree.

Sally came home with me on February 1st, and spent her first month or so in the corner of our family room, staring at the floor. She wouldn’t make eye contact with us, nor would she interact with our other pets. It took months before she would let us pet her, and even longer before she would play with us. Eventually she became comfortable with me, but she was still very nervous with Jason (most puppy mill workers are men, so this is pretty common with puppy mill survivors)… and we just couldn’t get her house-trained. After 10 months of cleaning up after her pottying in the house we decided to place her in the prison training program. It’s a wonderful program where they teach prison inmates to train dogs, then they rescue dogs from shelters- dogs that are considered unadoptable. These dogs live with with the prisoners in their cells, and they learn how to be well-behaved pets… then they’re adopted out to wonderful forever homes! For the same price, pet parents can can place their own critters in the program for 6 weeks.

So, for about $475, Sally went to live with a kind inmate named Shelton who taught her to potty outside, to walk on a leash and… (wait for it)… to walk upright on her back legs! The best part was she was no longer especially afraid of men. Oh, and the fact that she no longer went to the bathroom inside the house made me pretty happy. Another cool thing was that Shelton  kept a detailed daily journal of all the time he spent with Sally, and what they worked on. You can tell from reading it that he came to love her, and was heartbroken when it was time for her to come home. We, on the other hand, were ecstatic! Sally is now a happy little member of our family, and I’m so grateful to NMDR for rescuing her, and to the prison program for helping her to realize her full potential!

Okay, NOW it’s cake time!

Last month I made Epicurean Vegan’s Coconut-Lemon Bundt cake (and served it following my Cauliflower n’ Cheese!), and it was divine. See?

Coconut-Lemon Bundt Cake

Coconut-Lemon Bundt Cake from Epicurean Vegan

I love, love, LOVE her recipes! They’re all delicious and better yet are all altitude-adjusted for the baking-challenged like myself. For those of you at who’ve always lived at low altitudes: You have no idea how lucky you are!

Anyhoo… Last weekend I was at the market and spotted blueberries on sale, and thought to myself “Self? What could I make with those blueberries?”  Pancakes? Eh. Muffins? Nah.

Did I mention I was home alone and would get to really stuff my face with whatever I chose to make? Also, I still had coconut flakes left over from when I made the last bundt, which pretty much sealed the deal.

There are some changes in my version vs. April’s, mine is a little less sweet. And, obvs, it has blueberries instead of lemons. You should probably go ahead and make both. No need to choose a winner, just be grateful that you have two cakes to eat!


Blueberry-Coconut Bundt Cake
Write a review
Print
Ingredients
  1. Bakers Joy (or other nonstick spray)
  2. 1-1/3 cups granulated sugar
  3. 2/3 cup vegetable oil
  4. 1 13.5 oz can light coconut milk
  5. ¼ cup So Delicious coconut milk (plus 4 T)
  6. 2.5 teaspoons vanilla extract
  7. 3 cups AP flour
  8. 1 teaspoon baking soda
  9. 2 teaspoon baking powder
  10. 1 teaspoon salt
  11. 1 ½ cups shredded unsweetened coconut
  12. 1 ½ cups blueberries (fresh or thawed and rinsed)
  13. Powdered sugar, if desired
Instructions
  1. Spray inside of bundt pan with Baker's Joy, and set aside.
  2. In a large bowl combine the sugar, vegetable oil, both kinds of coconut milk, and vanilla. Stir really well to get rid of any lumps.
  3. Stir the remaining dry ingredients (leaving out the blueberries and coconut flakes), a small amount at a time, into the mixture. Once well mixed, fold in the blueberries and coconut flakes.
  4. Pour into pan and bake for 50-55 minutes at 350 degrees or until a wooden skewer comes out clean (well, it may be stained blue if you stab a berry! Just make sure there's no cake goo stuck to it)
  5. Allow to cool in the pan for 10-15 minutes, then remove from pan onto cooling rack. Once completely cooled you can sprinkle with powdered sugar if desired.
Adapted from Epicurean Vegan
That Was Vegan? https://www.thatwasvegan.com/
{ 15 comments }

Vegan Queso

Vegan Queso | www.thatwasvegan.com

I already shared my Tom Brady Dip with you, and here’s the next in my series of what I’m going to call Hot Athlete Dips (I totally just made that up- I promise there’s no such series!). Silliness aside, this queso is fantastic.  And delicious.  And almost as nice to look at as its namesake Wes Welker!

Wes Welker (the man, not the dip)

Wes Welker says “Do you like my soy milk mustache?”

It’s creamy and spicy and it really satisfied this vegan’s craving for some hot cheese. Daiya provides the base, so you know it’s good! I used a mixture of salsas, you should use your favorite. And of course you have to keep in mind that I’m a total baby when it comes to heat levels, so if you have a taste for the spice, kick it up a few notches! And did I mention it has Tofurky Italian sausage in it? And crunchy red onions to add delicious texture?

I hesitate to share this detail, but this queso (along with a big bowl of chips and a bottle of wine) was my entire dinner the other night. Jason was out of town, and when I’m cooking for myself I rarely make a proper meal… although I’m usually a little healthier than this, I promise! (Seriously, Mom, if you’re reading this, please don’t call and lecture me about the perils of a wine and Daiya induced coma… I promise to do better!)

Vegan Queso | www.thatwasvegan.com

I’ll be making it again on Sunday for the Super Bowl- and I’m going to spare you my musings on what Wes Welker looks like in those tight little pants of his. Consider it my gift to you 🙂  Although really, my gift to you is THIS RECIPE! I’ve even doubled it for you, because who wants portion control while they’re eating queso?!??

Vegan Queso | www.thatwasvegan.com


Can't Get Enough Queso | www.thatwasvegan.com


Vegan Queso
Write a review
Print
Ingredients
  1. 1 bag Cheddar-style Daiya shreds (you could also use Pepper Jack)
  2. 3/4 to 1 cup nondairy milk
  3. 1 heaping teaspoon chili powder
  4. 1/2 teaspoon garlic powder
  5. 1/2 teaspoon sea salt
  6. 1 cup chunky salsa of choice (I used a "medium" heat)
  7. 1 small red onion, diced
  8. 2 Tofurky Italian Sausage links, diced pretty finely OR 1 loaf homemade seitan crumbled in the food processor OR 1+ cups of your favorite meatless crumble
  9. a few tablespoons of the same or hotter salsa (I used Sadies "HOT") for drizzling
  10. Chives, for sprinkling if desired
Instructions
  1. Mix the Daiya and 3/4 cup milk in a saucepan over medium heat. Reserve the rest of the milk to adjust consistency later on.
  2. Once the cheese is melted, add the seasonings, the salsa, the onions (leaving out some for sprinkling) and the Tofurky. Keep stirring until everything is heated through. If you need to loosen it up, now's the time to add the rest of that milk (and then make sure it's all reheated!)
  3. Stir! Stir! Stir!
  4. Ladle into serving bowl(s) and top with a drizzle of the hotter salsa, the rest of the onions and the chives. Beautiful and yummy... what more can you ask for? Serve with chips or raw veggies (if you're feeling virtuous)!
Notes
  1. These measurements are all kind of approximate, other than the Daiya.  Just keep dipping that spoon in the pan... you'll know when you've gotten it right! If you're making it for a party, it would keep warm quite nicely in a slow-cooker on a low setting.
  2. If you're using seitan or other crumbles, you'll want to brown them in a pan with a little bit of oil before stirring them in.
That Was Vegan? https://www.thatwasvegan.com/
{ 9 comments }

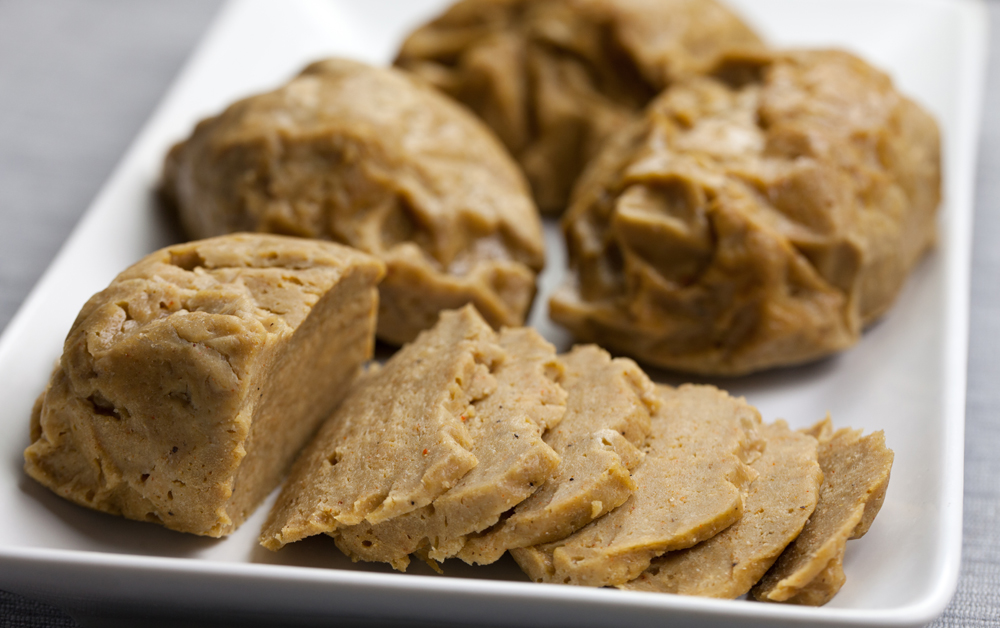
Updated: Hello seitan lovers! I’ve updated the pictures and added a nice printable recipe. If you’re looking for the old “step-by-step” pictures, they’re waaaay at the bottom. Enjoy!

My Favorite ("Chicken-style") Seitan Recipe | www.thatwasvegan.com

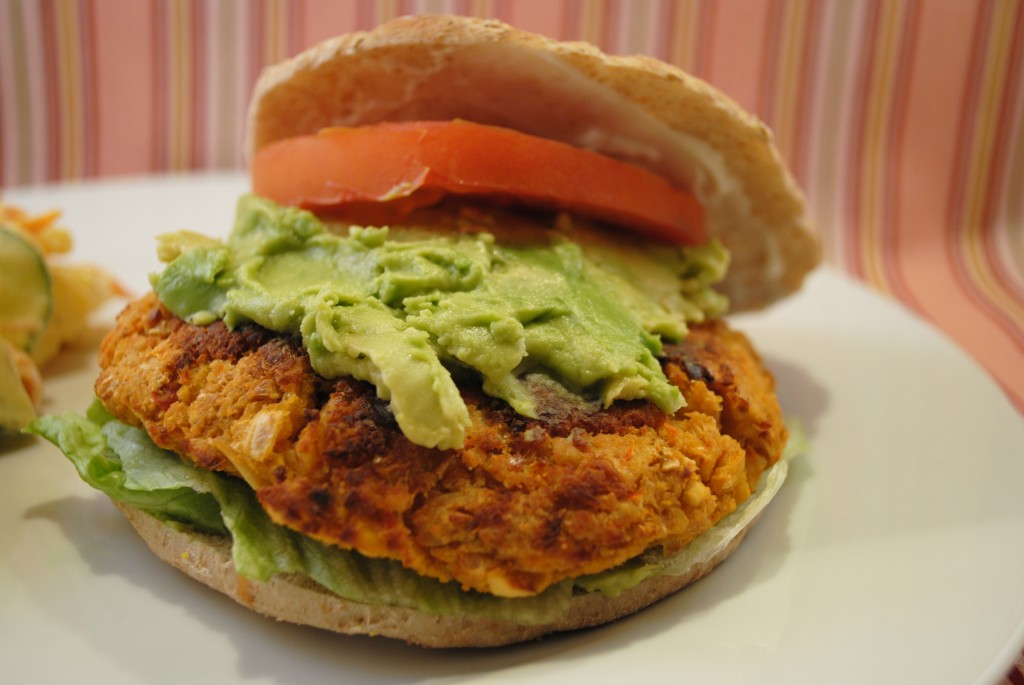
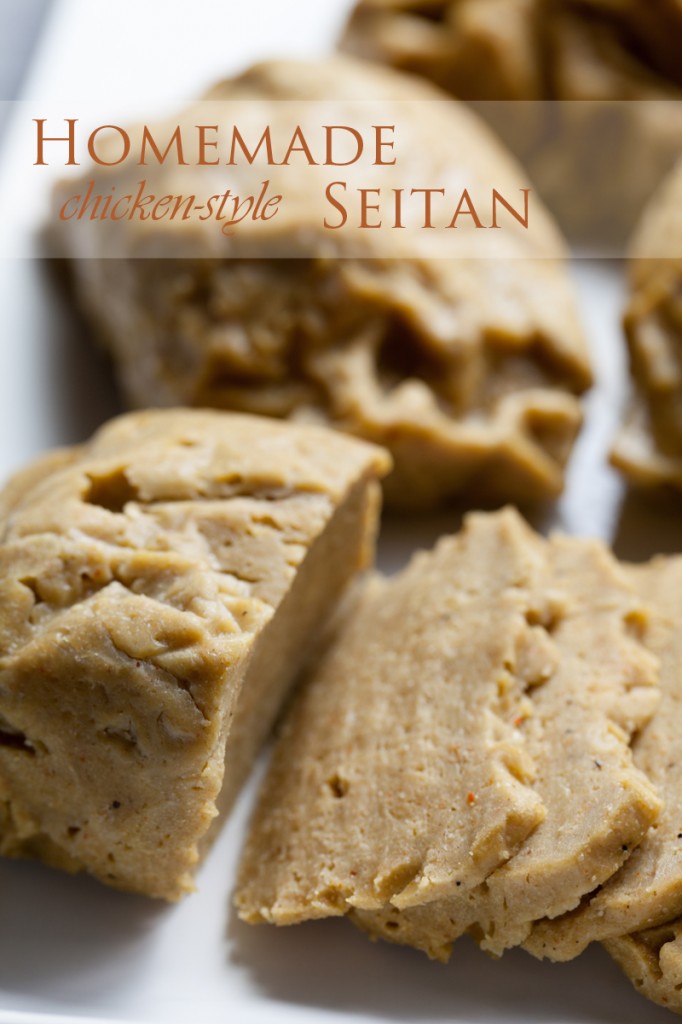
Seitan is probably my favorite meat-substitute, not only because its texture is almost exactly how I remember meat to be, but because it’s delicious and so versatile. I make a batch about once a month and use it on pizza, sandwiches and sometimes in my tofu scrambles. It’s excellent for veganizing recipes left over from my “pregan” days as you can sub it in for any meat. This recipe was adapted from Terry Hope Romero’s Steamed White Seitan recipe in Viva Vegan!, which was my first all-vegan cookbook. Her recipe was meant to simulate chicken or pork, but I think you can use it for pretty much anything.

Are you looking for the Homemade Beef-Style Seitan recipe

My Favorite ("Chicken-style") Seitan Recipe | www.thatwasvegan.com

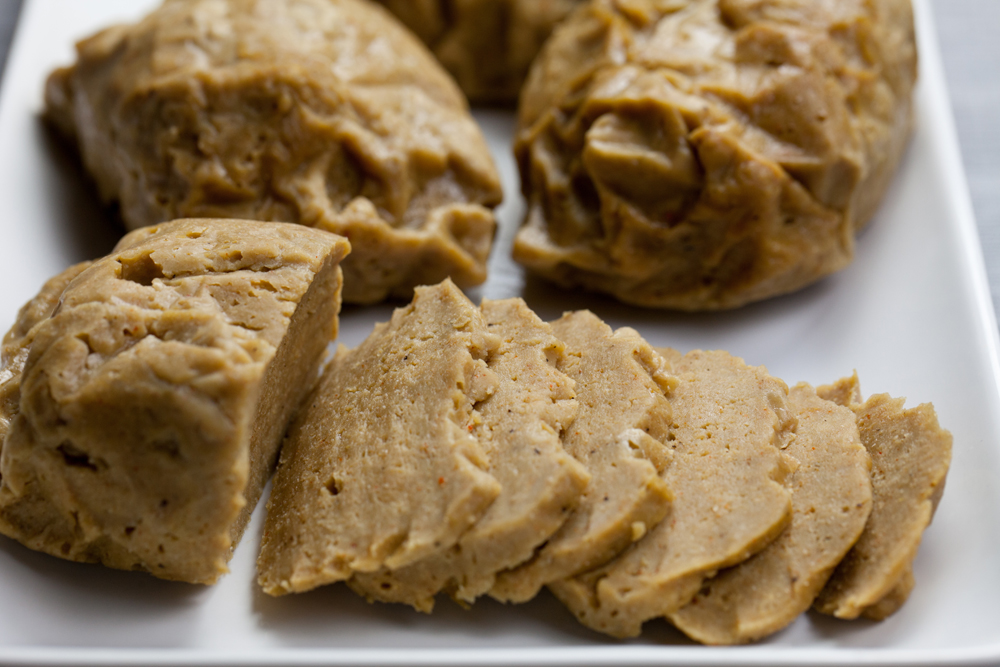
I know you can buy more and more seitan products at the store, but I really believe that home made is best. Not quickest, certainly… and yes, making your own does mean you have to clean your kitchen afterward, BUT I find the texture and the flavor to be far superior. 

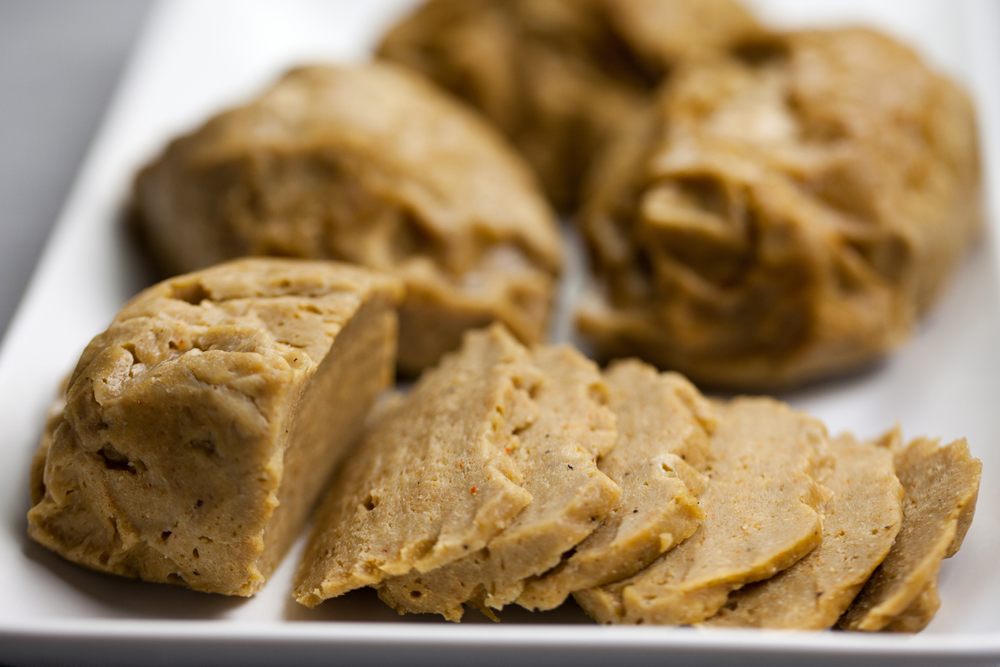
Seriously you guys, I snack on this stuff straight up- no sauces, no additional seasonings, nothing. Deelish!

My Favorite ("Chicken-style") Seitan Recipe | www.thatwasvegan.com

My Favorite ("Chicken-style") Seitan Recipe | www.thatwasvegan.com

My Favorite ("Chicken-style") Seitan Recipe | www.thatwasvegan.com

I also made a few small adjustments to the recipe… You know, now that I’ve been making it once a month for like 3 years…


My Favorite ("Chicken-style") Seitan Recipe
Serves 8
Write a review
Print
Prep Time
15 min
Cook Time
30 min
Total Time
45 min
Prep Time
15 min
Cook Time
30 min
Total Time
45 min
Ingredients
  1. 1.5 cups cold chick'n or vegetable broth (or water and bouillon cube)
  2. 2 tablespoons olive oil
  3. 1.5 cups vital wheat gluten flour
  4. 1/4 cup chickpea flour
  5. 1/3 cup nutritional yeast
  6. 1 teaspoon garlic powder
  7. 1.5 teaspoons poultry or chicken seasoning
  8. 1/2 teaspoon paprika
  9. 1/2 teaspoon cumin
  10. 1/2 teaspoon onion powder
  11. 1/2 to 1 tablespoon sea salt (I used a full tablespoon, but I love salt. Some people have found it to be a bit much)
  12. Aluminum foil
Instructions
  1. Wisk together broth and olive oil, and set aside.
  2. In a large bowl stir together all the remaining ingredients. Once they're completely combined, create a well in the center, then pour in the broth mix
  3. Stir with a rubber spatula until the entire mixture pulls away from the sides of the bowl. Now it's time to knead!
  4. Knead the dough for 2-3 minutes. Your hands may get tired but this step is crucial to develop the gluten. You'll actually be able to see the dough's consistency change, it's pretty cool! You can knead in the same bowl, or you can move it to a cutting board (you'll have to do that later anyway). Keep in mind as you're kneading that you're going to be cutting it into 4 loaves, so working it into a square/rectangle is better than a roundish lump.
  5. Let it rest for about 10 minutes, then knead for another 30 seconds. This is your last chance to get it into a workable shape for cutting. Move to the cutting board if you haven't already, and slice into 4 equal sized loaves.
  6. From your box of aluminum foil, tear off 4 pieces, each about 6 inches wide. Wrap each piece of seitan by folding the long edges, and then the short edges. You want the loaf to be completely covered, but with room to expand, so don't make it too tight.
  7. Steam for 30 minutes. If you don't have a steamer, you can use my ghetto-fabulous method. I fill a pot with about an inch of water, and heat it to boiling. I put the foil-wrapped loaves into a metal colander, which I place into the pan (make sure the water level is lower than the loaves themselves, you don't want them to get wet) and cover. If you're using my method, and the loaves are at all stacked, you should switch them around about halfway through.
  8. Remove from the steamer and let cool for 30 minutes or so before putting it in the fridge for at least an hour. Then you can wrap in plastic wrap or zippie bags.
Notes
  1. Makes 4 loaves, each of which makes about 2 servings. Wrapped tightly, it'll last in the fridge for up to 2 weeks. Freeze it, and it'll last for months.
  2. Please don't try my steaming-in-the-colander method unless your colander is metal!
Adapted from Viva Vegan!
That Was Vegan? https://www.thatwasvegan.com/

 Here’s the old version of the recipe, with photos!


“Chicken-Style” Seitan (4 loaves, each makes about 2 servings)

Recipe adapted from Viva Vegan!  Wrapped tightly, it’ll last in the fridge for up to 2 weeks. Freeze it, and it’ll last for months.

Ingredients:

  • 1.5 cups cold chick’n or vegetable broth (or water and bouillon cube)
  • 2 T olive oil
  • 1.5 cups vital wheat gluten flour
  • 1/4 cup chickpea flour
  • 1/3 cup nutritional yeast
  • 1 t garlic powder
  • 1.5 t poultry or chicken seasoning
  • 1/2 t paprika
  • 1/2 t cumin
  • 1/2 t onion powder
  • 1/2 to 1 T Herbamere or sea salt (I used a full tablespoon, but I love salt. Some people have found it to be a bit much)
  • Aluminum foil

Directions:

1. Wisk together broth and olive oil, and set aside.

2. In a large bowl stir together all the remaining ingredients. Once they’re completely combined, create a well in the center, then pour in the broth mix.

3. Stir with a rubber spatula until the entire mixture pulls away from the sides of the bowl. Now it’s time to knead!

4. Knead the dough for 2-3 minutes. Your hands may get tired but this step is crucial to develop the gluten. You’ll actually be able to see the dough’s consistency change, it’s pretty cool! You can knead in the same bowl, or you can move it to a cutting board (you’ll have to do that later anyway). Keep in mind as you’re kneading that you’re going to be cutting it into 4 loaves, so working it into a square/rectangle is better than a roundish lump. This was mine, about halfway through and before I transferred it to a cutting board…

5. Let it rest for about 10 minutes, then knead for another 30 seconds. This is your last chance to get it into a workable shape for cutting. Move to the cutting board if you haven’t already, and slice into 4 equal sized loaves.

6. From your box of aluminum foil, tear off 4 pieces, each about 6 inches wide. Wrap each piece of seitan by folding the long edges, and then the short edges. You want the loaf to be completely covered, but with room to expand.
7. Steam for 30 minutes. If you don’t have a steamer, you can use my ghetto-fabulous method. I fill a pot with about an inch of water, and heat it to boiling. I put the foil-wrapped loaves into a metal colander, which I place into the pan (make sure the water level is lower than the loaves themselves, you don’t want them to get wet) and cover.

If you’re using my method, and the loaves are at all stacked, you should switch them around about halfway through.

8. Remove from the steamer and let cool for 30 minutes or so before putting it in the fridge for at least an hour. Then you can wrap in plastic wrap or zippie bags.

Enjoy!

{ 190 comments }

Spicy Chickpea Burgers

spicy vegan chickpea burger

Spicy Chickpea Burger

I guess this 60+ degree weather was starting to mess with my head because all I could think about was firing up the grill and making some (vegan) burgers… crazy, right? I mean it’s JANUARY. In COLORADO. But I still couldn’t stop thinking about my favorite grilled treat of all, my very own Spicy Chickpea Burgers.

Unfortunately I couldn’t get the hubster on board for firing up the grill, but that’s okay because my chickpea burgers are just as yummy baked. These are my go-to for any backyard eating, and since that’s usually in the summer I tend to favor the grill, if only because I don’t want to heat up my kitchen. But it’s winter now, as much as Mother Nature seems to keep forgetting, so bake them I did!

I cooked my own chickpeas, as usual, but all other ingredients are store bought.  I love these things. I eat them as burgers, and I crumble them up over the salads I take to lunch. I’ll even tear bites off and eat them cold straight out of the fridge, but I highly recommend you try breaking these into bite sized pieces and adding them to a salad- it’ll take your lettuce to a whole new level! This time around I enjoyed them on Oroweat sandwich thins with fresh avocado, tomato and lettuce. The heat of the burger and the cool creaminess of the avocado were the perfect flavor combo.

spicy chickpea burger

True story: When I first went vegetarian I ate a lot of the Morning Star and Boca type frozen burger patties. They were okay. I kept seeing recipes online for veggie burgers, and I always wondered why these bloggers were making their own from scratch. Did their local grocer not carry Boca?  Then one day I made some black bean burgers from scratch, and I was hooked. I saw the proverbial light! These came along later, the spring/summer of 2011 to be exact… and now I’m sharing them with you. I hope you give them a good home (in your belly).


Spicy Chickpea Burgers
Yields 4
You'll never buy those frozen patties again!
Write a review
Print
Ingredients
  1. 1 tablespoon chia seeds
  2. ½ red bell pepper cut into large chunks
  3. ½ large onion, cut into large chunks
  4. 1 can (or equivalent) of chickpeas, cooked/ drained and rinsed
  5. 1 tablespoon cumin
  6. 1 teaspoon garlic powder
  7. 1 tablespoon chili powder
  8. 2 teaspoon thai chili sauce, or more if you like heat
  9. 1/2 + cup bread crumbs (you may need to had more, depending on consistency)
Instructions
  1. Mix the chia seeds with 3 tablespoons water, stir and set aside.
  2. Drop bell pepper and onion into food processer. Blend for just a few moments until the pieces are smallish, but not minced.
  3. Pour in beans, and blend until everything is all mixed n’ mashed together. You don’t want it to be liquid or completely smooshy, in fact a few bean chunks are a good thing!
  4. Pour entire mixture into medium bowl and add the rest of the ingredients, including a scant 1/2 cup of breadcrumbs. Mix with your hands until everything is completely blended. Add more breadcrumbs if needed- you want this to be sticky and you want to be able to form pretty little patties that will stay together.
  5. Place entire bowl into the fridge for at least 20 minutes. It gives the flax egg time to gel but I also think it give the flavors time to develop and meld together!
  6. Divide into patties (4-5 depending on your bun size).
  7. If you’re grilling, I recommend foil or a veggie tray- but baking is super awesome too. Spray a little cooking spray on a baking sheet, and give these babies about 20 minutes (10-12 each side) in a 375 degree oven. I like to finish mine under the broiler for just a few moments, to get that charred look that you get on the grill.
Notes
  1. Be mindful as you're adding in the breadcrumbs... you want to be able to work with the mixture, but you don't want it so dry that it falls apart.
That Was Vegan? https://www.thatwasvegan.com/
{ 22 comments }

Win a Copy of Everyday Happy Herbivore!

This contest is now closed, and our winner is… Tierra! She likes both Happy Herbivore and That Was Vegan? on Facebook.  Email me your address (thatwasvegan(at)gmail(dot)com) and we’ll get your new cookbook in the mail! Thanks to everyone who entered…this was my first giveaway and I had a lot of fun with it. We had exactly 100 entries, and the winning number was 19.

And even if you didn’t win this time, I have a few more giveaways in the hopper for the next few months! 🙂


Everyday Happy HerbivoreThis is TWV’s first-ever giveaway, and I couldn’t be more excited!* I’m a huge fan of Lindsay, her Happy Herbivore blog and both of her cookbooks. In case you haven’t been lucky enough to read either her books or her blog, she’s dedicated to creating delicious low-fat recipes without oil or sugar. She focuses on vegetables and fruits- true whole foods. I’ve made quite a  few dishes from both of her books, as well as from her blog, so its with a certain amount of expertise that I’m able to guarantee that Lindsay makes healthy eating easy!

Her blog tour made a stop at That Was Vegan? last year, you can read the interview and get a recipe sneak-peek here.

Mouth watering yet? Well here’s your chance to win a free copy of her second book, Everyday Happy Herbivore (you lucky readers, you!)

Because I’m so fond of you all, I’m giving you plenty of ways to enter- simply leave a separate comment below for EACH that you do!

1. Follow That Was Vegan? on Twitter

2. “Like”  That Was Vegan? on Facebook

3. Follow Happy Herbivore on Twitter

4. “Like” Happy Herbivore on Facebook

5. Tweets and “The Facebook” not your thang? Go ahead and leave a comment telling us all which veggie or fruit is your favorite to cook with!

You have until Midnight (Mountain time) on Sunday 1/29 to make your entries, and I’ll announce the winner (randomly chosen) on Monday morning (1/30). I’ll announce the winner here, on FB and on Twitter, so make sure and check back! GOOD LUCK! ETA: The publisher will only ship to US and Canada.

*Special thanks to Lindsay and BenBella Books for making the giveaway possible!

{ 100 comments }

cauliflower n cheese

We all know I’ve been on a m-n-c kick lately (evidenced here and here), but I’ve also been trying to eat healthier and (at least mostly) stick to the Eat To Live guidelines. I know Dr. Fuhrman probably doesn’t approve of Daiya, but he’d give me some points for avoiding that starchy macaroni, right? So, this was as close to a happy compromise as I was going to get. Plus we had friends coming over for dinner, so I knew I had to make something exceptionally yummy!

The Daiya mixed with So Delicious and a little roux is super creamy, and the breadcrumbs get all nice and crunchy on top. Those last few moments of broiling, but I think they’re a must! (My pictures are of the leftover portion and don’t show the lovely crust I achieved with the original dish!) I served this yummy concoction to Jason, along with our friends Jamie and Tyson who are vegan and vegetarian, respectively, and they all loved it. The original recipe says it makes 8 servings, but the 4 of us ate nearly all of it, with one serving left over. Of course, Jason eats like he’s two men…

I’ll be making this again, but next time I might try my B’nut cheese on it…

Cauliflower n' Cheese

So, my gal-pal Reia has started a new blog called The Cruelty Free Review, where she will be reviewing (wait for it… wait for it…) cruelty free products, foods and recipes.  She’s a vegetarian (who I think will be vegan someday soon!?!) who loves animals and I think this blog is a great idea, a fun way for us to learn about vegetarian/vegan products that we didn’t even know we were missing. So head on over there, dear readers, and show her some love 🙂


Cauliflower n’ Cheese

Prep Time15 mins
Cook Time30 mins
Course: Dinner, Entree, Lunch
Cuisine: American
Keyword: healthy, vegan, vegetarian
Servings: 4
Author: Barb

Ingredients

  • 8 cups chopped cauliflower – Approximately 1 large head
  • 2 tablespoons Earth Balance
  • 3 tablespoons AP flour
  • 2 cups vegan milk unsweetened!
  • 2 cloves garlic minced
  • 1 bag Daiya cheddar shreds
  • 3/4 cup nutritional yeast
  • 1/2 teaspoon chili powder or more to taste
  • 1 1/2 cups bread crumbs I like panko!
  • 1 tablespoon dried parsley optional

Instructions

  • Preheat oven to 250.
    Boil salted water in large pot, and add cauliflower. Boil until barely tender, about 5-7 minute. Drain, reserving 1 cup cooking liquid and set aside.
  • Melt the Earth Balance in same pot over medium heat, then whisk in flour to create a roux. Stir constantly for about a minute until it's really thick and well mixed.
  • Whisk in the milk, garlic and reserved cooking liquid and continue to whisk constantly until it starts to thicken, about 7-10 minutes. Reduce heat to the lowest setting and stir in Daiya, nutritional yeast and chili powder. Keep stirring until the cheese is completely melted, then fold in the cauliflower.
  • Coat a 13×9" baking dish with cooking spray, then spread the cauliflower/cheese mixture into the dish. Top with the breadcrumbs then sprinkle parsley. Stray top with an additional squirt of the cooking spray.
    Bake for about 30 minutes. You'll see the cheesy mixture bubbling around the edges. If the top isn't browned, move dish under the broiler and cook (on low!) for a minute or so. Keep an eye on it, you don't want to let it burn now!
{ 28 comments }

Sloppy (Vegan) Joes

Vegan Sloppy Joe

A vegan sloppy joe and some fries… yum!

I can’t even think about this yummy sandwich without that Adam Sandler song popping into my head. I’ve literally been walking around with “Schloppy joes… schlop, schloppy joes” stuck in there since last weekend when I first put these ingredients on my shopping list! But that’s okay- nothing can get me down this week because my foot is getting better! That’s right, I’m out of my walking boot and almost read to do this:

Vegan snowboarder

Me, resting at the bottom of the run. And yes, that collar is faux fur!

Even standing still I look totally badass on that thing, right? It’s not all me though, the fact that the board and bindings (and boots and gloves and goggles) have pink on them helps. (10 pts to anyone who can guess my favorite color!)

I hadn’t made these in a while, but Bianca over at Vegan Crunk blogged about some last month and it reminded me. I don’t have the recipe she used so I stuck with mine, but she mentioned pickles and that intrigued me, so I added some of those little babies in- and they were awesome! They add a little crunch and a little zing which is just what my sandwich needed. I took a jar of regular dill chips and poured out a whole bunch of the juice (about 1/4), and filled it back up with Sriracha and then just let them sit in the fridge until I needed them. Then I chopped a few up and sprinkled on my sammy. Perfection! The idea came from a jar of Rick’s Picks that I had ordered for Jason last summer, which turned out to be not-at-all vegan, unfortunately. (Side note: WhyTF do pickles need anchovy guts in them??)  I served them up with  side of Alexia fries because I’m totally addicted, and then proceeded to stuff my face!


Vegan Sloppy Joes

Serves 4


Write a review

Print

Ingredients
  1. 1 medium onion, chopped fairly small (but not diced)
  2. 1 green bell pepper, chopped about the same as the onion
  3. 1 medium tomato, chopped WITH all the juice
  4. 1 15oz can of refried beans
  5. About 1/2 a can of kidney beans
  6. 2 T Bragg's liquid aminos
  7. 1/3 cup quick oats
  8. 1/4 cup water (plus a few more tablespoons)
  9. 2 T spicy brown mustard
  10. 1-2 T chili powder, depending on taste
  11. 1 t paprika
  12. 10-12 pickles, diced
Instructions
  1. Saute onions and peppers in water until soft, about 5 minutes. Reduce heat to low.
  2. Add everything else into the same pan, and cover, stirring occasionally until heated through. You may want to add a few more tablespoons of water to get the right consistency. Using a rubber spatula, make sure and scrape the sides of the pan every time you stir, or else the edges will get dried out.
  3. Serve on buns and top with some spicy pickles, and maybe a dab more spicy mustard!
Notes
  1. ETA: I went with just one T of chili powder, and mixed extra into my husband's portion... A lot of people like the heat, but I'd recommend starting with 1 T, tasting, then add more 🙂
That Was Vegan? https://www.thatwasvegan.com/


Related Posts Plugin for WordPress, Blogger...

{ 11 comments }
Social media & sharing icons powered by UltimatelySocial