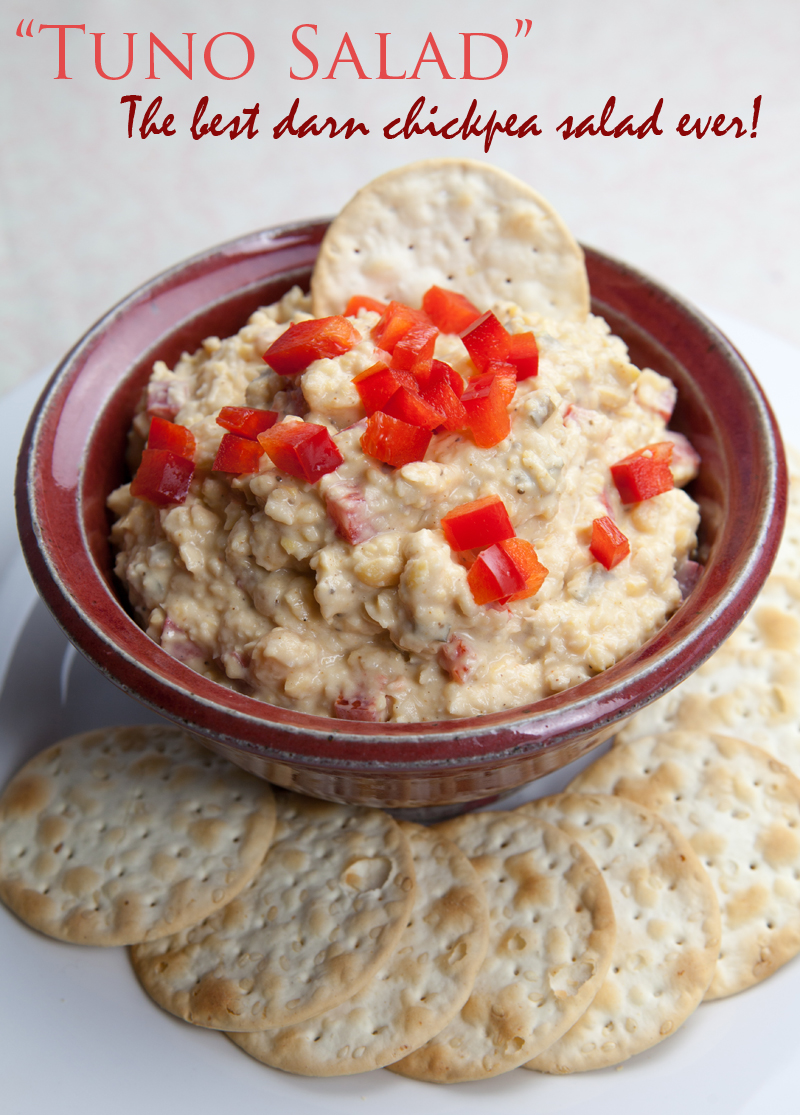
≡ Menu

Cheesecake Sopapillas

Cheesecake Sopapillas | www.thatwasvegan.com

Easy? Check. So freakin’ good they’ll blow your mind? Check.

Maybe I keep saying this, but it’s true- put a plate of these out at a party, and don’t tell anyone they’re vegan… NO ONE will ever suspect.  The Sopa is made out of Pillsbury crescent roll dough, so it’s got that yummy almost buttery flavor going on. The cream cheese filling tastes exactly like cheesecake, only softer.  So creamy, so good. The cinnamon sugar on top makes it pretty AND gives it that extra layer of flavor.

These took me about 10 minutes to throw together, and then they baked for another 20. Almost as soon as they went in the oven they started filling the house with their fabulous scent. I’ll be bringing these to my next holiday party, you can count on it!

The filling is so sweet and creamy and cheesecake-y!  

Cheesecake Sopapillas | www.thatwasvegan.com

And lest we forget the rich, buttery crust…

Cheesecake Sopapillas | www.thatwasvegan.com

And please, before anyone tries to drop some knowledge on us, Pillsbury Crescent Rolls are vegan. Deal with it. 

Vegan Cheesecake Sopapillas

Servings: 16 pieces

Ingredients

  • 2 cans Pillsbury crescent dough sheet is best, rolls will also work
  • 8 oz vegan cream cheese softened
  • 1/2 cup white sugar
  • 2 tbsp vegan butter melted
  • cinnamon + sugar for topping

Instructions

  • Preheat oven to 350 degrees.
  • Roll the dough from one can out as thin as you can, big enough to cover an un-greased cookie sheet. If you’re using Pillsbury rolls (instead of a sheet), pinch the seams together.
  • Stir the cream cheese and sugar together in a small bowl then spread evenly over the dough. Top with the remaining dough (also rolled out). Brush the melted butter on then sprinkle with cinnamon and sugar. Bake for about 20 minutes or until the dough is starting to brown, then the same you would if making the crescent rolls. Let cool for a few minutes before you slice into squares or triangles.

Notes

I like to serve these at room temperature.
{ 9 comments }

Butternut Squash Mac n’ Cheese

Vegan Mac n' Cheese Bread Bowl

Mac n’ Cheese Bread Bowl

After my terrible confession a couple weeks ago, I’ve really been trying to improve myself and be a better (m-n-c eating) person. The result? B’nut Squash (which I believe is the sexiest of the squashes) combined with some kickass vegan Mac n’ Cheese, creating an ooey-gooey deliciousness that actually has some nutritional value. Top that! And “deliciousness” doesn’t even begin to describe this dish. One of the main things that keeps Jason stuck in omnivore status is his love of “real” cheese, and he went just as crazy for this stuff as I did. Seriously. This is the dish you can serve to meat/cheese eaters and DARE THEM not to love it!

One trick I’d like to share with folks who roast their own squash- I like to cube and freeze my excess roasted squash in a zippie bag, so when a recipe calls for smooth (or mostly smooth) squash, I’ll just work the bag with my fingers until it’s the right consistency, then add it to the recipe! Easier and faster than transferring it to a bowl and mashing it.

If you love this recipe, check out my Mac n’ Cheese Bites!

Butternut Squash Mac n Cheese

A creamy mac n' cheese that you'll forget is vegan!
Servings: 4

Ingredients

  • 1 lb pasta I used shells
  • 2 T Earth Balance
  • 1 small sweet onion very finely diced
  • 3 T flour
  • 2 cups vegetable stock
  • 10-12 ounces of butternut squash cooked and/or thawed
  • 1 cup unsweetened nondairy milk choose one with a mild flavor
  • 1 bag Daiya cheddar shreds
  • 1/4 teaspoon nutmeg
  • 1/2 - 3/4 teaspoon Herbamere or salt of your choice
  • Pepper to taste

Instructions

  • Put pasta on to boil, making sure you keep it a little firm, otherwise it'll start to fall apart when you stir in the cheese sauce.
  • In a large pot over medium heat, melt the Earth Balance, then add the onions, cooking for about 2 minutes. If you need more moisture, you can add a tablespoon of water or more EB.
  • Add flour, and mix all together- this is your roux. Cook for another minute.
  • Pour in veggie stock and squash, stir until completely blended. This is your chance to make sure there are no large chunks of squash swimming around in there! Make sure you're constantly scraping the sides of the pan, I recommend using a rubber spatula.
  • Add milk and stir, letting it come to a slow bubble, then add the Daiya. Keep stirring (Don't stop!)
  • Once it's all melty and gooey, add in your nutmeg, salt and pepper. Taste and adjust. But don't taste too much, or there wont be any left! Pour in your (slightly undercooked) pasta, and that's it!

Notes

I roasted my own b'nut for this dish, but if you choose to buy a package of frozen kind that's cool too. If you roast your own, feel free to sneak a little extra in... I did 😉 Keep in mind though, if you roast your own you'll want to make sure it's pretty smooth. A few lumps are okay, but you really want the squash puree to meld with the cheese.
{ 71 comments }

An Interview with the Happy Herbivore!

Spicy Orange Greens

Lindsay S. Nixon is a rising star in the culinary world, praised for her ability to use everyday ingredients to create healthy, low fat recipes that taste just as delicious as they are nutritious. Lindsay’s recipes have been featured in Vegetarian Times, Women’s Health Magazine and on The Huffington Post. Lindsay is also a consulting chef at La Samanna, a luxury resort and four-star restaurant in the French West Indies. You can learn more about Lindsay and sample some of her recipes at happyherbivore.com

If you were in a room with a bunch of omnivores and could only say one thing to try and convince them to give veganism a chance, what would it be?

Eat this (hand over tasty food).

For people out there who are considering going vegan but aren’t 100% sold, obviously we think they should buy both of your cookbooks! What other tools/guides would you recommend to them, to help them get started?

It’s all in the mind. Take it one meal at a time. Focus on all the things you can have, not the things you are giving up.

What cookbooks do YOU have in your kitchen?

Only mine. Seriously! I do own a few others, but they’re in a box in my office. I swear I don’t have a huge ego — but I get so annoyed having to look at a recipe and change it. All the other vegan cookbooks I own use tons of oil and earth balance, and white sugar and white flour, all which I don’t eat, so I have to tweak the recipe to fit our diet… or they call for an ingredient I’ll never find in my tiny town so I have to Google for a substitution… and sometimes it doesn’t come out because I made changes, so I get even more aggravated. I love all my recipes, so I tend to circle around those.

I read that you took all your own photos for your first book, and they came out great! Food photography can be really challenging, but you seem to have a natural talent 🙂 Did you do the same with Everyday Happy Herbivore?

Aww thanks and yes, I take all my own photos.

Steamboat Springs (where the HH currently lives) definitely has vegan dining options, but I wouldn’t say that they’re known for their “vegan scene”. What do you hope to do to change that?

I’m only here for a few months so I’m not sure how much change I can foster, but I do make a point to thank the manager at any establishment that offers vegan options. I find that’s a great way to get more items on the menu — and sometimes they throw in a coupon!


Thank you so much Lindsay for taking the time to answer my questions, and especially for sharing your recipe for Spicy Orange Greens! I look forward to getting a copy of Everyday Happy Herbivore. I asked Santa for one so if I’m good it should be waiting for me in my stocking on Christmas morning 🙂

Spicy Orange Greens | serves 2

The slightly spicy orange sauce in this dish is one of my favorites. You can serve it with any greens you like or have on hand, but collard greens are my favorite to use. For a complete meal, serve over or tossed with noodles.

1/3 cup water
2 tbsp soy sauce
2 tbsp minced fresh ginger
1/4 tsp red pepper flakes
1 tbsp orange marmalade or jam
4 cups greens (any)

Pour water, soy sauce, ginger and red pepper flakes into a skillet. Turn heat to high and saute until the ginger is fragrant, about 1 minute. Whisk in marmalade and then add chopped greens. Reduce heat to medium and using tongs, turn greens into the sauce. This will help cook the greens down; stop when your greens are bright green and have softened. Serve.

Chef’s Note: Cooked broccoli florets may be substituted for the greens. Toss cooked broccoli with the sauce once it’s been warmed and serve.

Per Serving: 156 Calories, 1.5g Fat, 32g Carbohydrates, 8.8g Fiber, 11.6g Sugars, 10.1g Protein

Get your copy of Everyday Happy Herbivore: Over 175 Quick-and-Easy Low Fat and Fat-Free Vegan Recipes. Buy on Amazon.

After vegan chef Lindsay S. Nixon wrapped up her popular cookbook The Happy Herbivore Cookbook last year, she went back to her kitchen in her new home of St. Maarten. Island living encouraged Nixon to come up with simpler fare, which led to a follow-up cookbook focusing on recipes that bring tasty back to quick-and-easy.


Now, in Nixon’s much-anticipated follow-up cookbook, Everyday Happy Herbivore, readers will see, once again, that just because plant-based eating is optimal for health, it doesn’t have to also be expensive or time-consuming.

Everyday Happy Herbivore includes more than 175 doable recipes–recipes that are so quick and easy, you could cook three healthy meals from scratch every day like Nixon does.

Each of Nixon’s recipes are made with wholesome, easy-to-find, fresh ingredients and include no added fats. With additional notes indicating recipes that are ideal for preparing ahead of time and those you can whip up with just a few dollars, Everyday Happy Herbivore will be the must-have cookbook for anyone desiring a healthier, happier menu!

{ 4 comments }

Ramen Pho

Last night was one of those evenings when I didn’t really feel like cooking, and honestly didn’t have any idea of WHAT to cook. Enter the humble ramen noodle, friend to all and occasional life saver. Everyone is familiar with the Top Ramen brand, one of the only things you can buy at the grocery store for .20¢, but the little packets aren’t vegan. You could buy them and throw away the packet (the noodles themselves are vegan) but that option doesn’t really sit well with me, because even though there’s only a miniscule amount of animal product in that tiny little packet, I don’t like the idea that an animal suffered for it. SO, what’s a vegan ramen addict to do? Buy Koyo! They have many vegan flavors including Tofu & Miso, Lemongrass Ginger and Garlic Pepper, just to name few. Bonus: Their noodles are organic and the flavor packet is GMO-free! I picked mine up a few weeks ago at Sunflower Farmers Market, but you can also grab them at Vitamin Cottage and Whole Foods, according to their website.One thing to keep in mind, the amount of noodles you get in a Koyo package is smaller than what you get from Top Ramen, so you might want to double up.

I chose Tofu Miso for my bowl last night, and added just about every frozen veggie I had in my freezer along with some Bragg’s Liquid Aminos and of course some hot sauce! Was it technically Pho? Maybe not but it was darn close, and really good! I suppose this is less a recipe and more of an idea on how you can clean out your freezer when you don’t have the time to cook.

But, before we get to the food pics, there’s someone I’d like to introduce you to. His name is Cooper and it’s his birthday!

Cooper

Cooper came to live with us on December 7, 2007. Jason and I decided that year that, rather than buying gifts for each other, we’d each choose something we wanted and buy it for ourselves. Perhaps not the most romantic method, but certainly efficient. For my gift to myself, I adopted Cooper from the National Mill Dog Rescue (NMDR). They’re a WONDERFUL organization who rescue, rehabilitate and rehome puppy mill survivors, and educate the public on the evils of purchasing puppies from pet stores and online. I had recently heard through a friend about the amazing  NMDR- and I wanted in on the action! I looked on their website, and although every single dog looked adorable and loveable and everything else-able, I decided to wait until we could visit the rescue. I wanted to see if I had an instant connection with any of the pups. I wanted my new dog to choose ME.

Fast forward a few days, and Jason and I drove out to the rescue. I was sitting on a stool as they brought dogs into me one at a time to meet. Obviously I loved every dog that I saw and wanted to take them all home with me, but I never stopped her from bringing more dogs in. I wasn’t done yet. Then she came through the doorway carrying a little black bundle, and placed him on the ground at my feet. Not only was he covered in mud, but his fur was matted too- I really wasn’t even sure what breed he was. He was very shy (they called him “Timmy the Timid”) and although he wouldn’t approach me, he was doing this adorable little “commando crawl” on his belly back and forth in front of me. I knew immediately.

Some paperwork and an adoption fee later and Cooper was on his way to his Forever Home with us. He was about 5 years old, and had been rescued a few weeks before from a breeding dog auction in Missouri. That’s a story for another (longer, sadder) post, but suffice to say my sweet boy was minutes away from a cruel death when he was saved. But all that is in the past, and he’s now the happiest pup you could ever meet. He only has one eye, but that doesn’t stop him from scampering around the house begging for treats, or sitting on my lap watching while I watch TV. We’re best friends, totally inseperable! 🙂

Happy birthday Cooper! Thank you for 4 years of happiness and love and little doggie kisses- and I look forward to many more!

Okay… thank you for indulging me, and back to the food!


Ramen Noodle "Pho"

Yield: Single serving

Ingredients

  • 1 or 2 package of ramen noodles, depending on how voracious your appetite is
  • 2 cups veggie broth (or 2 cups water and 1 veggie bouillon cube)
  • 2-3 cups frozen veggies of your choice (I used sugar snap peas, edamame, broccoli and cauliflower)
  • Pressed, sliced tofu, if desired
  • 2 T, (more to taste) Braggs Liquid Aminos
  • Sriracha or other hot sauce

Instructions

Cook noodles and vegetables in broth according to package.

Add tofu (if using) along with Braggs

Remove from heat, cover, and let everything just meld together for a few minutes, and make sure the veggies are thawed/cooked

Ladle into bowl and apply as much hot sauce as you can stand! And probably more Braggs too, because why not? I like it salty!

Don't forget to grab a fork and a spoon!

https://www.thatwasvegan.com/2011/12/07/ramen-noodles-make-your-own-pho-and-happy-birthday-cooper/


Ramen Pho 2

Oh… and let me leave you with this one last picture of Cooper. Sorry for the blurry/bad lighting/cell phone pic … I had to share anyway. This is how he sleeps, with his tongue hanging out!

cooper tongue

{ 10 comments }

Tuno salad, anyone?

Tuno Salad | www.thatwasvegan.com

A lot of people have their favorite “tuno” or chickpea salad recipe, but this one is the best. I’m not even kidding, it’s ridiculously good, especially if you ever enjoyed that other version during your pregan days. Why? Well for one, the Old Bay seasoning really makes it taste fishy (but not in a gross way). Also the smooshed up chickpeas have a texture and consistency that is reminiscent of tuna from a can. Is it exactly the same? Obviously not, but it is a very enjoyable, very compassionate version that I hope you’ll all try and enjoy!

I bring my lunch to work nearly everyday, so when I make a recipe that both stores and travels well I tend to make enough to last me the week- and this is no exception. I’ll eat it in a sandwich, in a wrap, on a cracker, on my finger. I think you get the point. The last time I made it I went the appetizer route, serving it on crackers, and Jason and I munched on it while watching football. It was a party of two, but I think it would be great  to bring to a larger gathering too!

Tuno Salad and crackers2

You know how else this stuff is amazing? Inside a tomato! Or as a tuno melt!


Tuno Salad

Serves 6
A delicious chickpea version of everyone's favorite childhood sandwich!


Write a review

Print

Ingredients
  1. 32 oz chickpeas, drained and rinsed
  2. 6 tablespoons Vegenaise
  3. 1/3 cup sweet relish
  4. 1/3 cup diced red pepper (sweet, bell or hot, depending on your taste!)
  5. 1 teaspoon Old Bay seasoning (don't skip this, it makes the dish!)
  6. 1/2 teaspoon garlic powder
  7. 1/2 teaspoon sea salt
  8. pinch of black pepper
Instructions
  1. Pulse the chickpeas 2-3 times in your food processor OR mash them in a bowl with a fork. Don't leave too many whole beans, but also don't make the mixture too smooth.
  2. Stir in remaining ingredients and mix well. Serve on bread, wrap, crackers, fingers!
That Was Vegan? https://www.thatwasvegan.com/


{ 32 comments }

Chili Mac n’ Cheese


That was vegan? Chili Mac n' Cheese

After becoming vegan I went for 507 days without eating mac n’ cheese. FIVE HUNDRED AND SEVEN! That’s a lot of days, I know. And I also know that there are plenty of recipes for vegan m-n-c out there, and lots of restaurants that serve it, but somehow the stars just never aligned for me. I kept meaning to try a recipe, and there was even one day that I fully intended to order it for lunch at Udi’s until I got there and realized it was no longer on the menu (note to restaurants: please don’t leave delicious dishes listed on your website if you have no intention of making them!), but it just never happened for me. Not until this Thanksgiving, that is!  Our friends Lauren and Jeremy not only hosted us on Tofurkey Day, but Lauren also made a fabulous baked mac n’ cheese, breaking my dry spell with a BANG!  (The recipe she used is here and I strongly suggest you all give it a try!) It was so good, and all those old mushy feelings came rushing back to me, reminding me how much I missed that ooey-gooey comfort food.

How much did I miss it? Enough that in the 8 days since, I’ve eaten some version of  it 4 times! This improves my Once-every-507-days average to a more acceptable Once-every-103-days, a statistic I’m less embarrassed by.

My most favorite version (so far, at least!) has been this Tex-Mex style, loaded with tomatoes and corn and beans… vegan chili, basically. It’s a little spicy, but you could certainly kick up the chili powder or add some chopped jalapenos if that’s your jam. Jason, my hubby, is from NM and as far as I can tell he was born without the ability to taste heat. He’d put Ghost Pepper Aioli on everything if he could. I, on the other hand, am from NH and growing up considered Taco Bell to be authentic Mexican food, so lets just say that our tolerance for heat is not equal.


Chili Mac n' Cheese

Serves 5


Write a review

Print

Ingredients
  1. 1 medium onion, chopped (I used sweet)
  2. 2 teaspoons garlic powder
  3. 15 oz can black beans (drained and rinsed)
  4. 15 oz can pinto beans (drained and rinsed)
  5. 2.5 cups frozen corn
  6. 28 oz diced canned tomatoes, with the juice
  7. 1 10oz box elbow macaroni, or pasta of your choice
  8. 1.5 tablespoons cumin
  9. 1 tablespoon chili powder (I used a "New Mexico blend" that was on sale... also, use a little less than a tablespoon if you're worried about the heat!)
  10. 1 bag shredded Pepper Jack Daiya
  11. 4 tablespoons non-dairy milk (if needed)
  12. S&P to taste
Instructions
  1. Put the macaroni on to boil, but be careful to leave it undercooked otherwise it'll fall apart later on. I cooked mine just until it was "a little too chewy".
  2. In a large soup or stock pot saute the onion until tender, using either oil or water. Stir in beans, corn, tomatoes and macaroni, then add the cumin and chili pepper, tasting as you go.
  3. Stir in the Daiya and let it get all melty and gooey and fantastic, then add your salt and pepper if you'd like. If it's too dry, add a few tablespoons of your non-dairy milk of choice... And enjoy!
Notes
  1. This is one of those dishes that gets better after sitting in the fridge for a day or two, so make sure you have leftovers!
That Was Vegan? https://www.thatwasvegan.com/


{ 21 comments }

Black Bean and Sweet Potato Chili

sweet potato and black bean chili

Here’s a quick and easy chili recipe that will taste like you spent more time on it than you actually did- always a good thing in my opinion!  When making this last batch I accidentally doubled the chopped green chilies, and it was insanely hot- like “help! my face is melting!” hot. The bottle of wine I was enjoying while I cooked may or may not have contributed to this little oversight… who’s to say?

Anyhoo, I added some sour supreme to cool it off, and really enjoyed the creamy consistency it gave the chili after I stirred it all in, so I recommend adding some if you have it.  The recipe came from Fabulous Foods, check it out!


{ 2 comments }

Agave-Toasted Tortilla Chips

Agave-Toasted Tortilla Chips

Some things are just easier to buy at the store, pre-packaged in all their overly processed glory. For me this list includes dry cereal and coconut milk ice cream, to name a few. Other folks would probably add canned beans and baby carrots that they don’t have to peel, right? Well, here’s one thing that’s coming off my list*: Tortilla chips!

This recipe is simple, so there’s a good chance you already  have the ingredients on hand, and so fast that you can whip these together at the last minute, probably in less time than it would take to send your husband to the store to pick up a bag of chips (Especially if you factor in the time it would take to threaten convince him to go). Rachael Ray supplied the concept, but her recipe didn’t work for me. The first batch came out burnt-ish and not quite sweet enough for my taste. My one piece of advice would be to figure out how many you think you’re going to need, then double the batch because you’ll be shoving these little buggers in your mouth as fast as they come out of the oven! As you can see from the picture, I served mine with hummus, although they were also enjoyed with onion dip and salsa.


Agave-Toasted Tortilla Chips

So much better than anything you can buy at the store!


Write a review

Print

Ingredients
  1. 5 tablespoons agave
  2. 8 small (8") flour tortillas, cut into 6 wedges (I stacked 'em and sliced with a pizza cutter)
  3. 4 teaspoons sesame seeds
  4. 2 teaspoons sea salt
  5. water
  6. parchment paper
Instructions
  1. In a small bowl, stir 1-2 teaspoons of water into the agave to loosen.
  2. Cover the bottom of a cookie sheet with parchment paper, then arrange the tortilla wedges and brush with the agave mixture. You might have to hold onto the wedges so they don't move around too much!
  3. Sprinkle with sesame seeds and salt, then toast at 350 until they're a light golden-brown, 11-14 minutes.
Adapted from Rachael Ray
That Was Vegan? https://www.thatwasvegan.com/

*Full disclosure: I’ll probably still buy chips once in a while but they’ll never be as good as these!!


{ 3 comments }

Welcome to my blog!

I love vegan food blogs. I love the pictures and getting recipe ideas and even reading about other people’s kitchen mishaps. I love it all, and the proof is in the way my Google Reader is consistently full. Seriously, I don’t think I’ve ever gotten my unread items below 300. But the thing is, I love READING vegan food blogs, and for the longest time it never even occurred to me to start my own. I mean, there are eleventy billion vegan bloggers out there, what could I possibly contribute to that talent pool? So I kept chugging along, modifying and creating recipes, and testing out new ideas on my husband, friends and dogs. Then something changed- we bought our first dSLR camera, and I discovered a love of food photography (please note I said “love of”, not “talent for creating”, ha ha ha), and I started posting food pics on my Facebook page. That was fun, but I wanted to talk about the recipe, how I made it, how much my husband loved it, and how much I enjoyed the whole process. I suppose you could say I had this burning desire to (over)share!

So here I am, launching my own blog, with both excitement and trepidation- excitement because it means I get to share my recipes and cooking exploits with the world… and trepidation because, well,what if no one cares about my recipes or exploits!? What if no one comes and reads my little blog? OMG, what if NO ONE LEAVES COMMENTS??

Well, I can’t worry about that. Forget “Build it and they will come”, this is “Cook it, take pictures of it and write something rather witty about it, and they will come!” Thank you so much for joining me on this little adventure 🙂


Related Posts Plugin for WordPress, Blogger...

{ 6 comments }
Social media & sharing icons powered by UltimatelySocial