≡ Menu

Tuno Melts

Tuno Melts and a Nayonaise Giveaway

This contest is now closed that the TWO lucky winners are… acd6pack who uses vegan mayo to whip up some delicious (and fresh!) sounding vegan BLTs Carol who’s whipping up some vegan burgers in Canada, and Kathy who wants try a new kind Renee who tops her veggie burgers with the creamy vegan deliciousness down here in the US. Congratulations to you both! (Neither of the original winners responded, so I picked two more!)

You don’t need wikileaks to tell you that I love me some “tuno” salad (aka vegan tuna salad) because I’ll gladly shout it from the rooftops! It’s easy, it’s delicious, it’s versatile and it’s healthy.

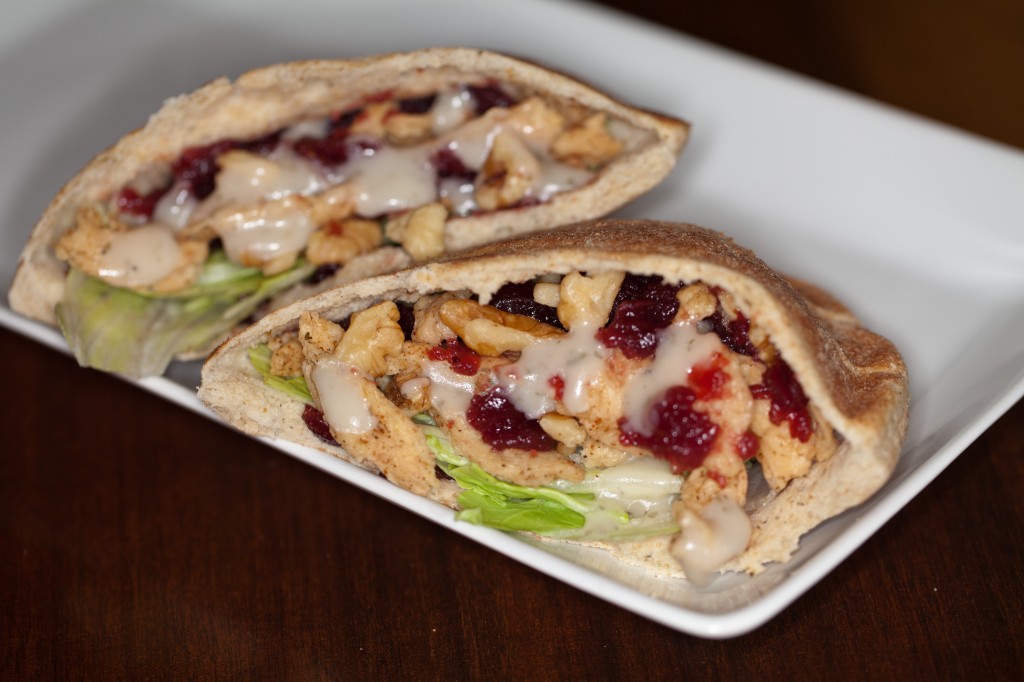
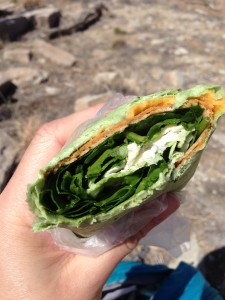
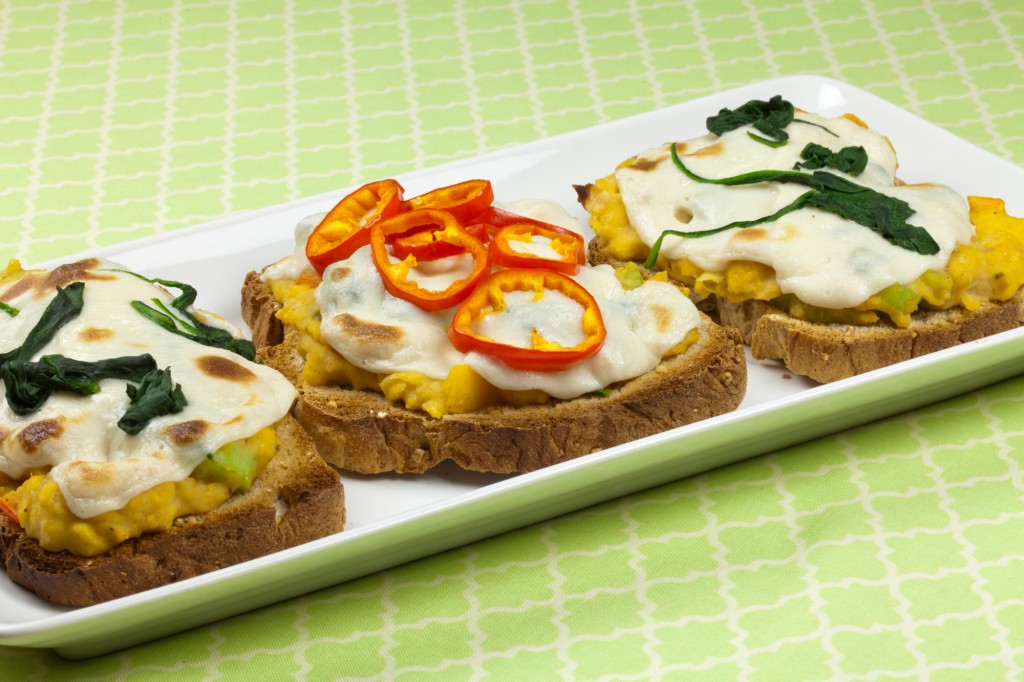
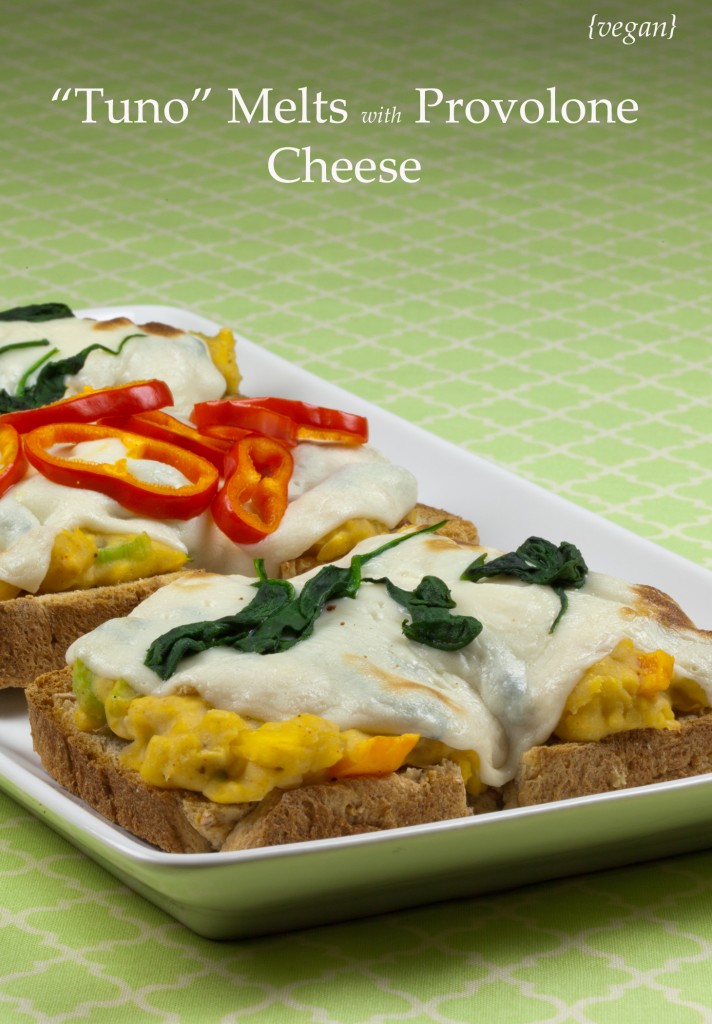
This time, however, I switched up my usual recipe just a bit. I had received a couple bottles of the (new and improved!) Nayonaise to review, including a bottle of their brand new nayo whipped, a vegan alternative to miracle whip! I used the nayo whipped, slathered the tuno salad on toast, topped it with some vegan cheese and myself some Vegan Tuno Melts!

Tuno Melts and a Nayonaise Giveaway

I really enjoyed the flavor of the nayo whipped, very tangy and sweet (which I love). The only issue I had was that it seemed to separate very quickly in the bottle, which wasn’t the most appetizing look. But please don’t let that stop you from giving this new product a try- the flavor was wonderful and it worked perfectly in all the recipes and sandwiches I used it in!

Tuno Melts and a Nayonaise Giveaway

So here’s the recipe for my melts… but don’t forget to scroll all the way down for the giveaway deets- we have prizes for a US winner AND a Canadian winner! Woot!


Vegan Tuno Melts (makes 4 halves)

Ingredients:

  • 1 batch Tuno Salad
  • 4 slices of hearty bread, lightly toasted
  • 4 vegan cheese slices (I used Daiya provolone)
  • sauteed spinach, peppers or other veggies for topping
  • S&P

Directions:

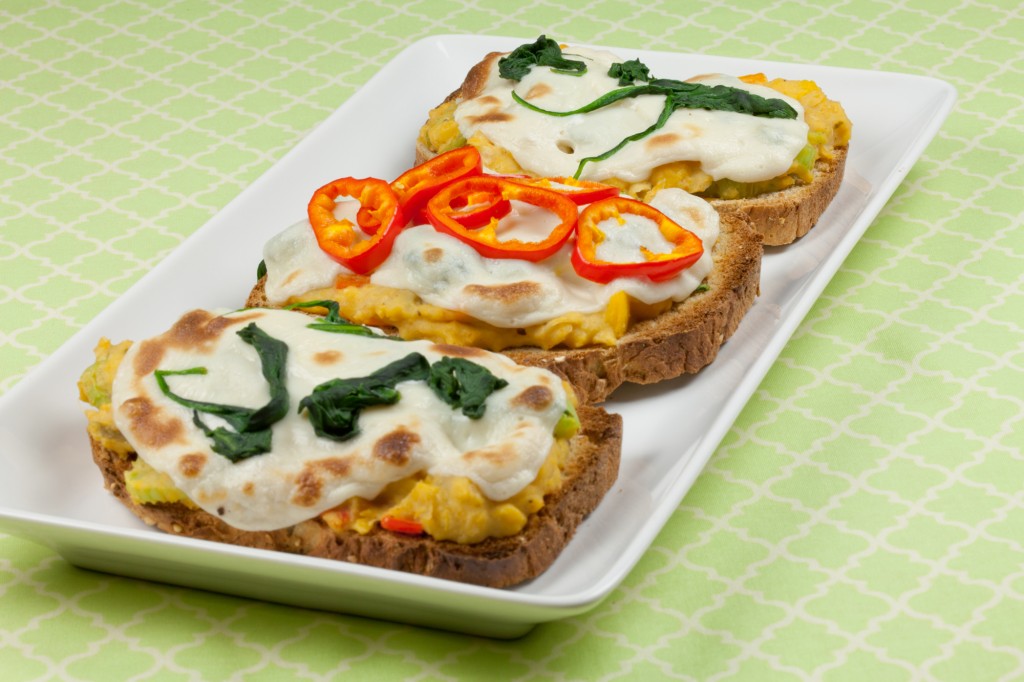
  1. Top your toast with the tuno salad, followed by the cheese. Place under the broiler until the cheese melts, then top with the sauteed veggies. Sprinkle a little S&P as desired.

Enjoy!


The Giveaway:

Thanks to the super friendly folks at Nasoya, one US winner will receive two free product coupons, and one Canadian winner will receive some awesome Nasoya swag (t-shirts, hats, etc).

The contest is open until Midnight (Mountain time), Sunday 7/21. The winners will be chosen randomly and announced the following day.

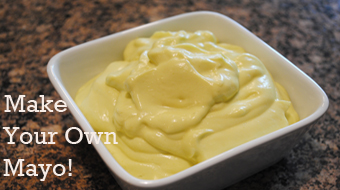
To Enter: Leave a comment below sharing your favorite way to use vegan mayo… On sandwiches? In casseroles? Washing your hair? You must also state whether you’re in the US or Canada, so I know which drawing to enter you in!


Contest is limited to US and Canada only. Good luck!!


*Nasoya provided me with free product to review, but the opinions are 100% mine!

{ 29 comments }

Crunchy Cranberry Chick’n Sandwiches

Vegan Crunchy Cranberry Chick'n Sandwiches

Hey guys! Where the heck have you all been lately? Oh wait, I’m the one who hasn’t been posting…

Well, I’ve just been busy. And perhaps a bit disorganized with the whole cooking/taking pictures/writing about it thang. Here, let me catch you up really fast:

Last night I went to JL’s book launch party which was faboooolous! I didn’t take pictures (see above) but there was vegan wine and vegan pizza and vegan smoothies and… I’m sure you’re seeing a trend here.  I’m so proud of her, you absolutely must get her book!

I’ve been hiking a ton, and have also taken up biking as well. I did my first single track this past weekend, kicked some butt, and even made a new friend:

photo (33)I almost ran the little dude over, but saw him at the last second. Phew!

But enough about me, I want to share a really quick and easy meal I made the other night… I’m calling it a Crunchy Cranberry Chick’n Sandwich.

Vegan Crunchy Cranberry Chick'n Sandwiches

I used canned cranberry sauce, which is just one of my very favorite things, chopped walnuts, a dried cranberry/cherry mix, soy curls, vegan ranch and lettuce. Easy, right? And so delicious! It was sweet and tangy and crunchy all at once. And if you don’t have soy curls you could easily use seitan, Beyond Meat “Chicken Free Strips”, or even chickpeas.


Crunchy Cranberry Chick’n Sandwiches (makes 2 pockets)

Ingredients:

  • 1 handful soy curls
  • 1/3+ can cranberry sauce
  • 1/4 cup dried cran/cherry mix
  • A scant 1/4 cup chopped walnuts
  • 2 pockets, wraps, or 4 slices of bread
  • Chopped lettuce
  • 3-4 Tablespoons vegan ranch dressing

Directions:

  1. Put the soy curls in a bowl of warm water to soak. When they’re done, squeeze out all the excess liquid.
  2. Mix in a bowl with 1/2 the cranberry sauce, the dried cran/cherry mix and walnuts. Schmear the pockets, wrap or bread with cranberry sauce, add lettuce, then stuff with the mixture.  Top with the ranch dressing and remaining cranberry sauce.

Enjoy!

{ 5 comments }

Grilled Spaghetti Squash Alfredo

Vegan Spaghetti Squash Alfredo

This Grilled Spaghetti Squash Alfredo was so delicious, my head nearly exploded! If you’ve never had spaghetti squash, you simply must. When cooked correctly, the flesh of the squash is similar in look and texture to spaghetti. Grilling also gave it a wonderful, sort of smoky flavor. Then I topped it with a little vegan alfredo sauce and some Daiya mozzarella, and it was just amazing. What makes it even more fun is that you can serve them right there in their own skins!

Seriously, you guys, you need to make this. Don’t have a grill? Bake it instead!

These weren’t difficult to make, but you do need to make sure that you grill the squash for the right amount of time. Too little and the insides will be hard and tough… too much and the strands will be mushy.

I used a variation of the Happy Herbivore alfredo sauce, but you could use one of those handy dandy jarred vegan sauces if you prefer to save a little time!


Grilled Spaghetti Squash Alfredo (makes 2 servings)

Please, please, please do not overcook your squash! I’d start checking for done-ness around the 15/20 minute mark.

Also, consider serving with a small bowl of extra alfredo sauce. As you’re eating the squash you’ll continue to pull more and more strands away from the edge, so you might want more sauce 🙂

Ingredients:

  • 1 spaghetti squash, washed
  • 2 tablespoons safflower oil
  • Non-stick spray
  • 1 to 1 1/2 cups vegan alfredo sauce (if you use the HH recipe mentioned above, I use regular AP flour and add sea salt!)
  • Vegan mozzarella shreds (I used Daiya!)
  • Chopped scallions
  • S&P

Directions:

  1. Heat your grill to medium.
  2. Slice the squash open lengthwise. You can remove most of the seeds with a spoon if you wish, or just leave them in. I removed about half and left the rest in.
  3. Brush oil over the open faces of your halved squash, and sprinkle with S&P
  4. Place the halves face down on a double sheet of heavy duty aluminum foil that has been sprayed with non-stick. Place on the grill.
  5. After about 20 minutes check the squash. Try stabbing a fork through the skin… you should be able to penetrate but not easily. I ended up leaving mine on for another 5 minutes, although I turned the heat down to low.
  6. Remove the squash from the grill and stir the insides with a fork. Looks like pasta, right!? Pour ~1/2 cup of alfredo sauce into each side and stir well. Top with mozzarella and chopped scallions then place under the broiler for just a minute or two to get it all melty.

Enjoy!

{ 10 comments }

Really Easy Spicy Lentil Dip

Really Easy Lentil Dip

This Spicy Lentil Dip is delicious and easy and healthy, and kind of reminds me of that refried bean dip served in Mexican restaurants that’s usually not vegan.

All you need to make it are some cooked lentils, spices and a food processor so it’s perfect for a last minute snack. Yum.

Really Easy Lentil Dip

Really Easy Spicy Lentil Dip (makes about 1 cup dip)

Adapted from Happy Herbivore Abroad taco meat recipe

Ingredients:

  • 1 cup cooked red or brown lentils
  • 1.5 Tablespoons ketchup
  • 1 Tablespoon chili powder
  • 1 teaspoon cumin
  • 1/4 teaspoon garlic powder
  • 1 Tablespoon non-dairy milk
  • 3-4 Tablespoons salsa
  • 1/1 teaspoon salt

Directions:

  1. Add all ingredients to your food processor and pulse until smooth. Add more milk or salsa as needed to get desired consistency.
  2. Heat mixture over medium heat until warm. You might need to add more milk to keep it from drying out.

Enjoy!

{ 8 comments }
Mile High Vegan Eats: Bucksnort Saloon

This place was so much fun! A biker bar located in Sphinx Park (near Pine), The Bucksnort Saloon is the perfect destination for a cold beer and some vegan snacks after hiking the brand new Staunton State Park! At least, that was how I experienced it, ha ha.

Mile High Vegan Eats: Bucksnort Saloon

It’s built in a series of old-timey log cabins alongside a narrow dirt road and has a reputation as not only a biker bar, but a fun stop for all sorts of people out for their “Sunday drives”. Seriously, look how many people brought their bikes out – and this was right at noon when they first opened. There was another parking lot full of cars (and more bikes) too.

Mile High Vegan Eats: Bucksnort Saloon

The inside of the bar is probably what you’d expect from the outside… dark and rustic… but very cool. People write their names on dollar bills and pin them to the walls and ceiling.

Mile High Vegan Eats: Bucksnort Saloon

While their menu does appear to be crafted with your average meat-eating biker dude in mind, rest assured that your vegan appetite can also be satisfied. They have a vegetable burrito (no cheese or sour cream, obvs) that when combined with refried beans (vegetarian!) was very filling. The ‘Climbers Special’ is also vegan if you sub guacamole for the cream cheese. And then of course there’s the guac, salsa and chips… although the guac isn’t made in-house, and let’s just say you wouldn’t drive all the way out there for it…

But the beer is cold! And if you’re lucky you’ll get a seat on the back patio overlooking the water.

Mile High Vegan Eats: Bucksnort Saloon

And if you’re planning to down more than a couple brewskis while you’re here, I recommend waiting as long as you can to <ahem> break the seal… you’re not going to want to make too many trips to the ladies room, if you know what I mean. Just sayin’.

Want more Denver-area restaurant reviews? Check out my Mile High Vegan Eats page!

{ 5 comments }

Korean BBQ & Kimchi Pizza

Remember my Kimchi Fried Rice? Well I had leftover kimchi and leftover Korean BBQ sauce, so I pulled some seitan out of the freezer and made bulgogi, then combined those with a little vegan mozzarella and green onions and voila! Kimchi Pizza!

Vegan Kimchi Pizza

I used the same BBQ sauce as pizza sauce, so there were literally only 6 ingredients (pizza crust, cheese, seitan, bbq sauce, kimchi, green onions). Easy as (Korean pizza) pie!


Korean BBQ and Kimchi Pizza (makes one 14″ pizza)

Ingredients:

  • Pizza dough of your choice, rolled out
  • I batch seitan bulgogi, chopped (alternatively you could just marinate seitan in Korean BBQ sauce, if you want to cheat a little. I wont tell anyone!)
  • 3/4 cup Korean BBQ sauce
  • 3/4 cup (or more!) kimchi
  • Vegan mozzarella (I used Daiya)
  • Green onions for sprinkling

Directions:

  • Spread the BBQ sauce evenly over your pizza dough, then top evenly with the bulgogi and the kimchi. Cover with as much mozzarella as you’d normally put on your pizza then bake for 12-14 minutes at 425 (on a pizza stone!). When done, sprinkle with green onions.

Enjoy!


{ 8 comments }

Dinosaur Tracks? Dinosaur Tracks!!

Here’s a riddle for ya: What’s 150 million years old and takes 10 miles of hiking along the Purgatoire River to see?

Here’s a hint…

Picketwire Canyon Dinosaur Tracks

Yep, that’s right, Dinosaur tracks! Jamie and I trekked down to SE Colorado a few weeks ago to visit Picket Wire Canyon in the Comanche National Grasslands with the sole purpose of seeing dino tracks.

Most of the tracks we saw (there are about 1,300 total preserved in the stone) were from Brontosaurus and Allosaurus, although there are tracks from a few other types as well.Picketwire Canyon Dinosaur Tracks

The hike itself was interesting. It’s an in-and-back hike, meaning you see and do everything twice. Mostly that’s okay, except for when it means you have to do Hell Hill™ twice. Hell Hill™ was the worst. You lose/gain 250′ of elevation in less than a quarter mile, so it’s quite steep, and even worse it’s very loose sand and stone. Imagine having just hiked 10 miles… your legs are sore, your feet hurt, your camelbak is empty, your scalp is sunburned and all you want is a cold G&T…

And then you have to climb/scramble back up Hell Hill™ with your feet slipping out from underneath you. There are 4 or 5 switchbacks, so you think you’re to the top, but you’re not. You start to whine and Jamie tells you to “vegan up”. Your sesamoid bone feels like it’s about to shatter and you keep sucking at that camelbak hoping the G&T fairy has maybe filled it up for you with the most refreshing beverage ever, but no such luck.

THEN you come to a very sad and misguided family who thought it was a good idea to take 4 children under the age of 8 (and their bikes/trikes/strollers) down Hell Hill™ and you realize that some people are even crazier have it worse than you so you help carry the bikes back up the hill.  Finally you make it to the top and collapse.

Of course, this was just our experience… I’m not trying to scare potential hikers away, I swear 😉

Okay, enough complaining, here are some pics!

Me, doing my best dino impression in some Bronto tracks:

Picketwire Canyon Dinosaur Tracks

Jamie, showing off her “Dino-myte” legs, haha!

Picketwire Canyon Dinosaur Tracks

The area is managed by the National Forest Service and there are a ton of informational signs all around.

Picketwire Canyon Dinosaur Tracks

Picketwire Canyon Dinosaur Tracks

Picketwire Canyon Dinosaur Tracks

The Bronto tracks we were posing in above were huge, but there were some smaller ones too…

Picketwire Canyon Dinosaur TracksThe best part was that because we got an early start we were the only ones on the trail for most of the way. At one point we stopped to look at some pretty cool petroglyphs and another group started to catch up with us, but as soon as I pointed out the carvings to them, they stopped to look and we were able to get away. We were also the only ones at the track site! That was amazing. We had a full half hour to check them out in total silence before we decided to have lunch and head back. While we were eating a couple of the other groups showed up.

Because this is a food blog, I have to show what we had for lunch!

Picketwire Canyon Dinosaur TracksThat’s sweet potato hummus, tofurky and daiya cheese with spinach wrapped up in a spinach tortilla! Yum!

On the way back we stopped at a really old cemetery, and it was the first time either of us had seen a sign like this…

Picketwire Canyon Dinosaur Tracks

Don’t think you can handle Hell Hill™? They have auto tours too!

Finally, here are a couple shots of the petroglyphs:

Picketwire Canyon Dinosaur Tracks

Picketwire Canyon Dinosaur Tracks

And I promise I’m almost done, but I wanted to share a couple shots taken at the beginning/end, at the top of the canyon:

Picketwire Canyon Dinosaur Tracks

Picketwire Canyon Dinosaur Tracks

So Beautiful!

{ 6 comments }

Vegan Buffalo Chicken Quesadillas

Vegan Buffalo Chicken Quesadillas

These Vegan Buffalo Chicken Quesadillas are my idea of the perfect snack for watching a movie or sharing a cold beer with a friend… and they’re so easy! You already know that that buffalo sauce goes wonderfully with all sorts of vegan proteins (tofu, seitan, soy curls). I decided to stick with soy curls this time, just cuz I love them so much.

These are delicious, spicy and really easy to make!


Vegan Buffalo Chicken Quesadillas (makes 2 quesadillas)

Ingredients:

  • 1/2 cup dry soy curls
  • 1 small carrot, sliced into thin circles (you could also add celery if you want)
  • 1/3 cup Franks buffalo wing sauce
  • 4 large tortillas
  • 1 cup shredded vegan cheese
  • vegan ranch, sour cream or whatever you like for dipping!

Directions:

  1. Place your soy curls into warm water for 10 minutes to hydrate.
  2. Water saute your carrots just for a couple minutes, then set aside.
  3. Squeeze all the water out of the soy curls, then add the wing sauce. Stir in the carrots and make sure everything is coated.
  4. Lay 2 tortillas out over medium heat and layer in the cheese and soy curl mixture. Cook until the tortillas brown and the cheese is melted, flipping once.

Enjoy!

{ 6 comments }

Enchilada Pasta Casserole

Vegan Enchilada Pasta Casserole

It’s no secret how I feel about casseroles – I love ’em! Here are just a few of my favorites…

And to add to that list, I now present my Enchilada Pasta Casserole with sweet potatoes and black beans!

Vegan Enchilada Pasta Casserole

It’s a little spicy and a little sweet, and very filling! This would be perfect to put together on a Sunday afternoon when you have a little time, then throw it into the oven to heat up one night after work (when you don’t have a little time, ha ha).


Enchilada Pasta Casserole (makes 6 servings)

Adapted from non-vegan/vegetarian recipe

Ingredients:

  • 13oz box whole wheat shells
  • 1 large sweet potato, peeled and chopped into small bite-sized pieces
  • 4 oz cream cheese
  • 10 oz red enchilada sauce
  • 1/3 cup vegan sour cream
  • 1/2 cup shredded vegan cheddar (I used Daiya)
  • 1/8 cup shredded vegan mozzarella (Daiya again!)
  • 4 oz chopped green chilies
  • 1 cup frozen corn
  • 1 cup fire roasted tomatoes
  • 1 can black beans
  • More cheese for sprinkling
  • Crushed red pepper flakes
  • Diced green onions

Directions:

  1. Place the pasta shells in boiling water, cooking for about 3/4 the recommended time. When there’s 2 minutes left, add the chopped sweet potatoes. Drain when finished, reserving a half cup of the water. With the pasta and potatoes still in the warm pan, stir in the cream cheese until melted.
  2. In a bowl combine the enchilada sauce, sour cream, both cheeses, green chilies, corn, tomatoes and beans. Add the pasta mix. If it needs more moisture, add some of the cooking water.
  3. Transfer to baking dish, and top with additional cheese and bake at 325 for 15-20 minutes. Broil for 1-2 minutes until all the cheese is melted, then top with the crushed red pepper and green onions.

Enjoy!

{ 4 comments }

Reia has been telling me about Marg’s Taco Bistro (and their yummy vegan options) forever, but I just never got around to trying it… until now! I’ve actually been there twice in the past month and could kick myself for waiting so long!

They have an amazing list of margaritas to choose from, as well as wines and other cocktails. You’re gonna want to start with one of those, and an order of guacamole…

Mile High Vegan Eats: Marg's Taco Bistro

Don’t eat the flour tortillas, they have lard!

Their menu is great for vegans and omnivores alike, especially since you can sub tofu into any taco you want! Just be careful, as their flour tortillas (which they also bring along with chips and salsa or guacamole) are made with lard. Vegans can get their tacos in either corn tortillas, or lettuce. You’ll also want to ask for your beans sans cheese.

Mile High Vegan Eats: Marg's Taco Bistro

The Ninja with tofu and a lettuce wrap

Mile High Vegan Eats: Marg's Taco Bistro

The Belle (top) and the Korean (with tofu)

My two favorite tacos are the Belle (made with marinated portabello mushrooms, slaw and guac) and the Korean (tofu, pickled cucumbers, sriracha and a Korean BBQ sauce).

My favorite margarita is the Strawbanero… which is exactly what it sounds like: Strawberries and habaneros. Each sip starts sweet and ends really, really hot…

Mile High Vegan Eats: Marg's Taco Bistro

Marg’s has 3 locations: Cherry Creek, LoDo and Uptown. I’ve been to the Cherry Creek and Uptown locations, both are great for people watching while you eat and drink! I went with my friend Justin and we had a great time just sitting in the sun, drinking and talking!

Want more Denver-area restaurant reviews? Check out my Mile High Vegan Eats page!

Related Posts Plugin for WordPress, Blogger...
{ 5 comments }
Social media & sharing icons powered by UltimatelySocial